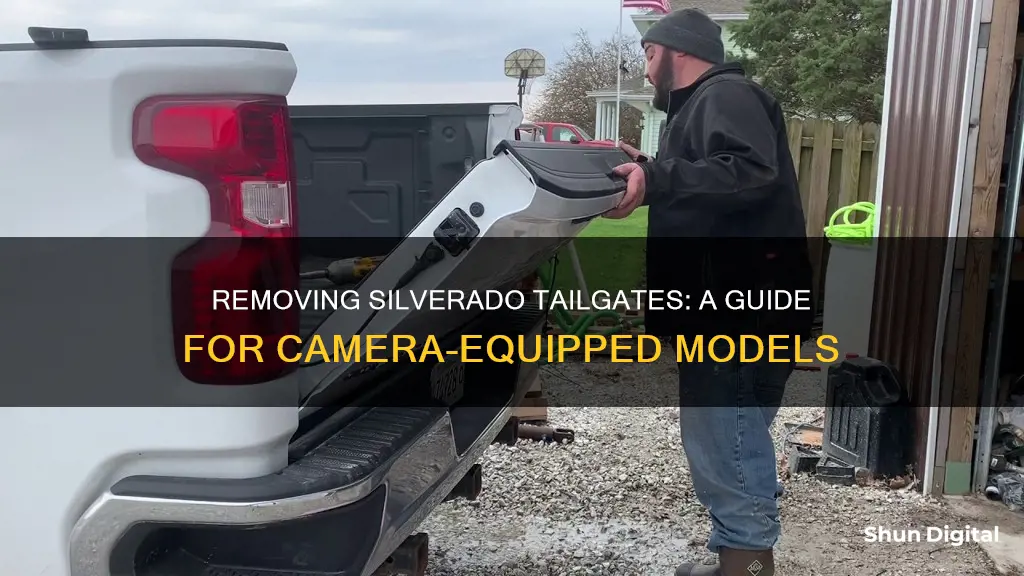
Removing the tailgate from a Chevy Silverado truck can be a challenging task due to the presence of backup or surround cameras. The process may involve disconnecting the camera wires, which are often located in tight spaces above the spare tire or under the truck bed. This requires careful handling to avoid damaging the wires or connectors. Some models have a connector that plugs into a junction block under the box on the driver's rear, while others have a pigtail connector located between the spare tire and the frame. In some cases, an extension wire or harness may be needed to reach the connector. Additionally, there may be multiple wire retainers and clips that need to be removed before the tailgate can be detached. Overall, while it is possible to remove the tailgate from a Chevy Silverado while preserving the camera functionality, it requires careful attention to detail and a good understanding of the truck's wiring and components.
| Characteristics | Values |
|---|---|
| Camera wire location | Above the spare tire |
| Ease of access | Difficult |
| Required tools | Lubricant, compressed air |
| Tailgate removal process | Disconnect camera wire, remove pass side first with it halfway down, then put it all the way up to remove the driver's side |
| Tailgate operation connector | 30-pin connector |
| Camera connector | Small single connection |
What You'll Learn

Disconnecting the rear vision camera
Locate the Connector: The RVC connector is plugged into the electrical junction box, which is mounted on the left side of the cross member of the vehicle frame. You will need to reach between the spare tire and the frame to access it.
Undo the Clip: About halfway between the connector and the hole where the wires route through, there is a clip that holds the harness in place. Undo this clip to release the harness. There may be a second clip above the spare tire, so make sure to check for that as well.
Disconnect the RVC: Once the clips are undone, you can disconnect the RVC by removing the connector from the electrical junction box. Be careful when handling the connector to avoid damaging the wires.
Relocate the Cap: After disconnecting the RVC, you will notice a cap mounted next to the camera connector. This cap needs to be relocated to cover the open terminals on the junction block, ensuring they are protected.
Secure the Wires: With the RVC disconnected and the cap in place, you can now secure the wires. Make sure they are safely tucked away and will not be damaged or pulled during the tailgate removal process.
By following these steps, you will successfully disconnect the rear vision camera of your Chevy Silverado, allowing you to proceed with removing the tailgate. Remember to handle the electrical components with care and take note of their positioning for easier reassembly.
Remotely Watching Lorex Cameras: A Step-by-Step Guide
You may want to see also

Removing the pass side
To remove the tailgate of a Chevy Silverado, you will first need to disconnect the rear vision camera (RVC). The RVC is located on the left side of the cross member of the vehicle frame. After disconnecting the camera, you will need to remove the pass side of the tailgate first, with the tailgate halfway down. Then, put the tailgate all the way up to remove the driver's side.
To disconnect the RVC, you will need to remove the connector from the electrical junction box. The connector is located under the box on the driver's rear. The connector will fit through the hole where the harness routes through. About halfway between the connector and the hole, there is a clip that holds the harness in place. You will need to undo this clip to get the harness out.
It is important to note that there may be two clips holding the harness in place, one above the spare tire and one closer to the junction box. Additionally, there may be a cap mounted next to the camera connector that needs to be relocated to cover the open terminals on the junction block after the connector has been removed.
Once the RVC is disconnected and the harness is removed, you can follow the steps outlined above to remove the pass side of the tailgate, and then the driver's side.
Q-See Cameras: SmartThings Compatibility Explored
You may want to see also

Accessing the junction block
To access the junction block, you will need to locate the connector for the rearview camera. This can be done by looking for the wires that run from the camera to the junction block. The connector plugs into the junction block, which is located under the box on the driver's rear. There may be a clip that holds the harness in place, so you will need to undo this to remove the harness.
On some models, the connector is located above the spare tire, while on others, it is located before the spare tire, closer to the junction box. It is important to note that there may be two clips holding the harness in place, one above the spare tire and one before it.
Once you have located the connector, you will need to disconnect it from the junction block. This will involve removing the connector from the electrical junction box mounted on the left side of the cross member of the vehicle frame. After disconnecting the connector, you will need to relocate the cap mounted next to the camera connector to cover the open terminals on the junction block.
It is important to note that the process of accessing the junction block may vary slightly depending on the model and year of your Silverado. Some models may have different locations for the connector and junction block, so it is always best to refer to the owner's manual or seek the advice of a qualified mechanic if you are unsure.
Additionally, there may be an extra camera connector on the rear junction block, depending on the model and features of your Silverado. This extra connector should be taken into account when accessing the junction block to ensure that all necessary connections are made or disconnected.
Sharp TV Camera Location: A Quick Guide
You may want to see also

Removing wire retainers
To remove the wire retainers of a Silverado tailgate with a camera, follow these steps:
Firstly, locate the wire retainers. There should be at least one, but there could be two. One is located above the spare tire, and the other is closer to the junction box. These wire retainers are clips that hold the harness in place. To remove them, simply undo the clips.
Now, to remove the tailgate, you will need to remove the passenger side first. Lower it halfway down, and then put it all the way up to remove the driver's side.
Once the tailgate is removed, you will need to disconnect the camera. The connector for the camera is located on the right side of the junction block. It is the black connector. Simply unplug it from the junction block.
After disconnecting the camera, you will need to relocate the cap mounted next to the camera connector to cover the open terminals on the junction block. This is important to protect the electrical components.
Finally, you can now proceed with any work that required the removal of the tailgate. Remember to reconnect the camera and secure the wire retainers when you are finished and reinstalling the tailgate.
Trail Cameras: Can Deer See Them?
You may want to see also

Relocating the cap
To relocate the cap, you must first disconnect the Rear Vision Camera (RVC). This is done by removing the connector from the electrical junction box, which is mounted on the left side of the cross member of the vehicle frame. Once the connector has been removed, you can then relocate the cap to cover the open terminals on the junction block.
The process of removing the tailgate on a Chevy Silverado or GMC Sierra can be challenging due to the placement of the camera wire connectors. In some models, the connector is located above the spare tire and can be difficult to reach without lowering the spare. There may also be wire retainers that need to be removed. Additionally, there is a lock on the access point to lower the spare, which can sometimes get stuck. Lubricant and compressed air can be used to try and release the lock.
It is important to note that removing the tailgate may cause the surround cameras to stop working. This is a known issue that Chevrolet is working to correct. If you choose to remove the tailgate, you may need to purchase an aftermarket camera system.
To make the process of removing the tailgate easier, some people choose to create more accessible spots for the wire connectors. This can be done by splicing in a longer pigtail that can be permanently attached to the truck side and then extended through to the tailgate.
TCL TV: Are Cameras Watching You?
You may want to see also
Frequently asked questions
Removing the tailgate of a Silverado with a backup camera involves disconnecting the camera and unclipping the harness. The connector can be found under the box on the driver's rear. The connector fits through the hole where the harness routes through. There is a clip that holds the harness that needs to be undone to get the harness out.
It depends on the model of your Silverado. For some models, the backup camera wire runs above the spare tire, making it necessary to lower the spare tire to access the connector. However, for other models, the connector can be accessed by simply removing the two screws holding the license plate.
Removing the tailgate of a Silverado with surround cameras may cause the cameras to stop working. This is because, during the removal, you need to unplug two connections: the 30-pin connector and a small single connection. The small single connection is for the camera, and simply plugging in an aftermarket camera system may not be sufficient to restore functionality.


