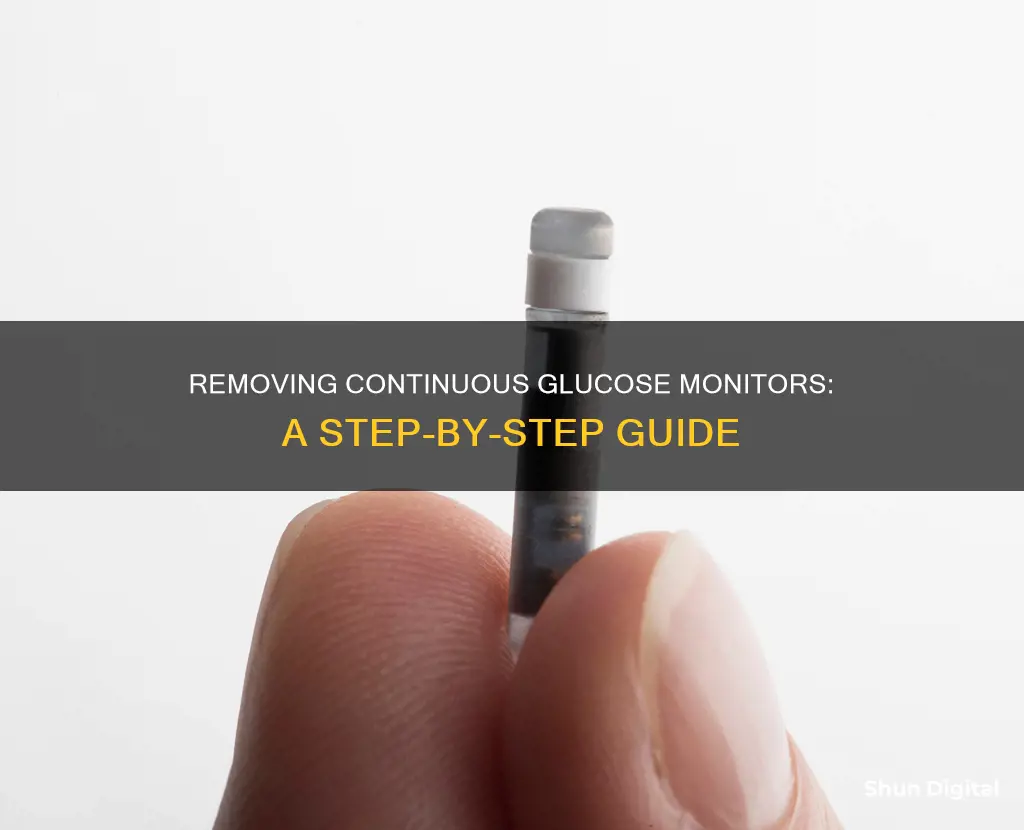
Removing a continuous glucose monitor (CGM) can be a straightforward process, but it's important to do it correctly to avoid skin irritation or damage. The removal process may vary slightly depending on the type of CGM being used. Generally, the first step is to end the sensor session through the corresponding app, if applicable. Then, gently peel the edges of the CGM away from the skin, similar to removing a bandage. For sensors that are strongly adhered to the skin, applying baby oil, vegetable oil, or coconut oil for 5-10 minutes can help loosen the adhesive and facilitate easier removal. After removing the sensor, clean any adhesive residue on the skin with warm soapy water or isopropyl alcohol. Properly dispose of the used CGM according to local regulations, as they cannot be reused or recycled.
How to Remove a Continuous Glucose Monitor
| Characteristics | Values |
|---|---|
| Removing the CGM | Gently peel the edges of the CGM away from the skin, as you would a bandage. |
| Strongly adhering CGM | Apply baby oil, vegetable oil, or coconut oil for 5-10 minutes before removing. |
| Removing the transmitter | Push down the lip of the transmitter holder and break open its wide end. Pull the transmitter out of the holder. |
| Removing adhesive residue | Use warm soapy water or isopropyl alcohol. |
What You'll Learn

Removing Dexcom G6, G7, Stelo, and Freestyle Libre CGMs
Removing Dexcom G6 CGM
To remove the Dexcom G6 sensor and transmitter, first go to the main menu of the Dexcom G6 App and scroll to the bottom of the menu. Then, select "Stop Sensor" and confirm by selecting "Yes". After that, grab the edge of the adhesive patch and peel the adhesive and transmitter up and away from your body like you would remove a bandage. To remove the transmitter from the holder, push down on the lip of the transmitter holder and break open its wide end. Finally, pull out the transmitter and keep it for reuse with your next sensor. Don't forget to dispose of the patch, holder, and sensor according to local guidelines.
Removing Dexcom G7 CGM
For the Dexcom G7, you can either end the sensor session early or wait until it automatically ends. To end it early, go to "Connections" and tap "Sensor". From there, you have the option to "Replace Sensor" if you want to start a new one immediately or "Stop Sensor Session" if you don't want to start a new one right away. When removing the sensor, simply peel off the patch. Remember to clean your new site with an alcohol wipe before inserting a new sensor.
Removing Freestyle Libre CGM
To remove the Freestyle Libre 2 sensor, start by pulling up the edge of the adhesive that keeps the sensor attached to your skin. Then, slowly peel it away from your skin in one motion. You can remove any remaining adhesive residue with warm soapy water or isopropyl alcohol. Remember to discard the used sensor according to your local regulations.
Removing Stelo CGM
Unfortunately, I could not find specific instructions for removing the Stelo CGM. However, as it belongs to the Dexcom family of products, it may have a similar removal process to the Dexcom G6 or G7. Please refer to the official Dexcom website or user manual for detailed instructions on removing the Stelo CGM.
Monitoring Data Usage on iPhone 5: Verizon Guide
You may want to see also

Using adhesive remover wipes or baby oil to loosen the sensor
Adhesive remover wipes or baby oil can be used to effectively loosen the sensor of a continuous glucose monitor (CGM) before removing it. This method is particularly useful for CGMs that are strongly adhering to the skin.
Adhesive remover wipes are designed to release adhesive on the skin quickly and easily, without causing skin damage or irritation. They are suitable even for those with sensitive or reactive skin. The wipes can be used to rub the skin under the tape toward the adhesive, helping to loosen the adhesive from the skin and reduce any pain during removal.
Baby oil is another effective method to loosen the sensor. It can be applied to the plastic part of the sensor and the surrounding skin, and left for 5-10 minutes to help dissolve the adhesive. Coconut oil or olive oil can also be used in the same way as a substitute for baby oil.
After applying the adhesive remover wipe or baby oil, the CGM can be gently peeled away from the skin, similar to removing a bandage. It is important to slowly peel the edges of the CGM away from the skin to avoid any skin irritation or damage.
For those with sensitive skin or adhesive allergies, it is recommended to use skin barrier wipes or sprays before applying the CGM to protect the skin and provide a better surface for the adhesive to stick to.
Setting Up ASUS Aura Sync on Your Monitor
You may want to see also

Removing the transmitter from the holder
To remove the transmitter from the holder, start by pushing down on the lip of the transmitter holder. This will break open the wide end of the holder. Once the wide end is broken open, simply pull the transmitter out of the holder. It is important to note that you should not throw away the transmitter. The same transmitter can be reused with new CGMs for up to 90 days. A new transmitter will be sent out to you before your current one expires.
Before reapplying the transmitter, it is important to clean it with an alcohol wipe.
If you are having trouble removing the CGM from your skin, you can apply baby oil or vegetable oil to the adhesive patch. This will help to loosen the adhesive, making it easier to remove. You can also try removing the CGM in the shower, as the warm water can help to loosen the adhesive.
It is normal to experience some irritation or discomfort when removing the CGM. If you experience pain or bleeding, you may want to try using an adhesive remover wipe or a product like Skin Tac to reduce adhesion and make removal easier. Additionally, make sure to clean the area with soap and water or isopropyl alcohol after removing the CGM to remove any remaining adhesive residue.
Remember to always follow the specific instructions provided by the manufacturer of your CGM for safe and effective removal.
The Mystery of Liquid in LCD Monitors
You may want to see also

Cleaning the transmitter with an alcohol wipe
To clean the transmitter with an alcohol wipe, you must first ensure you have a watertight tester to protect your transmitter from water damage during the cleaning process. The tester must be properly connected to the transmitter to ensure that the connector pins within the transmitter do not come into contact with water. If you do not have a tester available, do not attempt to clean your transmitter.
Once you have properly connected the tester, follow these steps:
Step 1:
Wash your hands with soap and water, then dry them thoroughly. It is important to ensure that your hands are clean before handling the transmitter to avoid transferring dirt or bacteria onto the device.
Step 2:
Saturate a cotton swab or ball with an alcohol wipe or medical adhesive remover solution. You can also use isopropyl alcohol. Gently rub the swab or ball over the transmitter, paying close attention to the connector pins and any adhesive residue. This will disinfect the transmitter and remove any built-up dirt or grime.
Step 3:
After cleaning the transmitter with the alcohol wipe, rinse it under room temperature water for at least one minute. This step is important to remove any remaining residue from the transmitter and ensure that all traces of the cleaning solution are gone.
Step 4:
Dry the transmitter thoroughly with a clean, lint-free cloth. You can also place the transmitter on a clean, dry cloth and let it air dry completely. This step is crucial to prevent any water damage to the transmitter.
Step 5:
Once the transmitter is completely dry, gently disconnect the tester by squeezing its arms. Your transmitter is now clean and ready to be used again.
Remember to always follow the specific instructions provided by the manufacturer of your continuous glucose monitor for cleaning and maintenance. These instructions may vary depending on the model and brand of your device.
Adjusting for Monitor Size Differences: A Guide to Scaling and Settings
You may want to see also

Disposing of the used CGM
Disposing of a used CGM requires careful handling and adherence to local disposal regulations. Here are the steps to properly dispose of a Continuous Glucose Monitor (CGM):
Step 1: Prepare the CGM for Removal
Before removing the CGM, gather the necessary supplies, such as adhesive remover wipes, cotton balls, or baby oil. These items will help you gently loosen the adhesive holding the CGM in place. Apply the selected product to the edges of the CGM and wait for a few minutes to allow the adhesive to soften.
Step 2: Remove the CGM
Once the adhesive is loosened, it's time to remove the CGM. Gently peel back the edges of the CGM from your skin, pulling slowly and carefully to avoid any discomfort. If you are using a transmitter, remove it from the holder by pushing down on the lip of the transmitter and breaking open the wide end. Remember to keep the transmitter for reuse with your next sensor.
Step 3: Clean and Dispose of the CGM
After removing the CGM, clean the transmitter with an alcohol wipe to sanitize it before applying it again. Place the used CGM in a designated disposal container for biohazardous waste. CGMs cannot be reused or recycled, so ensure they are properly discarded. Some local regulations may require special containers or disposal methods, so be sure to research and follow the guidelines specific to your area.
Step 4: Dispose of Other Components
In addition to the CGM itself, properly dispose of any other components, such as sensor packs and applicators. These items should be discarded in accordance with local regulations for electronic equipment, batteries, sharps, and materials potentially exposed to body fluids. In some cases, you may need to use a Biohazard Sharps bin, which typically requires a clinical waste referral from a healthcare professional.
Step 5: Explore Eco-Friendly Options
While CGM disposal options are limited, some companies are developing eco-friendly initiatives. For example, Abbott has launched a take-back program for its Freestyle Sensor Kit, allowing users to ship their used sensors back to the company for incineration, which converts non-hazardous waste into energy. Stay informed about such programs and consider participating to reduce the environmental impact of your CGM waste.
Connecting Your AP CPM Peter: Monitor Setup Guide
You may want to see also
Frequently asked questions
In the app, go to the main menu, scroll to the bottom, select "Stop Sensor", and confirm by selecting "Yes". Then, remove the Levels Performance Cover. Gently peel the CGM away from your skin, applying baby oil or vegetable oil first if the adhesive is strong.
First, remove the Levels Performance Cover. Then, gently peel the CGM from your skin, using baby oil or vegetable oil if necessary.
You can use warm soapy water or isopropyl alcohol to remove any remaining adhesive from your skin. Coconut oil can also help to loosen the adhesive.
Throw away the used CGM. It cannot be reused or recycled.


