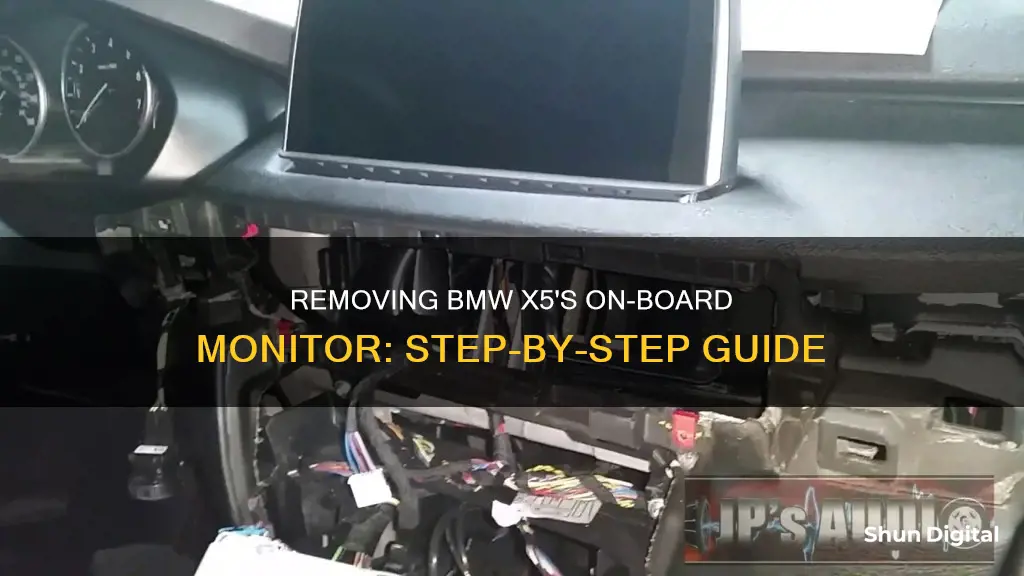
If you want to remove the on-board monitor from your BMW X5, you may be wondering where to start. There are plenty of resources available online, including forums and YouTube videos, which can guide you through the process. It seems that removing the on-board monitor from a BMW X5 is a complex and time-consuming task, requiring careful attention to avoid damaging the vehicle's interior. It is recommended that you gather the right tools and set aside plenty of time to avoid rushing the job.
What You'll Learn

Removing the rear centre console-mounted DVD system and monitor
Step 1: Disassemble the Console
Start by disassembling the entire centre console. This includes removing the side covers by sliding them forward to unclip. Getting them back in can be tricky due to the proximity of the seats, so consider removing the seats entirely for easier access.
Step 2: Remove the Screen
To remove the screen, carefully take out the plastic trim pieces around it. These pieces usually snap together like a clam shell. Be gentle and take your time to avoid breaking anything. Once the trim pieces are removed, you'll have access to the screws holding the screen in place.
Step 3: Keep Track of Screws
There will be various sizes of screws and clips holding the console together. It is important to keep track of which screws go where, as they will be needed for reassembly. Place them in labelled containers or take detailed notes to ensure you can put everything back together correctly.
Step 4: Unplug the Connections
Before attempting to lift out the console, make sure to unplug all the connections and wiring harnesses. Pay special attention to the connectors for the hazard switch and shift indicator, as they are keyed the same and can be inadvertently switched during reassembly.
Step 5: Remove Mounting Screws
Using a Phillips screwdriver, remove the mounting screws for the console. There will be several screws located in different areas, such as the console storage bin cavity and the right front footwell.
Step 6: Lift Out the Console
After all the screws have been removed and connections unplugged, carefully lift out the console. Be mindful of any wiring harnesses, lines, or ductwork that may be snagged during this process. Place the gear selector in "D" to make it easier to manoeuvre the console out of the vehicle.
Step 7: Reassembly
To put the console back together, simply reverse the disassembly process. Be careful with clips and guides during reassembly, ensuring that everything is securely fastened.
It is important to note that removing the rear centre console-mounted DVD system and monitor is a detailed and time-consuming process. It may take several hours to complete, especially if you are doing it for the first time. Patience and careful attention to detail are key to ensuring a successful removal and reassembly.
Understanding Monitor Types: LED, LCD, and Plasma Differences
You may want to see also

Replacing the monitor with a simple storage system
If you're looking to replace the on-board monitor in your BMW X5 with a simple storage system, there are a few options to consider. Firstly, it's important to note that the available storage options may vary depending on the model year of your X5. Here are some options to consider:
- Roof and storage systems: BMW offers a range of roof rack and roof box systems that can provide additional storage space. For example, the BMW X5 Roof Rack Base Support System is a sturdy and attractive option that is tailored to your vehicle. It can be easily installed without tools and meets high-quality and safety standards. There are also different sizes of roof boxes available, such as the 320-liter, 420-liter, and 520-liter options, which provide ample storage space for various items.
- In-vehicle storage systems: If you're looking for a more discreet storage solution, you might consider an in-vehicle storage system like the TruckVault. This option is custom-fit to your BMW X5 and offers secure storage for sensitive items. TruckVaults are designed to protect your gear from theft, moisture, and fire damage. They also help prevent unnecessary wear and tear on your equipment.
- Cargo carriers: BMW offers cargo carriers that can add extra storage space to your vehicle. The BMW X5 Cargo Carrier, for example, provides up to 13 cubic feet of additional storage and is corrosion-resistant with sealed seams for water resistance.
- Universal holder: BMW also offers a universal holder that is ideal for transporting various objects. It features four adjustable holders, strap eyelets, and tension belts to securely fasten large and bulky items.
- Collapsible box: For a more compact storage solution, BMW offers a collapsible box made from high-grade textile fabric. It fits perfectly in the luggage space of the BMW X5, allowing for slip-safe storage and protection against soiling.
When considering any storage system, it's important to ensure compatibility with your specific BMW X5 model. You can consult your local BMW dealer or refer to the vehicle's VIN (Vehicle Identification Number) to find the most accurate information.
Diffusion Tubes: Where to Buy for Pollution Monitoring
You may want to see also

Disassembling the entire console
To remove the entire centre console of a BMW X5, you will need to prepare yourself for a lengthy and intricate process. It is a complex task, so be sure to set aside a few hours to complete the job. The first step is to remove the side covers on both sides of the console. Slide them forward to unclip them from the rest of the console. It is recommended that you remove the seats entirely to make this process easier.
Next, you will need to remove the plastic trim pieces around the screen. These are easy to remove, as they simply snap together, but be careful not to apply too much force and break anything. Once the trim pieces are removed, you will have access to the screws that hold the screen in place. Remove these screws and set them aside, being sure to keep track of which screws go where, as there are many different sizes and it will be difficult to reassemble the console if you lose track.
Now, you can begin to disassemble the entire console. This will involve removing a lot of screws and clips, so take your time and be patient. Again, keep track of which screws go where to make reassembly easier. Once you have removed all the screws and clips, you should be able to lift the console out of the car.
Finally, you will need to unplug any wiring harnesses that are connected to the console. Be gentle when doing this to avoid damaging any of the connectors. And that's it! You have now successfully removed the entire centre console of your BMW X5.
Opening an HP LCD Monitor: A Step-by-Step Guide
You may want to see also

Removing the side covers
To remove the side covers of your BMW X5, you will need to set aside a considerable amount of time and have some basic hand tools at hand. The process is quite involved and will require patience. Begin by gathering the necessary tools, such as a plastic card (an old credit card or loyalty card will do), some trim tools, and basic hand tools like screwdrivers.
Start by removing the seats completely to provide yourself with more space to work. Then, you can begin to remove the side covers. Slide them forward to unclip them from the rest of the console. Take your time with this step, as the plastic trim pieces can be delicate and you don't want to cause any damage. Once the side covers are unclipped, carefully lift and remove them from the vehicle.
With the side covers removed, you will now have access to the rest of the center console assembly. To detach the rear TV screen, you will need to refer to a separate guide or manual, as this requires a careful prying process using the plastic card. It is important to note that this process is also time-consuming and intricate, so proceed with caution and patience.
Once you have successfully removed the rear TV screen and detached any remaining wires or connections, you can now focus on the center console. Disassemble the entire console by unscrewing and unclipping all the components. Keep track of the different sizes and types of screws, as you will need to know where each one goes during reassembly.
Overall, removing the side covers of the BMW X5 is a detailed process that requires patience and careful attention to avoid damaging any parts. It is recommended to refer to additional resources, such as online videos or manuals, for a more comprehensive step-by-step guide.
Ford Fusion Trim Levels: Which Has Blind Spot Monitoring?
You may want to see also

Using a plastic card to separate the monitor's base
Removing the on-board monitor from a BMW X5 is a complex process that requires careful attention. Here, we will focus on the step of using a plastic card to separate the monitor's base. This procedure is specifically for the rear TV screen of the BMW X5.
To begin, ensure you have the necessary tools, including a plastic card, which can be an old credit card or loyalty card. Avoid using metallic tools like screwdrivers or thick plastic trim tools, as they can scratch or damage the monitor's finish. The key is to use a thin, flexible plastic card.
Now, let's turn our attention to the monitor's base. The base is comprised of several pieces, with the smallest pieces being the "shoulders" of the monitor. These shoulder pieces are made of soft, flexible, rubber-like material. Carefully insert the plastic card between the shoulder pieces and the hard plastic body of the monitor. Gently pry the soft rubber away from the body, being careful not to use excessive force.
Next, focus on the remaining pieces of the base. Using the plastic card, carefully stick it between the two pieces and gently pry them apart. According to the source, the piece facing the front of the car usually pops out first. This piece covers the screws for the monitor, console compartment, and console wooden trim.
By following these steps, you can successfully separate the monitor's base using a plastic card. Remember to work slowly and gently to avoid damaging any parts of the monitor or its base.
For the remaining steps of removing the on-board monitor, you can refer to other guides or videos that provide a comprehensive overview of the entire process.
Monitoring Data Usage: TP-Link Router Guide
You may want to see also
Frequently asked questions
You will need to disassemble the entire console to get the on-board monitor off. This includes prying off the plastic trim pieces, removing screws, and unplugging wires.
You will need basic hand tools, such as screwdrivers and a trim tool or a credit card to pry off the plastic trim pieces.
It is a very involved removal process that can take at least 3 hours.


