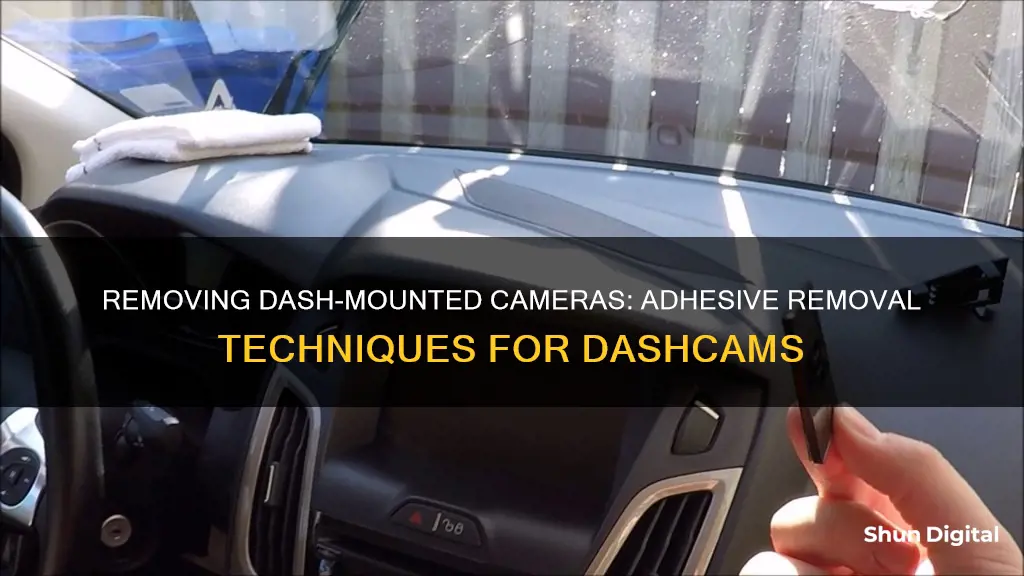
Removing an adhesive dash-mounted camera can be a tricky process. The adhesive mount is designed for long-term installation and can be challenging to remove without damaging the mount or the dashboard. One effective method is to use a hairdryer or blow dryer to heat up the adhesive, which will make it easier to peel away. Applying a product like Goo Gone or a General Purpose Adhesive Cleaner can also help dissolve the adhesive residue. It is important to work slowly and carefully to avoid damaging the dashboard or the mount itself.
Removing an Adhesive Dash Camera
| Characteristics | Values |
|---|---|
| Difficulty | Difficult |
| Tools | Blow dryer/heat gun, dental floss, plastic scraper, razor blade, fishing wire, card, prying tool, Goo Gone, alcohol, plastic trim removal prybar, Q-tip, Citrisolve, lemon oil, fishing line, credit card, paper towel, razor, plastic razor blade kit, hairdryer, suction cups, 3M Command stripes, lighter fluid, naphtha, WD-40, nail polish remover |
| Temperature | Warm |
| Method | Heat adhesive, cut away at paper/rubber, apply slight upward pressure, scrape, pull |
What You'll Learn

Warm the adhesive with a hair dryer or heat gun
Warming the adhesive with a hair dryer or heat gun is an effective way to remove an adhesive dash-mounted camera. This method is especially useful if you live in a cold climate. Take your hair dryer to your car and warm up the area where the mount is attached to your dashboard or windshield. Be careful not to heat it up too much, especially if there are any chips or cracks in the glass. Once the adhesive is warm, it will be much easier to remove. You can then use a prying tool, such as a butter knife or old credit card, to lift at one corner of the mount and work your way through. If the mount is on your dashboard, be very careful not to cut into it. Exert a slight upward pressure on the mount while you slowly ease the prying tool under it.
If you don't have a hair dryer, you can try parking your car in direct sunlight on a hot day to warm up the adhesive.
After removing the mount, you will likely have some adhesive residue left on the surface. You can use a product like Goo Gone or a General Purpose Adhesive Cleaner made by 3M to remove this. Apply the product to the residue, let it soak for a few minutes, then wipe it away with a clean rag or paper towel.
Watching Camera Footage on PC: Easy Steps to Follow
You may want to see also

Use dental floss to loosen the adhesive
To remove adhesive from a dash-mounted camera, dental floss can be an effective tool. This method is useful when you want to avoid damaging the mount and dashboard.
First, ensure you are working in a warm environment. If your car has been sitting in the sun, that should be sufficient. Otherwise, take a hairdryer and warm up the area where the mount is attached to your dash. This will help to loosen the adhesive.
Next, take a few strands of dental floss and work them under the mount, between the adhesive and the glass. You can use a small plastic tool to help guide the floss, but be careful not to scratch the glass or dashboard.
Once the floss is in place, slowly saw back and forth, applying slight upward pressure on the mount. You can also try looping the floss and pulling it closed. This action will cut through the adhesive. If you find that the floss is breaking, try using a stronger type, or fishing line, and repeat the process.
After you've cut through the adhesive, you can use your hand to peel back the adhesive foam from the windshield and the dash camera mount. This process may take a few minutes, so be patient and careful not to damage the surface of your dashboard or windshield.
Finally, use a product like Goo Gone or alcohol to remove any remaining adhesive residue. Apply the product with a Q-tip or clean rag and let it soak for a few minutes before wiping it away.
Smart TV Built-In Cameras: Which Models Have This Feature?
You may want to see also

Use a plastic tool to ease the mount off
Using a plastic tool is an effective way to ease off a mounted camera without causing any damage to the dashboard. Here are some detailed instructions on how to do this:
Firstly, it is important to ensure that you are working in a warm environment. If it is cold, use a hairdryer to warm up the area where the mount is attached to your dash. This will make the adhesive less sticky and easier to remove.
Once the area is sufficiently warm, take a plastic tool, such as a small plastic flat trim tool or a plastic scraper (some people use a Tupperware plastic scraper), and carefully start at a corner of the mount. Gently twist the tool sideways and push, applying slight upward pressure on the mount as you go. This will help to loosen the mount without damaging the dashboard or the mount itself.
As you work your way around the mount, you may find it helpful to use dental floss or string to saw between the mount and the dashboard, further loosening the adhesive. Continue this process until the mount comes away from the dashboard.
After removing the mount, use your fingers to roll off any remaining adhesive from the glass. You can then use alcohol to remove any remaining sticky residue.
If you are having trouble removing the mount, another option is to use a blow dryer. Point the blow dryer at the outside of the vehicle, heating up the adhesive until it peels away. This method is effective and reduces the risk of damaging the mount or the dashboard.
Disable Windows 10 Camera: A Step-by-Step Guide
You may want to see also

Remove remaining adhesive with Goo Gone
Removing adhesive from a dash-mounted camera can be a tricky task, but with the right tools and techniques, it can be done without damaging your dashboard. After you've warmed up the adhesive with a hairdryer and removed the mount, you'll likely be left with some stubborn glue or paper residue. This is where Goo Gone comes in—a product specifically designed to tackle this issue.
Goo Gone is a safe and effective adhesive remover that can be used on a variety of surfaces, including dashboards. It is crucial to test it on a small, inconspicuous area first to ensure it does not damage the surface. To use Goo Gone, start by applying a small amount directly to the adhesive residue. Allow it to soak for about ten minutes to ensure it penetrates and loosens the adhesive. Then, using a clean rag, apply some pressure and wipe away the residue. It may take a few attempts and several coats of Goo Gone to completely remove the adhesive, especially if it has been there for a long time.
Goo Gone is safe for use on various surfaces, including clothing, dinnerware, tables, carpets, cement, wood, plastic, and metal. However, it should not be used on certain materials like silk, leather, suede, or rubber, as it can cause deterioration. Always follow the instructions on the label and take the necessary precautions when using any chemical product.
In addition to Goo Gone, there are other products and tools that can aid in adhesive removal. For example, the General Purpose Adhesive Cleaner by 3M is an aerosol spray designed to remove epoxies. You can also use a plastic razor blade kit to help scrape away any remaining adhesive without risking damage to your dashboard. With the right tools and a little elbow grease, you can effectively remove adhesive residue and restore your dashboard to its original condition.
By following these steps and using Goo Gone, you can successfully remove the remaining adhesive from your dash-mounted camera, ensuring a clean and damage-free dashboard.
Cameras' X-Ray Vision: Seeing Through Clothes
You may want to see also

Clean the surface with alcohol
To remove adhesive from a dash-mounted camera, you can clean the surface with alcohol. This method is effective in removing glue residues left behind by labels, as common adhesives are soluble in alcohol.
- Remove as much of the adhesive residue as possible with your fingers. Roll the sticky adhesive into balls and lift them off the surface.
- Dip a cotton swab into rubbing alcohol if the label is small. For larger labels, pour a small amount of alcohol into a bowl and use a sponge or cloth.
- Gently rub the alcohol solution over the sticky residue. Continue rubbing until the label is saturated.
- After a few seconds, the alcohol will start to break down the label and dissolve the adhesive.
- Wipe the surface with a soft cloth to check if the label has been removed.
- Repeat steps 3-5 if necessary.
- Once the label is removed, wash the surface with warm soapy water and dry it.
It is important to note that rubbing alcohol may not be suitable for all surfaces, so it is recommended to test it on an inconspicuous area first. It should also be used in a well-ventilated area, and containers of alcohol should be kept away from flames or combustible materials due to its high flammability.
Tips to Watch Camera Person Like a Pro
You may want to see also
Frequently asked questions
First, do not attempt to remove the mount in a cold environment. Warm up the area where the mount is attached to your dash with a hairdryer. Then, use a thin butter knife to slowly cut away at the adhesive. Apply slight upward pressure on the mount while easing the knife under it.
You can use a plastic trim removal pry bar, a plastic scraper, or a razor blade to remove the adhesive residue. For the adhesive itself, you can use Goo Gone, Citrisolve, or lemon oil.
Using a blow dryer or a heat gun to heat up the adhesive is the quickest and easiest way to remove the mount. The adhesive will peel away after it's been heated.
You can use Goo Gone, a Q-tip, and a plastic trim removal pry bar. Apply the Goo Gone to the adhesive with a Q-tip, then work the pry bar under the adhesive. Keep swabbing with Goo Gone as the adhesive comes up.


