Removing a stripped screw from a monitor can be a challenging task, but with the right tools and techniques, it is certainly achievable. Stripped screws are typically marked by a damaged head, making it difficult to remove them with a standard screwdriver. In this guide, we will explore various methods to help you successfully remove a stripped screw from your monitor.
| Characteristics | Values |
|---|---|
| Screwdriver | Try a different style or size |
| Rubber band | Place over the screw head to help screwdriver grip |
| Tape | Use duct tape or electrical tape over the screw head |
| Pliers | Grip a raised screw head with pliers |
| Hammer | Tap the screw with a flathead screwdriver and hammer |
| Friction drops | Apply to the screw head so the screwdriver gets a better grip |
| Drill | Drill into the screw with a left-handed bit |
| Screw extractor | Cut into the screw and then drill it out |
| Rotary tool | Cut a new slot in the screw head |
| Welding | Weld a nut onto the screw |
What You'll Learn

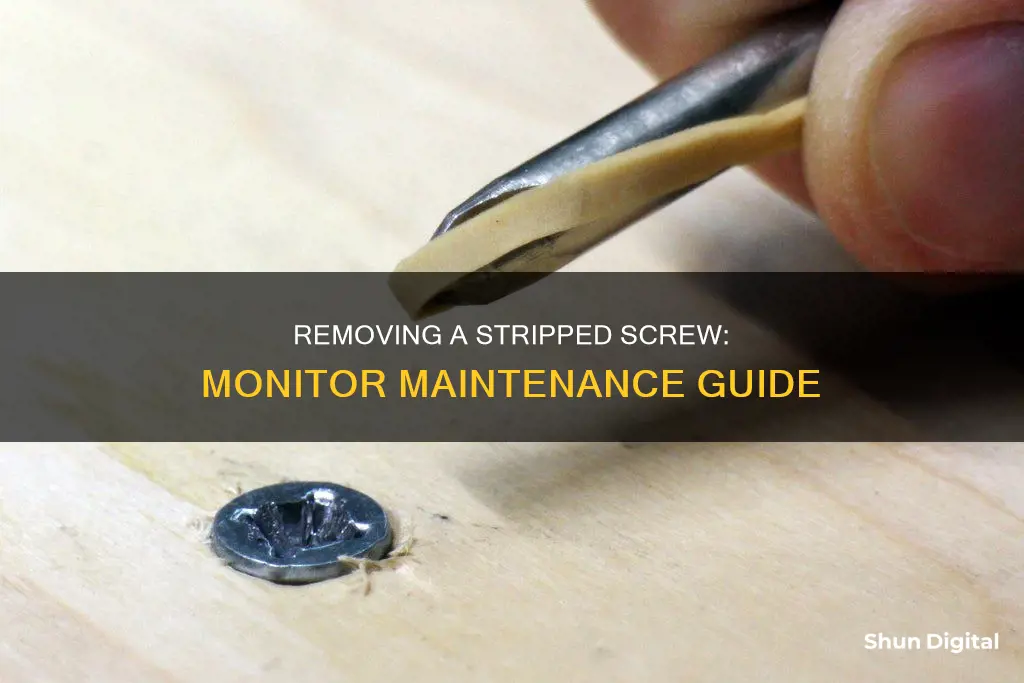
Using a rubber band for extra grip
If you're trying to remove a stripped screw from a monitor, one method you can try is using a rubber band for extra grip. This is a simple and economical way to grip and remove the stripped screw.
First, choose a rubber band that is wider than the screw. It has to cover the opening in the screw head. Place the rubber band over the stripped screw, and press it flat against the screw head. Hold it firmly in place with one hand, ensuring that you have a good grip.
Next, push the screwdriver into the rubber band and screw head. Make sure the rubber band goes inside the opening of the screw head. Hold the screwdriver steady, and press down with firm pressure so that the rubber band fits against the threads.
Then, turn the screwdriver counterclockwise to remove the screw. Work slowly, as the screw will still be difficult to turn. While maintaining firm pressure on the rubber band, gradually turn it. You should feel the screw begin to turn and come loose. Reposition the rubber band if necessary, and continue working until you are able to remove the screw.
If the screw still doesn't budge, try using a screwdriver with a slightly larger head so it catches better. You can also try using a hammer to drive the screwdriver deeper into the screw. Place the rubber band over the screw, followed by the screwdriver, and tap the back end of the screwdriver a few times to wedge it in place. This may enable the screwdriver to get a better grip on the screw threads. Test it by attempting to slowly turn the screw counterclockwise.
Asus Monitors: Do They Track Usage Hours?
You may want to see also

Drilling into the screw with a left-handed bit
Drilling into a stripped screw with a left-handed bit is a great way to remove it from a monitor. This method is especially useful when the screw head is damaged beyond the help of a standard screwdriver. Here is a detailed guide on how to do it:
First, it is important to choose the right drill bit. Select a left-handed drill bit that fits into the hole of the stripped screw. Left-handed drill bits are designed to work in reverse, so make sure your drill is set to reverse gear. If the drill bites into the material, there is a chance it will extract the screw and remove it from the hole.
Before drilling, ensure that the bolt is as flat as possible. File or grind the bolt if necessary to create a flat surface. Once the bolt is flat, centre punch the centre of the bolt and drill it with a centre drill first. This will help ensure that your left-handed drill bit is correctly aligned with the screw.
Now, you can insert the left-handed drill bit into the chuck of your drill and position it at the centre of the screw. Start drilling in reverse. The sharp edges of the drill bit will bite into the soft metal of the screw. In some cases, this action alone may be enough to pull the screw out.
If the screw does not come out with the initial drilling, don't worry. You can try drilling a little deeper, being careful not to drill off too much of the screw. Remember to wear protective eyewear to shield your eyes from any flying debris or sparks.
If the screw still does not come out, you can try using a screw extractor or easy out. These tools are designed to help remove broken or stubborn screws. Simply follow the instructions provided with the tool to complete the screw removal.
By following these steps, you should be able to successfully remove the stripped screw from your monitor using a left-handed drill bit. This method may take some time and patience, but it is an effective way to address this common issue.
Setting Up Speakers on Your Acer Monitor
You may want to see also

Using a screw extractor
Step 1: Prepare the Screw Extractor
Screw extractors have two ends: a cutting end and a removal end. Start by installing the cutting end of the screw extractor onto your drill. Ensure the drill is set to reverse mode.
Step 2: Bore into the Screw
With the drill running in reverse, carefully bore into the middle of the stripped screw. Apply gentle pressure and work slowly to avoid damaging the screw or the surrounding components. Continue drilling until the bit catches onto the screw.
Step 3: Switch to the Removal End
Once the cutting end has caught onto the screw, it's time to switch to the removal end of the screw extractor. This end has pointed sides designed to bite into the metal and loosen the screw. Drill into the screw with the removal end to further loosen it.
Step 4: Remove the Screw
After drilling with the removal end, the screw should be significantly loosened. You may now be able to simply turn the screw counterclockwise with your fingers or a screwdriver to remove it completely. If not, repeat the process with the removal end of the screw extractor until the screw is loose enough to be removed.
Tips for Using a Screw Extractor:
- Screw extractors are reusable, so it's a good idea to keep one in your toolbox for future stripped screw situations.
- When using a drill with a screw extractor, always start with a low speed and gradually increase as needed. This will help prevent splitting or breaking the screw.
- If the screw is still difficult to remove, you can apply penetrating oil to help loosen it further.
Volkswagen's Blind Spot Monitoring: What You Need to Know
You may want to see also

Using a flathead screwdriver and hammer
Removing a stripped screw from a monitor can be a challenging task, but with the right tools and techniques, it is certainly possible. Here is a detailed guide on how to use a flathead screwdriver and hammer to remove that stubborn stripped screw:
Prepare the Screwdriver and Hammer:
Before starting, make sure you have a flathead screwdriver that fits the screw head. The screwdriver should be able to fit completely into the screw's head. It is also important to have a hammer ready. A regular hammer will do, but if you have a rubber mallet, that would be ideal to avoid damaging the monitor.
Position the Screwdriver:
Place the tip of the flathead screwdriver directly on top of the stripped screw. Ensure that the screwdriver is positioned as straight as possible and that it is firmly in contact with the screw.
Tap the Screwdriver with the Hammer:
Now, gently tap the end of the screwdriver handle with the hammer. You don't need to use a lot of force; 2-3 light taps should be enough. This action will help the screwdriver dig into the screw head, creating a new slot.
Try to Turn the Screw:
Without lifting the screwdriver, attempt to turn the screw counterclockwise. Apply some force, but be careful not to use too much pressure as you don't want to damage the monitor. If the screw starts to loosen, continue turning until it is completely removed.
Repeat as Needed:
If the screw doesn't turn or only turns a little, don't worry. Simply reposition the screwdriver and gently tap it again with the hammer. You may need to do this several times until the screwdriver is firmly embedded in the screw head. With each attempt, try to turn the screw counterclockwise to see if it loosens.
Additional Tips:
If the screw is rusty, consider using a rust penetrant before tapping the screwdriver. This will help break apart the corrosion and make it easier to remove the screw. Additionally, if the screw is only slightly raised above the surface, you can try using locking pliers to grip the screw head and turn it.
By following these steps and being patient, you should be able to successfully remove the stripped screw from your monitor using a flathead screwdriver and hammer.
Expanding Your View: Four Monitors with the Asus G74SX-DH72
You may want to see also

Using pliers
Step 1: Assess the Screw
Before attempting to remove the stripped screw with pliers, it is important to ensure that the screw head is accessible and that there is sufficient clearance for the pliers. The pliers need to be able to grip the screw head firmly. If the screw is too tight or deeply embedded, other methods may be required first to loosen it, such as using a different screwdriver or a rubber band.
Step 2: Choose the Right Pliers
Selecting the appropriate type of pliers is crucial for success. Screw extracting pliers or locking pliers (also known as vise grip pliers) are recommended. These types of pliers provide a secure grip and are designed for this purpose. If you don't have access to these specific types, you can try using other types of pliers with a good grip, such as combination pliers or needle-nose pliers.
Step 3: Get a Firm Grip
Once you have chosen the right pliers, it's time to grip the stripped screw. Position the pliers firmly on the sides of the screw head, as close to the monitor surface as possible without damaging it. Ensure that the pliers are securely clamped onto the screw. If the screw head is small or the clearance is limited, you may need to use a smaller pair of pliers or adjust your grip to ensure a tight hold.
Step 4: Turn the Screw
With the pliers firmly in place, it's now time to apply force to turn the screw. Gently twist the pliers in a counterclockwise direction, which is the direction to loosen the screw. It is important to work slowly and carefully to avoid snapping off the screw head or damaging the monitor. Apply steady pressure and gradually increase the force if needed.
Step 5: Loosen and Remove
Continue turning the screw counterclockwise until it is loosened enough to be removed by hand or with a screwdriver. If the screw is particularly tight, you may need to use the pliers to turn it most of the way out. Once it is loose enough, switch to a screwdriver to finish unscrewing it, being careful not to overtighten or strip the screw again.
Unlocking Freesync: Understanding Your Monitor's Range
You may want to see also
Frequently asked questions
You can use screw extracting pliers, a screwdriver with a rubber band or duct tape over the screw head, a flathead screwdriver and a hammer, a rotary tool, or a drill with a left-handed bit.
A stripped screw is a screw with a damaged head, making it challenging to remove with a standard screwdriver.
Use a high-quality screwdriver, the correct screwdriver bit, and apply force perpendicularly to the screw.
Captive screws are designed to remain attached to the parent material for convenient maintenance. They should not be mistaken for stripped screws.


