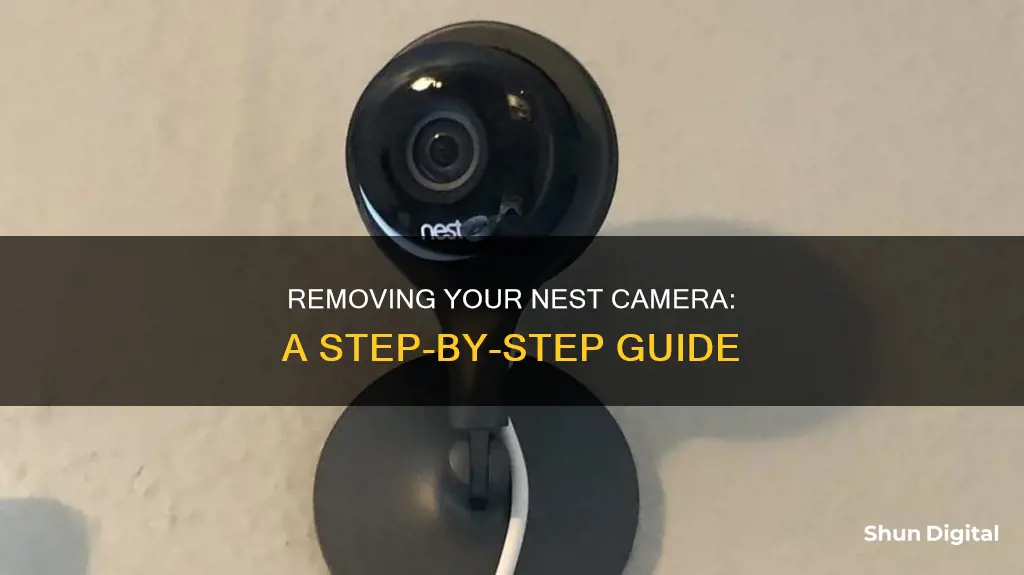
If you want to remove a previously set-up Nest camera, you'll need to reset it. This can be done in several ways, depending on the model of your Nest camera. The first method is to use the Nest app. Open the app and tap the gear icon to open the Settings menu. Then, scroll to Cameras and tap the camera you want to reset. From there, scroll to the bottom of the camera's settings menu and tap Remove Camera. You will then need to confirm your choice. Another method is to use the reset hole on the camera itself. Insert a thin object, such as a paperclip, into the reset hole and hold it there for 12 seconds. The camera will indicate that the reset is complete. However, this method does not remove the camera from the Nest app, so you will need to do this manually.
| Characteristics | Values |
|---|---|
| Removing a Nest camera from a stand or mount | Grip the base of the camera and pull it away from the stand or plate |
| Removing a Nest camera from the wall mount | Remove the secure loop from the wall mount by pulling down on its tab until it slips off |
| Removing a Nest camera from the app | Open the Home app or the Nest app, tap the camera you want to reset, tap Settings, then Remove Device, then Confirm |
| Restarting a Nest camera | Disconnect the camera from power by unplugging the adapter, then plug the adapter back into an outlet |
| Factory resetting a Nest camera | Press and hold the reset button on the back of the camera for 5 seconds, or use the reset hole and insert a thin object such as a paperclip for 10-12 seconds |
What You'll Learn

Removing a Nest camera from its stand or mount
Nest Cam Indoor
The Nest Cam Indoor is attached to a metal wall plate with a magnet. To remove it, simply grip the base of the camera and pull it away from the metal plate. The camera itself can be rotated 360 degrees in the stand, so you may need to adjust it to find the best angle for removal.
Nest Cam IQ Indoor
If your Nest Cam IQ Indoor is attached to a wall mount, you will need to gently twist it counter-clockwise to loosen the screws before removing it. If your camera is resting on a flat surface, such as a shelf, you don't need to do anything as the camera stand and base cannot be detached from the camera head.
Nest Cam Outdoor
The Nest Cam Outdoor is similar to the Nest Cam Indoor in that it is also attached to a metal plate using a magnet. To remove it, simply grip the camera and pull it away from the plate.
Nest Cam (Wired)
The Nest Cam (wired) cannot be detached from its stand. However, if you need to remove it from the wall plate, grip the base of the camera (not the camera head) and turn it counter-clockwise. It will click as it detaches from the wall mount.
Nest Cam with Secure Loop
If you have a secure loop installed, you will need to open the loop by pulling down on its tab until it slips off the wall mount. After removing the camera, you can use the loop as a wrist strap for safe carrying.
Nest Cam on a Tripod
If you have attached your Nest Cam to a tripod, make sure to grip the camera's base when removing it.
Nest Cam IQ Outdoor
The Nest Cam IQ Outdoor is secured to the wall with a lock. To remove it, you will need to use the included hex key and insert it into the hole on the camera's base. Turn the hex key counter-clockwise to detach the camera from the wall. If you lose the hex key, you can purchase a 2.5 mm (3/32") replacement from a hardware store.
DropCam or Nest Cam
First, remove the power cable from the camera. Then, locate the two small tabs on the camera towards the front. These tabs stabilize the camera within the stand. Push both tabs in simultaneously and then push the camera through the opening on the stand. It is recommended to do this over a cushioned surface to prevent damage if the camera falls.
Nest Hello Doorbell
The Nest Hello Doorbell snaps onto its mount. To remove it, you can use the included release tool or a flathead screwdriver. Insert the tool into the hole at the bottom of the doorbell and press until it releases. Then, gently pull the doorbell away from the wall.
Remember to consider the security implications of temporarily removing your Nest camera and ensure you have alternative security measures in place during the process. Additionally, review your device's warranty and return policy, as incorrect removal may void your warranty.
The Magic Behind Self-Cleaning TV Cameras
You may want to see also

Restarting a Nest camera
Restarting your Nest camera can be a great way to solve configuration issues without resetting the camera entirely. Here is a step-by-step guide on how to restart your Nest camera:
Nest Cam, Nest Cam IQ, and Nest Dropcam:
- Unplug the camera from its power source.
- Wait for 10 seconds.
- Plug the camera back into the power source.
Nest Cam Indoor (wired), Nest Cam (battery), and Nest Cam Floodlight:
- Locate the reset hole on the camera. It is usually near the power connector or mount.
- Use a thin object like a paperclip to press and hold the reset button for 5 seconds.
- Your camera will restart, and the status light will be solid white.
Nest Doorbell (battery):
- Locate the reset pinhole on the back of the doorbell, below the USB port.
- Press and hold the reset button for about 5 seconds.
- The status light will turn solid white, and your doorbell will restart.
Nest Doorbell 2nd Gen (wired):
- Find the reset pinhole on the back of the doorbell, above the QR code.
- Press and hold the reset button for about 5 seconds.
- The status light will turn solid white, and your doorbell will restart.
A Simple Guide to Watching Videos on DBPOWER Cameras
You may want to see also

Resetting a Nest camera
Step 1: Ensure Your Camera is Powered On
Make sure your Nest camera is plugged into an outlet and turned on. This step is necessary for performing a factory reset.
Step 2: Locate the Reset Button
The reset button is typically located on the back of the camera. However, for some models, like the Nest Cam Indoor (Wired), it can be found between the power cord and the support arm. For the Nest Cam (Battery) and Nest Cam with Floodlight, it is located at the back of the camera, directly opposite the camera lens.
Step 3: Press and Hold the Reset Button
For the Nest Cam (Battery) and Nest Cam with Floodlight, press and hold the reset button for about five seconds. For other models, such as the Nest Cam Indoor (Wired), simply press the button once with a paperclip or similar object.
Step 4: Wait for Reset Confirmation
For the Nest Cam (Battery) and Nest Cam with Floodlight, release the button after the status light turns steady and solid white. For the Nest Cam Indoor (Wired), hold the button down for about 12 seconds until the status light is a steady yellow colour, and you'll also hear a confirmation tone.
Step 5: Remove the Camera from the Nest App
Open the Nest or Google Home app, select the camera you want to reset, and then remove it from the app. This step is important, especially if you're planning to sell or give away the camera, as it ensures the device is completely wiped of your personal data.
Additional Tips:
- Before performing a factory reset, try restarting your camera by unplugging it from the power source and plugging it back in. This can help resolve minor issues without the need for a full reset.
- If you want to save any video footage before performing a factory reset, create video clips or timelapses and download the files to your phone or computer. A factory reset will permanently delete all video history and snapshots, and they cannot be recovered.
- If you have a 1st-gen Nest Aware subscription and plan to get rid of your camera or add it to a new account, cancel the subscription before the factory reset to remove subscription-only features and delete the video history.
By following these steps, you can successfully reset your Nest camera and, if needed, remove it from your Nest or Google Home app.
Casting Camera Feed to TV: Easy Steps to Follow
You may want to see also

Removing a Nest camera from your account
To remove a Nest camera from your account, you will need to use the Google Home app or the Nest app.
Using the Google Home App
- Open the Google Home app.
- Touch and hold the device listed on the Device tab.
- Tap "Settings".
- Tap "Remove device".
- Tap "Remove".
Using the Nest App
- Open the Nest app.
- Sign in to your account.
- If you have another home, tap "Menu" on the app home screen, then select the home that has the camera you want to remove.
- Tap "Settings".
- Tap the camera you want to remove.
- Scroll down and select "Remove [product name]".
- Confirm your choice when prompted.
Please note that removing a camera from your account will permanently delete all of that camera's recorded video history.
Controlling Your Camera with the Galaxy Watch 4: A Guide
You may want to see also

Deleting Nest camera footage
Deleting your Nest camera footage will depend on whether you want to delete individual clips or your entire video history.
Deleting Individual Clips
Deleting individual clips from your Nest camera history is not possible from within the Nest app. However, you can delete individual clips by accessing your Nest account via a web browser.
Deleting Entire Video History
You can delete your entire Nest camera video history in the Nest app, the Google Home app, or the web interface.
- Launch the Nest app and select the desired camera feed, such as "Backyard" or "Driveway".
- Tap the Settings icon and scroll down to the bottom.
- Tap "Delete video history" and confirm your choice.
- Launch the Home app and go to "Cameras".
- Tap the desired camera feed and go to Settings.
- Tap "Delete video history" and then "Delete".
Deleting Nest Videos in the Nest Web Interface
- Log into your Nest account and choose the camera feed to delete.
- Click the Settings icon.
- Go to "About".
- Click "Delete video history".
- Click "Delete history" to confirm your choice.
Note that once your Nest camera footage is deleted, it cannot be recovered.
Understanding the Man, Woman, Camera, and TV
You may want to see also
Frequently asked questions
This depends on the model of your Nest camera. For the Nest Cam Indoor, grip the base of the camera and pull it away from the metal plate. For the Nest Cam IQ Indoor, you don't need to do anything else if you placed your camera on a surface. If you used the wall mount, rotate the camera's base until it unscrews from the mount. Then, remove the screws holding the mount in place. For the Nest Cam Outdoor, grip the camera and pull it away from the magnet. For the Nest Cam IQ Outdoor, use the included hex key and insert it into the hole on the camera's base. Turn the hex key counterclockwise to detach the camera from the wall.
Open the Google Home or Nest app. If you first set up your camera with the Google Home app, remove it from there. If you can't find your camera in one app, check the other. In the app, tap the camera you want to reset. Then, tap Settings, followed by Remove Device, and confirm.
This depends on the model of your Nest camera. For the Nest Cam (battery) or Nest Cam with Floodlight, plug your camera into a power source and locate the reset button on the back of the camera. Press and hold the button for 10 seconds. For the Nest Cam Indoor (wired), disconnect and reconnect the camera from its power source. For the Nest Cam IQ (indoor and outdoor), disconnect your camera from its power source, then plug the power adapter back into an outlet.


