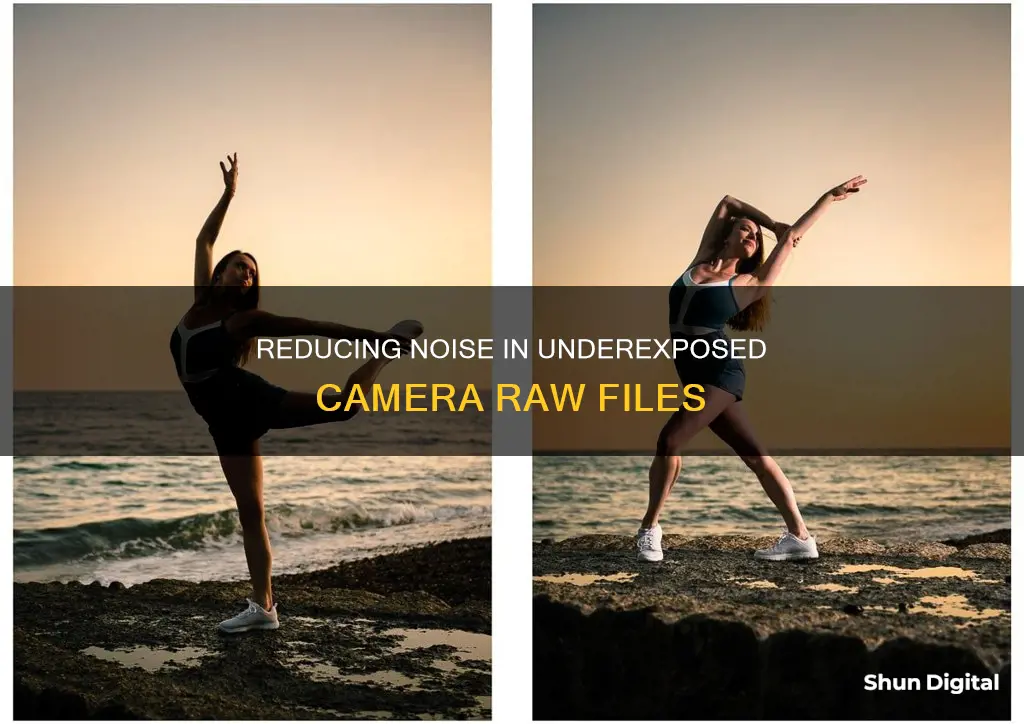
Underexposed images can be noisy, and noise reduction is a common post-processing technique. There are two types of noise: luminance noise, which is the grainy look of an image, and colour noise, which appears as multicoloured speckles.
The Detail tab in Camera Raw has controls for reducing image noise. The Luminance slider reduces luminance noise, and the Colour slider reduces colour noise.
It is important to zoom in to 100% to effectively reduce noise. When reducing noise, it is better to preserve a little noise than to blur the image substantially.
| Characteristics | Values |
|---|---|
| Type of noise | Luminance (light and dark) and Color |
| Luminance noise | The grainy look |
| Color noise | Multicolored speckles |
| Cause of noise | Long-exposure image or high ISO setting |
| High ISO setting | Varies depending on camera model |
| Ways to reduce noise | Shoot at lower ISO settings, shoot in RAW format, expose correctly, be careful when doing long exposures, use in-camera noise reduction |
| Noise reduction tools | Lightroom, Adobe Camera Raw, Photoshop, Noiseware Professional, Noise Ninja, Neat Image, Topaz |
What You'll Learn
- Use the Luminance slider to reduce luminance noise
- Use the Color slider to reduce colour noise
- Use the Luminance Detail and Luminance Contrast sliders to fine-tune luminance noise reduction
- Use the Color Detail and Color Smoothness sliders to fine-tune colour noise reduction
- Be conservative with adjustments to avoid over-softening
![]()
Use the Luminance slider to reduce luminance noise
Underexposed images can be noisy, and luminance noise is a common problem. Luminance noise is monochromatic and appears as grain in the image. It is less colourful than colour noise but can be more challenging to remove effectively. Lightroom and Adobe Camera Raw offer a Luminance slider to reduce this noise.
To reduce luminance noise, first, open your image in Lightroom or Photoshop. View the image at 100% to identify the noise. If you are using Lightroom, you can also try the AI-powered Denoise feature first. However, this can be very slow.
Next, adjust the Luminance slider. This slider reduces luminance noise by smoothing out noisy pixels. Boost the slider until the noise starts to disappear. Be careful not to go too far, as this can result in an unnatural-looking image.
After adjusting the Luminance slider, fine-tune your results with the Luminance Detail and Luminance Contrast sliders. These sliders control the amount of detail and contrast preserved in your photo. Increasing these sliders will retain more detail and contrast but may also decrease the strength of the noise reduction, resulting in more visible noise.
It is important to note that noise reduction always comes at the expense of image detail. Smoothing out noisy areas will remove unwanted artefacts but can also obliterate fine details. Therefore, use the Luminance slider with restraint, preserving some noise rather than blurring the image too much.
Charging Your Action Camera: A Quick Guide
You may want to see also
![]()
Use the Color slider to reduce colour noise
The Color slider is an essential tool in reducing colour noise from images, which often appears in underexposed shadow areas. This type of noise is characterised by random pixels in uniform colour areas, detracting from the overall quality of the image. By adjusting the Color slider, you can effectively minimise this unwanted chromatic aberration.
In Lightroom, the default setting for the Color slider is 25, which is typically sufficient to eliminate colour noise. However, depending on the image, you may need to adjust this setting. To assess the presence of colour noise, reduce the slider to 0, and then gradually increase it until the noise disappears. It is recommended not to exceed 25, as going higher can muddle the colours and compromise the image's overall sharpness.
Additionally, you can fine-tune your results using the Color Detail and Color Smoothness sliders. The Color Detail slider allows you to strike a balance between preserving thin, detailed colour edges and preventing colour speckles. On the other hand, the Color Smoothness slider helps to maintain smooth and even colours, particularly in large areas.
It is important to note that the effects of colour noise reduction can be subtle and challenging to discern without zooming in. Therefore, it is advisable to view your image at 100% magnification or higher to accurately evaluate the impact of your adjustments.
While colour noise reduction is an effective tool, it is not always necessary. Well-exposed images captured at base ISO settings typically exhibit minimal colour noise. In such cases, it is preferable to retain the original colour details rather than apply unnecessary adjustments.
Recycling Camera Batteries: Safe Disposal and Environmentally Friendly Options
You may want to see also
![]()
Use the Luminance Detail and Luminance Contrast sliders to fine-tune luminance noise reduction
When reducing noise in Adobe Camera Raw or Lightroom, you can fine-tune your results with the Luminance Detail and Luminance Contrast sliders. These control the amount of detail and contrast preserved in your photos following luminance noise reduction.
Noise reduction smooths out noisy pixels, which automatically reduces detail and contrast. However, by increasing these sliders, you will retain detail and contrast.
The sliders come with a trade-off: when you increase the values, you decrease the strength of the noise reduction. So, while you'll end up with a sharper image, you'll also see more noise.
The Detail slider (just below the Luminance slider) is used to bring back some of the details that may have been lost due to the noise reduction process and keep your image from blurring. Moving it to the right will bring back some of those details.
The Contrast slider helps to preserve some of the contrast that is also removed by the Luminance slider. Moving this up a bit will bring back some of this lost contrast.
In general, it's better to preserve a little noise than to blur the image substantially.
Troubleshooting SpyPoint Camera Battery Drain
You may want to see also
![]()
Use the Color Detail and Color Smoothness sliders to fine-tune colour noise reduction
When editing images in Lightroom, you can use the Color Detail and Color Smoothness sliders to fine-tune colour noise reduction. These sliders allow you to adjust the level of detail and smoothness in your image, removing unwanted noise while preserving important details.
The Detail slider for colour noise reduction controls the amount of detail preserved during the noise reduction process. Increasing the value for Detail increases the threshold for when noise reduction is applied, resulting in more detail being retained. However, increasing the Detail value too much can introduce noise back into the image, especially in small areas or individual pixels, causing it to stand out. Therefore, it is important to balance the setting to maintain detail without creating new noise artefacts.
The Smoothness slider, on the other hand, is used to reduce colour artefacts that remain after applying colour noise reduction. Increasing the value for Smoothness will blend these artefacts, often removing their appearance altogether. It is generally safe to use higher settings for Smoothness, but it is important to monitor the image for blending of colours along contrast edges to avoid unwanted colour bleeding.
By carefully adjusting the Color Detail and Color Smoothness sliders, you can effectively reduce colour noise while retaining the desired level of detail and smoothness in your image. These sliders provide a high degree of control over the noise reduction process, allowing you to fine-tune your images and achieve the desired results.
Extending Action Camera Battery Life: Tips and Tricks
You may want to see also
![]()
Be conservative with adjustments to avoid over-softening
When reducing noise in your images, it's important to remember that all noise reduction techniques will soften your image to some extent. This softening effect can be more or less noticeable depending on the type of image you're working with. For example, images with foliage in landscapes can suffer from even conservative attempts to reduce noise. On the other hand, images consisting of primarily smooth water or skies may be able to handle more aggressive noise reduction without losing too much detail.
To avoid over-softening your images during noise reduction, it's crucial to strike a balance between reducing noise and preserving detail. Here are some tips to help you achieve that balance:
- Zoom in to 100% or more: Before applying any noise reduction, zoom in to your image to at least 100%. This will allow you to clearly see the noise and assess its impact on the image. By zooming in, you can also monitor the effects of your adjustments in real time and stop before they become too extreme.
- Start with basic adjustments: Begin with small adjustments to the noise reduction sliders. Gradually increase the amount of noise reduction until you start to see the noise disappear. Be careful not to go too far, as excessive noise reduction can lead to over-softening and a loss of detail.
- Fine-tune with detail and contrast sliders: After making initial noise reduction adjustments, fine-tune your results using the detail and contrast sliders. These sliders will help you retain detail and contrast in your image, but they also reduce the strength of noise reduction. So, while you'll end up with a sharper image, you may still see some noise. It's a delicate balance, and you may need to go back and forth between the noise reduction and detail sliders to find the optimal setting.
- Be selective with noise reduction: Instead of applying noise reduction to the entire image, try using local adjustments to selectively reduce noise in specific areas. For example, you can apply more aggressive noise reduction to blurred backgrounds or areas with high noise while being more conservative in areas with important details.
- Compare before and after: As you work, frequently compare the current state of your image to the original. This will help you gauge the effectiveness of your adjustments and ensure you don't overdo the noise reduction.
- Preserve some noise: Remember, not all noise is bad. In some cases, a small amount of noise can add atmosphere or a film-like grain effect to your image. Unless noise is very distracting, you may not need to remove it completely. Sometimes, it's better to leave a little noise than to compromise the overall quality and detail of your image.
By following these tips and being conservative with your adjustments, you can effectively reduce noise in your underexposed camera raw images while avoiding over-softening. Remember, the goal is to strike a balance between noise reduction and detail preservation to ensure your images remain sharp and true to your artistic vision.
Conditioning Camera Batteries: Prolonging Battery Life
You may want to see also