Charging an action camera is a simple process, but it's important to know the specifics of your model, as different cameras have different charging options and requirements. The standard for most action cameras is 5V/1A, but some models can take up to 5V/3A for fast charging. You can charge your camera using a USB wall charger, by connecting it to a computer, or with an external USB battery or power bank. To begin charging, power off your camera, then use a USB cable to connect to an adapter or external power source. A standard wall charger will take around 2 hours to fully charge your device, while a computer USB port may take up to 4 hours. Once the power indicator light is off, your action camera is fully charged and ready to use!
What You'll Learn

Charging with the battery inside the camera
To charge your action camera with the battery still inside, you will need a USB cable. The type of USB cable you need depends on the model of your camera. For example, to charge a Canon camera, you will need a USB 3.0 to USB-C or USB 2.0 Type A to Mini B cable. For a DJI Osmo Action camera, you will need a USB-C cable.
Once you have the correct cable, follow these steps:
- Ensure your camera is turned off. Charging will take longer if it is powered on.
- Connect your USB cable to your camera.
- Plug the other end of the USB cable into a power source. This could be a wall plug, a power bank, a computer, or the USB outlet in your car.
- Wait for the battery to charge. The charging time will vary depending on your camera model and the power source you are using. For example, charging a Canon camera battery via a wall plug or computer will take approximately 3 hours.
It is important to note that not all action cameras support in-camera charging. For example, the DJI Action 2 camera cannot be charged with an external charger and must be charged in-camera via USB cable. Always consult your camera's user manual to determine the best charging method for your specific model.
Monthly Fees for Cellular Cameras: What's the Deal?
You may want to see also

Charging with the battery outside the camera
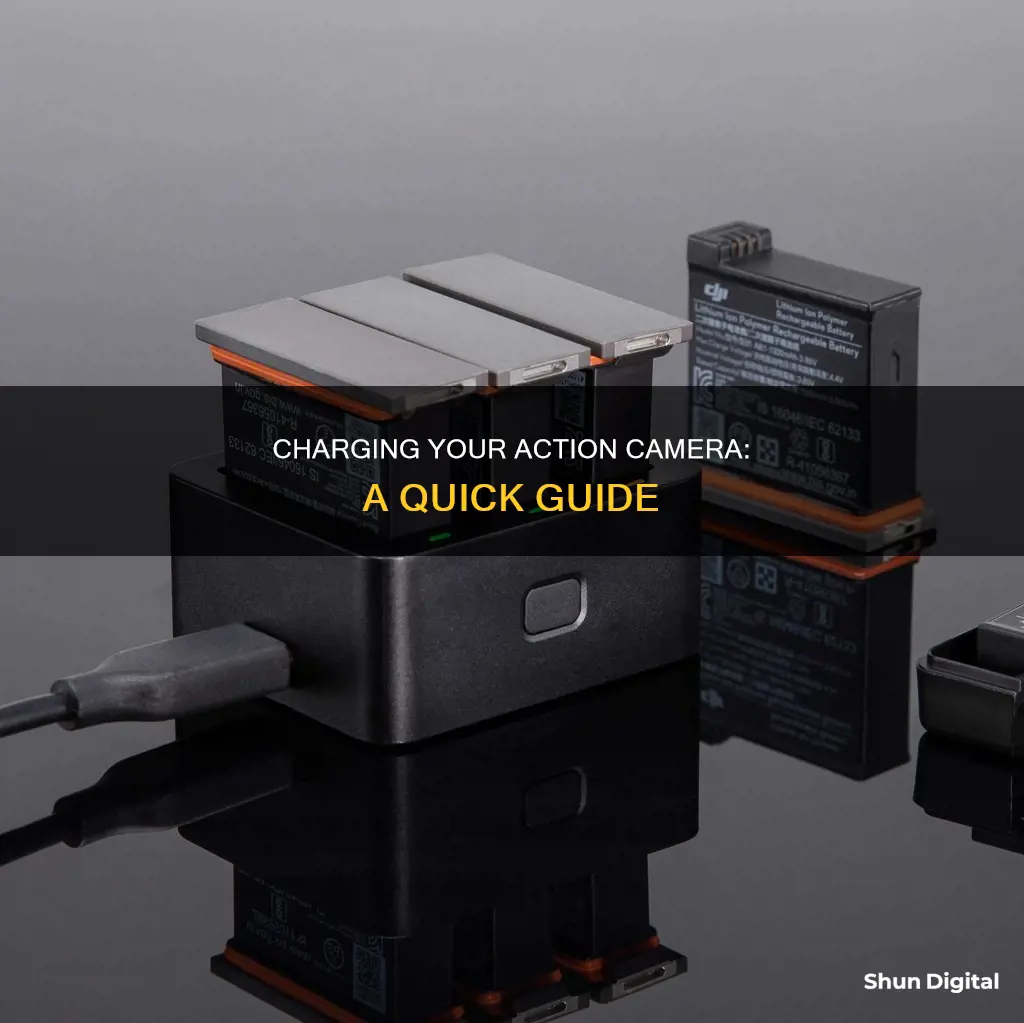
Charging your action camera with the battery outside the camera is a convenient option that allows you to continue using your camera while charging a spare battery. This method typically involves using an external charger, which can be connected to various power sources. Here's a detailed guide on how to charge your action camera with the battery outside the camera:
Prepare the Required Items:
You will need an external charger compatible with your action camera's battery. Additionally, ensure you have a spare battery for your camera, as this method involves charging one battery while the other is in use. Some external chargers come with a spare battery, but you can also purchase them separately.
Connect the External Charger:
External chargers usually have a USB cable that you can connect to a power source. Common power sources include a wall outlet, power bank, car USB outlet, or a computer. When connecting to a wall outlet, use a USB adapter that outputs at least 5V 2A for the best results.
Charge the Battery:
Once you've connected the external charger, place your spare battery into the charger. The charger should indicate that the battery is charging, often with a red light. Some chargers can charge two batteries simultaneously, saving time.
Monitor the Charging Process:
Keep an eye on the charger's indicator lights to know when the battery is fully charged. The light will typically turn blue or green when charging is complete. The charging time may vary depending on the battery's capacity and the charging conditions.
Swap the Batteries:
Once the spare battery is fully charged, you can swap it with the battery in your camera. This allows you to continue using your action camera without interruption. Make sure to properly insert the charged battery, ensuring the connections are secure.
Additional Tips:
- It is recommended to have at least two batteries for your action camera, so you can always have a spare ready.
- When charging via a computer, ensure that the USB port remains powered even when the computer is turned off.
- If you're charging in a car, check your user manual to ensure the USB ports provide sufficient power (at least 5V 2A).
- Always use genuine batteries, chargers, and cables to ensure compatibility and safety.
- Avoid continuously charging a battery that is already fully charged, as it may deteriorate battery performance.
By following these steps and tips, you can effectively charge your action camera with the battery outside the camera, ensuring you don't miss any shooting opportunities!
Charging Your Vivitar Camera: A Step-by-Step Guide
You may want to see also

Using a USB wall charger
To charge your action camera using a USB wall charger, follow these steps:
- Ensure your camera is powered off. Charging with the camera turned on will take longer.
- Remove any accessories that draw power from the camera, such as a microphone.
- Plug your USB cable into a USB wall charger. Use an adapter that outputs at least 5V 2A.
- Connect your camera to the power source using the USB cable.
- Wait for the charging to complete. The green LED light will indicate that the camera is charging. Once it turns off, your camera is fully charged.
It is worth noting that some action cameras, like the DJI Action 2, cannot be charged with an external charger and must be charged in-camera via a USB cable. Always refer to your camera's user manual for model-specific charging instructions.
Charging Your SimpliSafe Outdoor Camera: A Quick Guide
You may want to see also

Charging via a computer
Charging your action camera via a computer is a convenient way to charge your device and free up space without being tethered to a wall. Here is a step-by-step guide on how to do it:
Firstly, ensure your camera is powered off. This will allow your device to recharge much faster. Then, remove any accessories that draw power, such as an external microphone.
Next, locate your USB cable. Most action cameras come with a micro-USB cable, which has a standard USB connector at one end and a micro-USB connector at the other. If your camera uses a different type of USB cable, such as USB-C, ensure you have the correct cable.
Now, plug the standard USB connector into your computer's USB port. It is best to connect directly to your computer, avoiding USB hubs unless they are powered with AC. Make sure that your USB port is powered when your computer is off.
After that, connect the other end of the cable to your camera. If your camera has a "USB mode," you may need to change the settings to this mode using the mode button before the charging begins.
Finally, keep an eye on the charging indicator. When charging via a computer, the indicator light colour may vary. Some action cameras have a green LED light to indicate that the device is charging. This light will turn off once charging is complete.
Charging your action camera via a computer is a simple and effective way to power your device, especially when on the go. It is one of several ways to charge your camera, including via a wall plug, power bank, or car USB outlet.
Charging a VTech Camera: A Step-by-Step Guide
You may want to see also

Charging with a power bank
Charging your action camera with a power bank is a convenient way to ensure your camera stays powered up while you're on the move. Here's a detailed guide on how to do it:
Check Compatibility:
First, ensure your camera battery can be charged via USB, as most power banks have USB ports. Check your camera battery's input requirements and the power bank's output specifications to ensure compatibility. The power bank should provide the required voltage and current for your camera battery.
Gather Equipment:
You will need a power bank with sufficient capacity, a USB cable, and, if necessary, a USB adapter if your camera battery requires a specific connector. Most cameras use USB cables, so ensure you have the correct cable for your camera model.
Connect the Power Bank:
Plug the USB cable into the power bank's USB port, choosing the port with the highest output for faster charging if multiple options are available.
Connect the Camera Battery:
Attach the other end of the USB cable to your camera battery, using the USB adapter if needed. Ensure the connections are secure.
Start Charging:
Turn on the power bank, and the camera battery should start charging automatically. Some power banks may require you to press a button to initiate charging.
Monitor the Charging Process:
Keep an eye on the power bank's battery level and the camera battery's charging progress. This is important to ensure the power bank doesn't drain completely and to prevent overcharging the camera battery, which could cause damage.
Disconnect and Use:
Once the camera battery is fully charged, disconnect it from the power bank, and you're ready to use your camera!
It's important to note that charging times may vary depending on the power bank and camera battery capacities and their supported charging speeds. Additionally, some power banks have safety features that automatically stop charging when the battery is full. Always refer to the user manuals for specific instructions and safety precautions.
Charging Your Bird Buddy Camera: A Quick Guide
You may want to see also
Frequently asked questions
First, power off your camera. Then, use a USB cable to connect your camera to a power source. This could be a USB wall charger, a computer, or an external power source such as a mobile power charger.
If your camera has a removable battery, you can also charge the battery separately by removing it from the camera and inserting it into a charging cradle, which you can then plug into a power source.
Finally, disconnect the USB cable when the power indicator light is off—this means your camera is fully charged.
The time it takes to fully charge your action camera will depend on several factors, including the age of the battery, the power source you are using, and whether the battery is fully depleted. Charging tends to be fastest at the beginning and slows down for the last 20% or so.
Using a power source with a low current, such as a computer's USB port, can take up to 4 hours to fully charge your camera. Using a standard AC wall charger should take no longer than 2 hours, with the battery reaching about 80% after 1 hour.
First, check that your camera is powered off—if it is still on, it may be drawing power to run the camera, which will slow down the charging process. If your camera has a removable battery, try charging the battery separately in a charging cradle to see if that makes a difference.
If your camera still won't charge, try using a different USB cable or power source to see if that resolves the issue.


