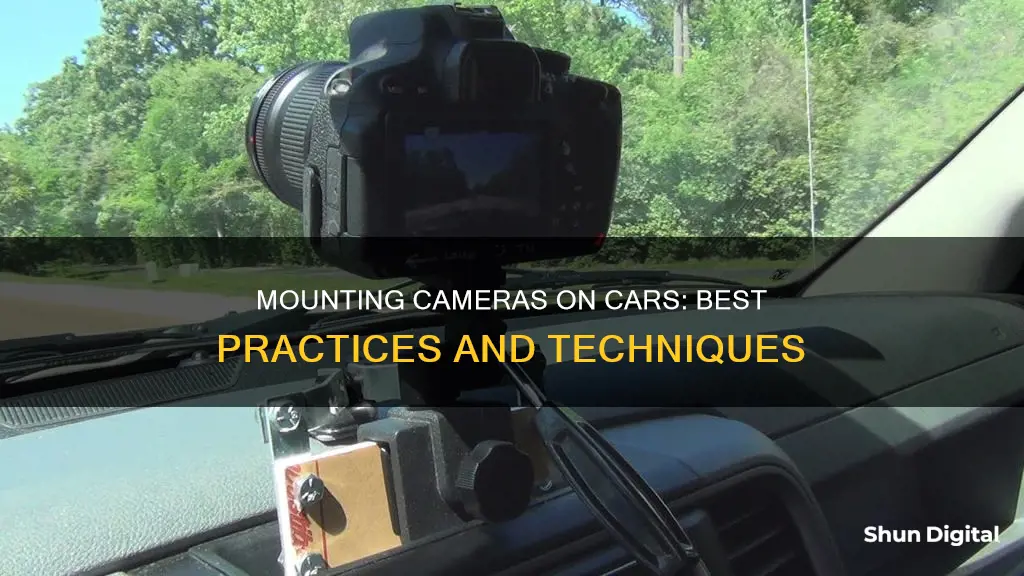
There are several ways to stick a camera on a car. One way is to use a suction cup camera mount, attaching it to the rear of the car, on the trunk or spoiler. Another way is to use an adhesive mount, which requires cleaning the surface with a window cleaner, ensuring the area is dry and at room temperature, then applying pressure for 10 seconds to secure the adhesive. Alternatively, one can use Velcro or VHB tape to stick a camera to the ceiling of a car's interior.
| Characteristics | Values |
|---|---|
| Camera Type | 360-degree camera, dash cam, rear dash cam |
| Mounting Location | Rear of the car, either on the trunk or the spoiler; center of the front windshield; uppermost center of the rear windshield; roof on the rear |
| Mounting Equipment | Suction cup camera mount, adhesive mount, Invisible Selfie Stick, VHB tape, velcro, magnets |
| Installation Steps | Clean the window with a professional glass cleaner; mount the camera; test the camera |
What You'll Learn
![]()
Clean the car window before mounting the camera
When sticking a camera to your car window, it is important to prepare the window surface before mounting. Here is a step-by-step guide to cleaning the car window before attaching your camera:
Firstly, ensure the glass temperature is suitable. The glass should not be too hot or too cold, ideally between 50°F and 80°F. This is important as extreme temperatures can affect the adhesive's effectiveness.
Next, clean the window surface thoroughly. Use a professional glass cleaner to ensure the glass is free from dust, dirt, and grime. This step is crucial as it ensures the adhesive will bond properly to the glass. Any residue or oil can weaken the bond, so be sure to wipe down the area with an alcohol wipe or a suitable adhesive remover.
After cleaning, ensure the window is completely dry before proceeding. You can use a cloth or tissue to wipe down the area and absorb any remaining moisture.
Now, you need to prepare the camera for mounting. Clean the camera bracket with an alcohol wipe, removing any dust or fingerprints. It is important to ensure the bracket is completely clean and dry before attaching the adhesive pad.
Once the window and camera are prepared, you can proceed to the next step of attaching the adhesive pad and mounting the camera.
By following these steps, you will ensure a strong and secure bond between the adhesive and the window, providing a stable base for your camera.
Focusing the Casio Exilim: Tips for Sharp Photos
You may want to see also
![]()
Use a suction cup mount for the camera
Using a suction cup mount is an excellent way to attach a camera to your car. This method provides a strong grip and can be easily released when needed. Here are some detailed steps and tips on how to use a suction cup mount for your camera:
Choosing the Right Suction Cup Mount
First, you'll need to select an appropriate suction cup mount for your camera. There are various options available, such as the Hague SM90s Camera Suction Mount, Delkin Fat Gecko Stealth Suction Mount, or the NEEWER 6" Camera Suction Cup Mount. Consider the size and weight of your camera when making your choice. Some mounts are designed for specific camera models, while others are universal and compatible with multiple types of cameras.
Preparing the Surface
Ensure that the surface of your car, where you intend to attach the suction cup, is clean and free of any dirt, grease, or debris. This is crucial for achieving a strong and secure bond between the suction cup and the car's surface.
Attaching the Suction Cup Mount
Position the suction cup mount on the desired area of your car, typically the windshield or side window. Press the suction cup firmly against the surface, ensuring that it is securely attached. You may need to activate the suction mechanism by pumping or locking a lever, depending on the design of your mount.
Adjusting the Camera Angle
Once the suction cup mount is securely in place, attach your camera to the mount. Adjust the ball head or tilt head of the mount to achieve the desired camera angle. Many suction cup mounts offer flexibility in adjusting the camera's position, allowing you to capture the perfect shot.
Ensuring Stability
Check that the suction cup mount can withstand wind and road vibrations. Test the stability of the mount by driving at different speeds and on varying road conditions. Ensure that the camera remains stable and does not wobble or detach from the mount.
Removing the Suction Cup Mount
When you need to remove the suction cup mount, release the locking lever or mechanism to break the suction seal. Do this carefully to avoid damaging the mount or the car's surface. Clean the suction cup after each use and store it properly to extend its lifespan.
Suction cup mounts provide a versatile and convenient way to attach a camera to your car. By following these steps, you can ensure a secure and stable mounting experience, capturing footage or images with ease.
Surveillance in NYC Subway Cars: Are We Being Watched?
You may want to see also
![]()
Position the camera to capture 60% road and 40% sky
To position the camera to capture 60% road and 40% sky, you'll need to consider a few factors. Firstly, the camera should be mounted on the windshield, typically at the top, near the rear-view mirror. This location ensures the camera is out of the way and doesn't obstruct the driver's vision. Aim to have the camera capture as much of the road as possible while still being able to see overhead traffic lights when stopped at an intersection.
The ideal angle is achieved by gently angling the lens upwards, capturing approximately 60% of the road and 40% of the sky. This balance ensures optimal exposure and detail in the footage. It's important to ensure that the camera's view is not obstructed by any tint or sun blinds on the windshield, as this can affect the image quality.
When positioning the camera, make sure it is within the driver's line of sight when seated. The camera should be mounted high enough so that it is out of the way but still accessible if needed. It is also crucial to check your state laws regarding dashboard camera placement, as some states have specific regulations.
Overall, by following these guidelines, you can effectively position your camera to capture the desired ratio of road and sky, ensuring clear and detailed footage of your surroundings.
Understanding PDAF Camera Mode: How It Works
You may want to see also
![]()
Use a screen protector to avoid residue on the windshield
To avoid leaving residue on your windshield when sticking a camera to your car, you can use a screen protector. This is a clear film that adheres to your windshield and provides support for devices such as dashcams. The film is easy to apply and can be removed without causing any damage to your windshield.
First, ensure the application area on your windshield is clean and dry, and free of any debris or oil. Apply the clear film to the windshield and allow it to cure for at least a minute. Expel any air bubbles if necessary. Then, place your dashcam's adhesive mount on top of the clear film.
When it's time to remove the dashcam, simply peel away the film. To reuse the film, clean it with warm soapy water and let it air dry. Then, you can reapply it to a clean surface.
Using a screen protector is a great way to avoid leaving any residue on your windshield when mounting a dashcam. It's simple to apply and remove, and it won't damage your windshield. This solution is perfect for those who want the functionality of a dashcam without the hassle of residue or adhesive damage.
Unleashing Camera Raw's Power: From Basics to Advanced Techniques
You may want to see also
![]()
Use a binder clip to attach the camera to the roof
To attach your camera to the roof of your car, you can use a binder clip. This is especially useful for rear windows that can be lifted independently of your trunk hatch. The basic headliner fabric of your vehicle is not suitable for standard adhesives, so you'll need to install a platform on your headliner with a suitable material for your camera adhesive to rest on.
Here's a step-by-step guide on how to do it:
Step 1: Prepare the Binder Clip
Start by taking a large binder clip and removing the metal prongs. You can do this carefully with pliers or a similar tool. You want to ensure that the binder clip is secure and won't come loose, so it's important to remove the prongs carefully without bending or damaging the rest of the clip.
Step 2: Attach the Binder Clip to the Roof
Once the binder clip is ready, you can attach it to the roof of your car. Wedge the binder clip horizontally between the headliner and the roof of your car. Apply firm but controlled pressure to ensure the clip is securely in place. Be careful not to damage the headliner fabric or any other interior components.
Step 3: Prepare the Camera Mounting Surface
With the binder clip in place, you now have a stable platform to attach your camera to. Take your camera adhesive and fix it to the broad side of the binder clip. Follow the instructions for your specific adhesive to ensure a strong bond. Make sure the adhesive surface is clean and free of any debris before attaching your camera.
Step 4: Mount Your Camera
Now, you can mount your camera onto the adhesive attached to the binder clip. Centre your camera on the adhesive and apply firm pressure to ensure a strong bond. Again, refer to the instructions for your specific adhesive to know how long it will take to cure and ensure a secure hold.
Step 5: Test and Adjust
Once your camera is mounted, test its stability by gently trying to move it side to side and up and down. If it feels secure, you can proceed to close the rear window carefully. Take your car for a short drive and test the camera to ensure it remains stable and provides clear footage. If any adjustments are needed, make them carefully, ensuring the camera is secure before driving again.
Using a binder clip to attach your camera to the roof of your car is a creative and cost-effective solution. This method ensures that your camera is securely mounted and provides a clear view from the roof of your vehicle. Remember to test the setup thoroughly before any extended use, and always be mindful of the camera's presence to avoid accidental damage.
Rear Car Camera Placement: Centered or Offset?
You may want to see also
Frequently asked questions
A suction cup camera mount is a good option for attaching a camera to the rear of your car. Mount the camera on the trunk or spoiler, ensuring it is secure before turning on the camera and starting to shoot.
Dash cams are commonly used for this purpose. Before mounting, clean the windshield with a window cleaner and allow it to dry. Position the dash cam near the rearview mirror to avoid blocking the driver's field of vision. Use the adhesive provided with your dash cam to secure it to the glass.
You can use industrial-grade Velcro or VHB tape to stick a camera to the ceiling of your car. Alternatively, magnets are good for maintaining a vertical hold.
Try tilting the lens slightly upwards, so the footage displays about 60% road and 40% sky. This provides a good balance of exposure and clarity, ensuring important details such as road signs and license plates are captured.
You can use a combination of magnets and VHB tape to stick a camera directly to the side of your car.