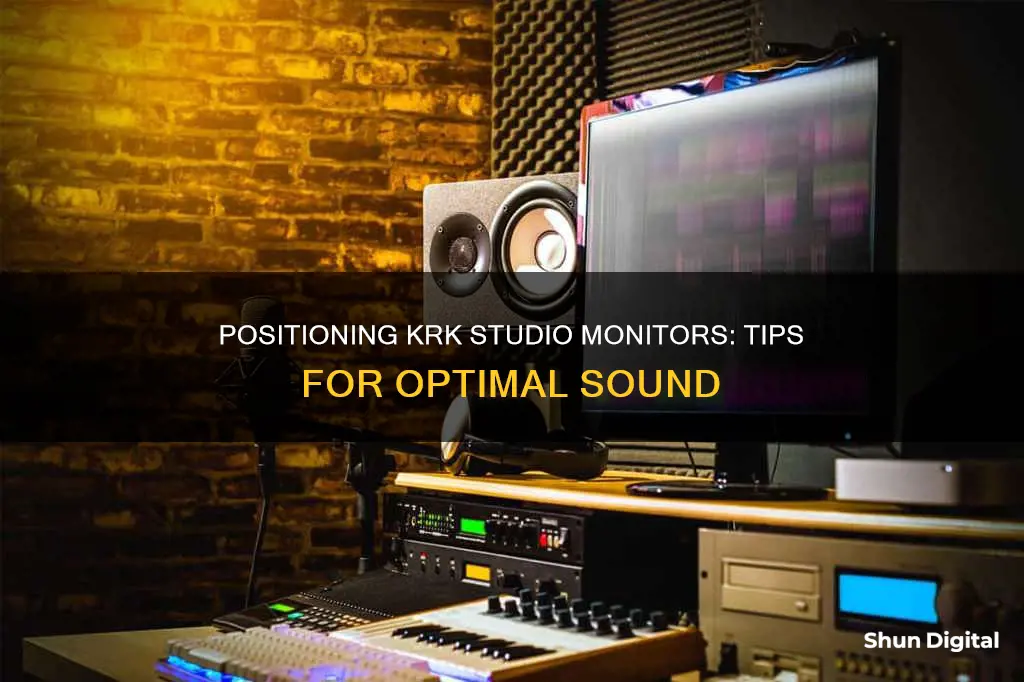
Positioning your studio monitors correctly is crucial for achieving a well-balanced mix and optimal sound. Here are some tips to help you position your KRK studio monitors effectively:
- Form an Equilateral Triangle: Position your monitors and listening position to create an equilateral triangle. This means the monitors and your head should be equidistant from each other, forming an equal-sided triangle. This setup helps create an accurate stereo image and establishes an optimal sweet spot for monitoring.
- Ear Level Height: Place the monitors at ear level or slightly above. This ensures that the sound is directed accurately towards your ears, reducing unwanted reflections from surfaces. You can use height-adjustable monitor stands or isolation pads to achieve the correct height.
- Avoid Reflections: Keep your monitors away from hard, reflective surfaces like windows, drywall, or mirrors. Reflections from these surfaces can cause comb filtering, altering the sound you hear.
- Symmetry is Key: Position your monitors along the short wall of the room. This helps minimise sonic reflections and provides more accurate results in smaller spaces.
- Avoid Corners: Don't place your monitors directly against walls or in corners. This can lead to a buildup of low-frequency energy and uneven frequency response, affecting the accuracy of your audio.
What You'll Learn

Form an equilateral triangle with your monitors
Forming an equilateral triangle with your monitors is a widely recommended setup for studio monitors. This setup ensures that the distance between the left speaker and your left ear is the same as the distance between the right speaker and your right ear, resulting in the sounds reaching your ears in phase and with the same intensity. This setup is crucial for achieving a good stereo image and sound stage.
However, it is important to note that the equilateral triangle setup is not a rigid rule and can be adjusted to suit your specific needs and room acoustics. The key principle is to ensure that the speakers are angled correctly so that the acoustic axes intersect several inches behind your head. This ensures that the speakers are aimed at your ears, which is the part of your anatomy responsible for hearing.
To achieve this, you can start by setting up your speakers and head in a traditional equilateral triangle configuration. Then, make small adjustments by rotating the speakers slightly so that the acoustic axes intersect a few inches behind your head. This will ensure that the speakers are pointing directly at your ears, resulting in the flattest speaker response.
It is also worth mentioning that the distance between the speakers is not as critical as ensuring that the speakers are angled correctly. As long as the distance between the speakers is within a reasonable range, you can adjust the angle to optimize the sound for your specific room. A good starting point is to have the speakers spread apart by about 55% of the room width.
Additionally, the height of the speakers is an important consideration. Your studio reference monitors should be at least 47 inches (120 cm) off the floor, with the tweeters aimed directly at your ears in the listening position. This will ensure optimal sound projection and help create a clear and detailed high-end response.
Recognizing When Your Savanah Monitor Needs Help
You may want to see also

Position tweeters at ear level
When setting up your studio monitors, it is important to position the tweeters at ear level. This is because high frequencies are more directional than low frequencies, so they will be noticeably louder when the tweeters are pointed directly at you. This is also why it is important to point the monitors towards your head.
To achieve this, you can adjust the height of your studio monitors so that the tweeters are at ear level when you are seated in your usual listening/mixing position. You can also adjust your chair height to ensure your ears are level with the tweeters. Additionally, you can tilt the monitors slightly downwards if needed, but try not to angle them more than 15 degrees from vertical.
The ideal height for studio monitors depends on the specific speakers, the room setup, and personal preference. A common guideline is to position the monitors so that they form an equilateral triangle with your head, with your head at one point of the triangle and the two monitors forming the other two points. This helps to create a balanced stereo image and ensures that the sound from both speakers reaches your ears at the same time.
It is worth noting that the height of the tweeters in relation to the room is also important. Avoid placing the tweeters in the vertical center of the room, even if it means orienting them slightly off-axis with your ears. This is because low frequencies have long wavelengths, and placing the tweeters in the vertical center can affect the sound.
By following these guidelines and making adjustments based on your specific setup and preferences, you can optimise the positioning of your studio monitors for the best sound quality.
LED vs LCD Monitors: Which Option Saves You Money?
You may want to see also

Avoid nearby hard surfaces
When setting up your studio monitors, it is important to avoid nearby hard surfaces. Acoustically hard surfaces reflect sound in the same way that a mirror reflects light. When the direct sound from the speaker combines with a reflected sound, the sound is altered, and this phenomenon is called comb filtering.
To avoid comb filtering, you should avoid placing your studio monitors near windows, drywall or plaster walls, mirrors, and any non-absorptive, non-diffusible surfaces. To check for these reflections, you can use a flat mirror. Position the mirror on a flat surface, such as a wall or desktop, and see if you can spot the reflection of the speaker's face in the mirror. If you can see the speaker, you should apply absorption to that reflective surface.
Another way to avoid comb filtering is to vary the distances between your monitors and each wall. First, ensure that the height of your monitors is either slightly above or below the midpoint between the floor and ceiling. Next, measure the distance between the monitors and the sidewalls, ensuring that they are neither the same distance nor a multiple of the previous two distances.
Additionally, create space between the monitors and the rear wall. As bass frequencies project outward in all directions, much of that sound travels backward and reflects off the rear wall of the room. To solve this problem, you can pull your monitors away from the wall by one to two feet, reducing the strength of the reflections.
In conclusion, by avoiding nearby hard surfaces and creating space between your monitors and walls, you can minimise comb filtering and improve the accuracy of your studio monitor setup.
Freesync Monitors: Why Nvidia Users Should Consider the Switch
You may want to see also

Isolate your monitors
To isolate your monitors, you can use various accessories designed to minimise the impact of vibrations on sound quality. Here are some methods to achieve this:
Monitor Isolation Pads
Special rubber pads placed between the monitor and the surface they are placed on can absorb the vibrations emitted by the monitor. These pads minimise the contact between the monitor and the hard surface, ensuring you get a clean and unaltered sound for mixing. Examples of such pads include Auralex Acoustics Monitor Isolation Pads and Studio Monitor Isolation Pads by Vocalbeat.
Monitor Isolation Stands
Monitor isolation stands are designed to be a standalone acoustic solution. They are equipped with rubber bumpers that absorb vibrations, and they also allow you to adjust the height and placement of your monitors. Iso Acoustics Monitor Isolation Stands and Fluid Audio Desktop Monitor Stands are good options in this category.
Silicone Isolation Bumpers
Small silicone hemispheres with adhesive, placed between the table and the monitor to minimise contact. This is a cheap solution, but not as effective as the other methods. An example is the Platinum Silicone Hemisphere Bumper.
Isolation Pucks for Studio Monitors
ISO Acoustics designed these small circular accessories, which adhere to the underside of the monitor cabinet. They manage the vibrations emitted by the speaker, providing superior isolation and control. Eddie Kramer, an engineer and producer, praised ISO PUCKS for providing "clarity and focus" in their mixes.
Isolation Springs for Studio Monitors
A simple and cheap solution that uses springs and rubber-coated aluminium rings to absorb vibrations. However, as the springs age, they may produce spring sounds. An example is the Nobsound Silver Aluminium Spring.
Open-Box Monitor Purchase: Worth the Risk?
You may want to see also

Place monitors along the short wall
If you're setting up your KRK studio monitors in a room, the first thing to do is to find the best listening position. Face the shortest wall of the room, equidistant from the left and right walls (the longer walls). The ideal listening position will be somewhere between 30% and 40% of the distance between the front and back walls, midway between the side walls. For example, if your room is 10 feet by 12 feet, the listening position should be five feet away from each of the side walls (centred on the short wall) and somewhere in the neighbourhood of 3.5 to 4 feet from the front wall (30-40% of the long wall length).
Now, centre your workstation along the short wall. This way, reflections from the side walls will arrive at the listening position at the same time, giving you a better stereo image. When choosing where to place your workstation, strive for symmetry. For instance, a door or window to your immediate left or right when sitting in the listening position will change the reflections that reach you from that side, messing with the balanced stereo image you're trying to achieve. Choose your location with this in mind.
Next, you'll want to position your monitors. The ideal setup is to have your listening position and the two monitors form an equilateral triangle. In other words, the distance between the left and right speakers and the distance from each speaker to the back of your head should be equal. A tape measure, a piece of string, or even a guitar cable will help you set up this triangle. The tweeters should be at the same height as your ears when you are seated, typically about 47-55 inches (120-140 cm) from the floor.
Now, let's talk about the monitors' distance from the wall. The bass frequencies from your monitors will reflect off the rear wall of your room, and when they recombine with the direct sound from the monitors, the "in-phase" frequencies will get amplified, and the "out-of-phase" frequencies will cancel out. This is known as the boundary effect. To minimise this, you should place your monitors a minimum of 6 to 10 inches away from the wall; 2 to 3 feet is better. This will help reduce bass buildup from the front wall.
Finally, let's discuss acoustic treatment. To minimise the impact of room modes and standing waves, you can add bass traps behind your monitors and acoustic panels at the initial reflection points. You should also consider adding diffusion to the rear wall to scatter the sound energy and prevent the formation of standing waves.
Finding Database Files: Android Device Monitor Navigation
You may want to see also
Frequently asked questions
For the best sound, position your monitors so that they form an equilateral triangle with your head. This will help you achieve a clear and precise stereo image.
Position your KRK studio monitors along the short wall of the room. This will help to minimise early sound reflections and give you a more accurate sound.
Position the tweeters of your KRK studio monitors at head height (ear level) so that your ears are directly in front of the speakers.
Avoid placing your KRK studio monitors directly against walls or corners as this can lead to a buildup of low-frequency energy and cause an uneven frequency response.


