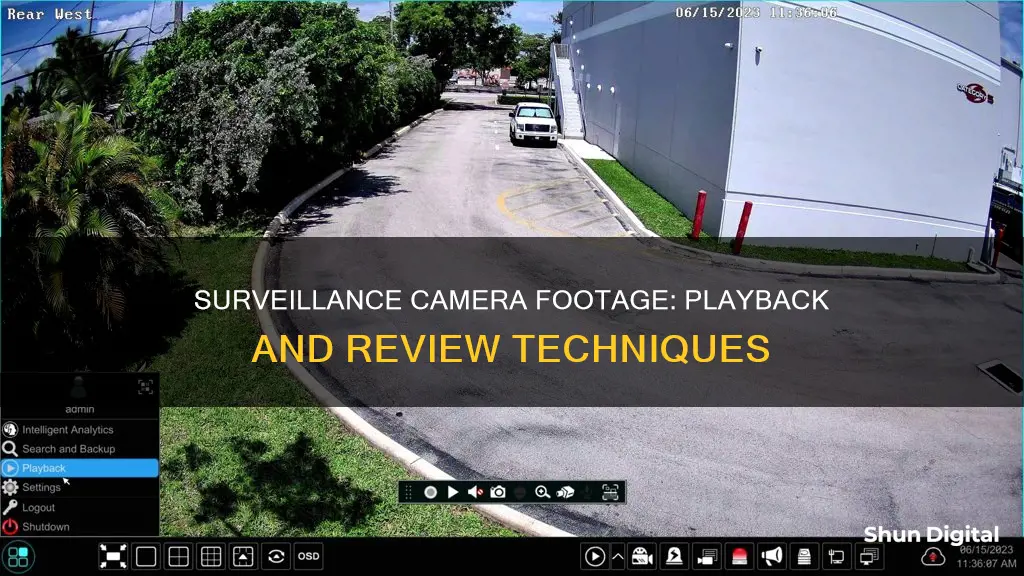
Playing back surveillance camera footage is a simple process, but it depends on the type of security camera and software you're using. If you have a PC-based CCTV system, you'll need a video capture device like a capture card or USB capture device, as well as video editing software. Stand-alone CCTV systems, on the other hand, require a monitor and a recorder, which usually comes with playback software. For cloud-based systems, you'll need to log in to your cloud storage account and navigate to the folder with your CCTV footage. Once you've accessed the footage, you can use the software to pause, fast-forward, rewind, zoom in and out, and adjust the playback speed.
| Characteristics | Values |
|---|---|
| Software | Amcrest Surveillance Pro, CCTV Camera Pros, Smart Search, Surveillance Station |
| Hardware | PC, monitor, recorder, USB capture device, capture card, hard drive, USB drive |
| File Management | Import/export, download, archive, cloud storage |
| Playback Controls | Play, pause, fast forward, rewind, slow motion, zoom, adjust playback speed |
| Search Methods | Search bar, time/date, event list |
What You'll Learn

Using a PC-based CCTV system
To playback CCTV footage from a PC-based system, you will need a video capture device such as a capture card or a USB capture device, as well as video editing software.
Firstly, connect the video capture device to your PC. For a USB capture device, simply plug it into a USB port. If you are using a capture card, install it into an expansion slot on the PC.
Next, open your video editing software and select the video capture device as the input device. You can now search for the footage you want to play back by date and time. Select the footage and press play. You can now use the software to pause, fast-forward, rewind, zoom in and out, and adjust the playback speed.
If you are using a DVR (Digital Video Recorder), you can search for footage by using the search bar, time/date, or event list search methods. Use the jog/shuttle wheel or arrow buttons to select the date and time, then press OK or Enter to start playback. You can now use the playback controls on the DVR or its remote to control the direction and speed of the footage.
PC-based CCTV System Considerations
When setting up a PC-based CCTV system, there are several factors to consider:
- Storage and Performance: The PC should be able to store at least one month's worth of footage and have good processing power and storage capacity for smooth playback.
- Space Constraints: PCs are smaller than traditional DVR or NVR devices, allowing for more flexible installation, including mobile setups.
- Connectivity and Power: Ensure your PC has the necessary connections to a power supply and the network. Consider using a LAN port for a reliable connection and the possibility of using Power over Ethernet (PoE).
- Graphics Capability: Opt for superior graphics processing power if you require HD quality playback or intense scrutiny of footage.
How to Find Your Camera Raw Version
You may want to see also

Using a stand-alone CCTV system
Stand-alone CCTV systems are an effective way to monitor and record activities in specific areas without the need for complex setups or additional devices. These systems operate independently and offer a straightforward, reliable, and cost-effective means of surveillance. Here's a step-by-step guide on how to set up and use a stand-alone CCTV system for playback:
Step 1: Choose the Right Stand-Alone CCTV Camera
Select a stand-alone security camera that suits your specific needs. Consider factors such as the size and layout of the area you need to monitor, the resolution and image quality, and whether you require advanced features like pan-tilt-zoom or night vision. Stand-alone CCTV cameras can be wired or wireless, so choose one that fits your power supply and network connection preferences.
Step 2: Install and Set Up the Camera
Stand-alone CCTV cameras are typically easy to install and often require minimal wiring. Follow the manufacturer's instructions for physical installation and mounting. Once installed, connect the camera to a power source, such as a standard electrical outlet or, for wireless cameras, rechargeable batteries or solar panels.
Step 3: Configure Network and Storage
If your stand-alone CCTV camera supports Wi-Fi, connect it to your local wireless network. This will enable remote access and viewing from other devices. Additionally, set up the storage option for your camera. Stand-alone CCTV cameras usually offer built-in storage options, such as SD cards, or cloud storage services. Ensure you have sufficient storage capacity to meet your recording needs.
Step 4: Accessing and Viewing Footage
To access and view footage on your stand-alone CCTV system, you can use a web browser or a dedicated mobile app, depending on the manufacturer's instructions. Open the appropriate application and enter the login credentials for your camera. This will allow you to view live footage and, in some cases, adjust camera settings remotely.
Step 5: Playback and Footage Management
To playback recorded footage, access the camera's settings through the web browser or mobile app. Look for options such as "Remote Search" or "Playback." Here, you can select the date and time range for the footage you want to review. After selecting the desired timeframe, click the Play button to start the playback. You should be able to control the playback speed and direction using the available controls.
Step 6: Advanced Features and Customization
Depending on your stand-alone CCTV camera's capabilities, you may have access to advanced features such as motion detection, night vision, or two-way audio. Customize these features according to your requirements. For example, you can set up motion detection alerts or schedule recordings during specific times of the day. Refer to your camera's user manual for detailed instructions on utilizing these advanced options.
Step 7: Data Security and Privacy
When using stand-alone CCTV systems, it's important to consider data security and privacy. Ensure that your stored footage is secure and accessible only to authorized individuals. Regularly review and manage your stored footage to avoid exceeding storage capacity. Additionally, be mindful of any privacy concerns, especially when capturing footage in public spaces or areas with privacy expectations.
Charging Your Nikon: A Quick Guide to Powering Up Your Camera 3700
You may want to see also

Navigating the playback section
Once you have accessed the playback section of your surveillance system, you will be able to view and navigate through previous footage. The steps to navigate the playback section may vary depending on the system you are using. Here is a general guide:
Selecting the Camera
To start, you will need to select the camera for which you want to view the footage. In some systems, this can be done by clicking on a black box to highlight it yellow, and then clicking on the camera icon next to the camera's name. This will load that specific camera and allow you to view its past footage.
Choosing the Playback Time
You can choose the time period for which you want to view the footage. This can be done by selecting a start and end date, or by using a "set playback time" feature. Some systems may offer a calendar option, where you can select specific dates and times.
Viewing and Exporting Footage
Once you have selected the camera and the time period, you will be able to view the past footage. You may also have the option to export the video or take screenshots for future reference.
Searching for Specific Events
Some systems offer a search function that allows you to look for specific events within the footage. This could include motion-detected events, which will be displayed with the time and date they occurred. You can then select the event you want to view and jump directly to that point in the footage.
Controlling Playback
During playback, you will typically have the option to control the direction and speed of the footage. This includes functions such as fast-forward, reverse, pause, and play.
Archiving and Downloading Footage
Depending on your system, you may be able to archive or download specific footage for future reference. This could involve saving the footage to a PC, NAS, or cloud storage. Some systems offer flexible archive settings, allowing you to specify the number of days to keep recordings, select specific cameras, and choose recording times and event modes.
Cleaning Corroded Camera Battery Terminals: DIY Guide
You may want to see also

Using a cloud-based system
Cloud-based security camera systems are becoming more prevalent across industries and business types. They offer the same reliable features as traditional video surveillance systems, with the added convenience of cloud computing.
Cloud-based systems record and store footage in cloud storage using an internet connection. This differs from traditional camera systems, which store video data on a physical hard drive using wired connections. Cloud-based systems use an edge gateway device or bridge, which cameras plug into, reducing bandwidth.
Robust Backup:
Footage stored in the cloud is not vulnerable to theft or damage, providing a concrete backup. In some states in the US, certain organizations are legally required to have cloud storage backup for their CCTV systems.
Accessibility:
With cloud-based surveillance, you can access your footage from anywhere at any time, as long as you have an internet connection. This is especially beneficial for businesses with multiple sites, as it allows for centralized viewing and monitoring of all locations through a single login.
Advanced Features:
Cloud-based surveillance often includes advanced features such as motion detection, facial recognition, and analytics. These features can be added to existing CCTV systems, transforming them into proactive security systems that alert users to important situations.
Sharing and Collaboration:
Cloud-based systems make it easy to share footage with multiple users and stakeholders. Users can be granted different permission levels, from read-only to admin, ensuring controlled access to sensitive information.
Cost-Effectiveness:
Cloud-based systems can reduce costs associated with hardware maintenance and upgrades. They also offer flexible storage options, allowing users to expand their cloud storage capacity easily.
Security:
Cloud storage can be more secure than traditional local systems as it doesn't require port-forwarding, which can leave your system vulnerable to cyberattacks. Additionally, cloud providers have security protocols in place to ensure the security of user footage.
Overall, using a cloud-based system for surveillance camera playback offers increased accessibility, advanced features, improved security, and cost savings. It is a modern approach to video surveillance that is well-suited for businesses, especially those with multiple locations.
The Origin Story of SpyPoint Cameras
You may want to see also

Using Amcrest Surveillance Pro
To playback recorded material in the Amcrest Surveillance Pro software, start by navigating to the Home Page and clicking on 'Playback' in the Operation menu. In the Device menu, select the device you would like to view playback on and ensure the checkbox next to the device name and group name are checked.
Next, locate the search menu on the bottom left side of the playback interface. Click on your chosen device in the Device menu, then choose the type of recording you would like to access from the Video Type dropdown menu. To view all recordings, select 'All Records' from the dropdown list.
All recordings will be displayed in a 24-hour time frame format. To access recordings within a specific date range, click on the calendar option in the Time field and select a start and end date. Once you have chosen a date, click on the Search button. The recordings will then populate in the time bar, and a record of each event will be displayed in the records field. To playback a recording, simply select it from the records field.
You can also download recordings in the playback menu using the Amcrest Surveillance Pro software. To do this, first open the software and click on 'Playback'. Then, select your device from the device menu and click on the Time option to display the calendar. A blue dot will indicate the dates on which recordings are present. Enter a start and end time for the recording and click Search.
The Event menu will then display all events located on the microSD card for your selected device from the chosen date range. Choose a recording from the records menu. If you do not want to trim the recording, click on the export icon to begin downloading. If you would like to trim the recording, click on the scissor icon. This will bring up a start and end duration, which you can modify by dragging the red bars with your mouse. Click on the scissor icon again to begin exporting the file.
Finally, click on Browse to choose a destination folder for your recording, then select MP4 from the Export Format dropdown menu. The recording will then begin to download. Once it has finished downloading, click on the Downloaded tab and then the Folder icon to access the recording. You can then play the recording on your computer's default media player.
Reolink Cameras: Made in China?
You may want to see also
Frequently asked questions
First, connect the CCTV camera to your computer or device. Open the software for viewing the footage, which should come with the camera. Locate the footage you want to play back by browsing files or searching based on the date and time. Once you've found the footage, click play or it may begin playing automatically.
Find the security camera software that came with your camera. Open the software and use the "Search" or "Find" function. Enter the date and time and the software will bring up the relevant footage.
Connect the hard drive to a computer and use the computer's media player to play the footage. Alternatively, use video editing software to edit the footage and create a video file to play back.
Connect the USB drive to a computer and open the CCTV software. Select the camera you want to view footage from and click "Playback".
Log in to your cloud storage account and navigate to the folder where your CCTV footage is stored. Select the footage you want to play back and click "Playback". Once the footage has loaded, click "Play".


