Power over Ethernet (PoE) security cameras are an increasingly popular option for homeowners and businesses. They are easy to install, flexible, and provide high-quality footage. PoE cameras receive power and data through a single Ethernet cable, removing the need for separate power adapters. This makes the setup process more accessible, and the cameras more affordable. This paragraph aims to introduce the topic of how to mount a PoE surveillance camera, covering the benefits, technology, and installation process.
| Characteristics | Values |
|---|---|
| Type of camera | PoE (Power over Ethernet) |
| Cable required | Ethernet cable |
| Number of cables | 2 |
| Cable 1 | For the switch/router |
| Cable 2 | For the internet connection |
| Hardware necessities | Network Video Recorder (NVR) |
| PoE switch or injector | |
| Camera placement | High points, avoiding direct light and windows |
| Mounting methods | Ceiling, wall, and pole |
What You'll Learn
![]()
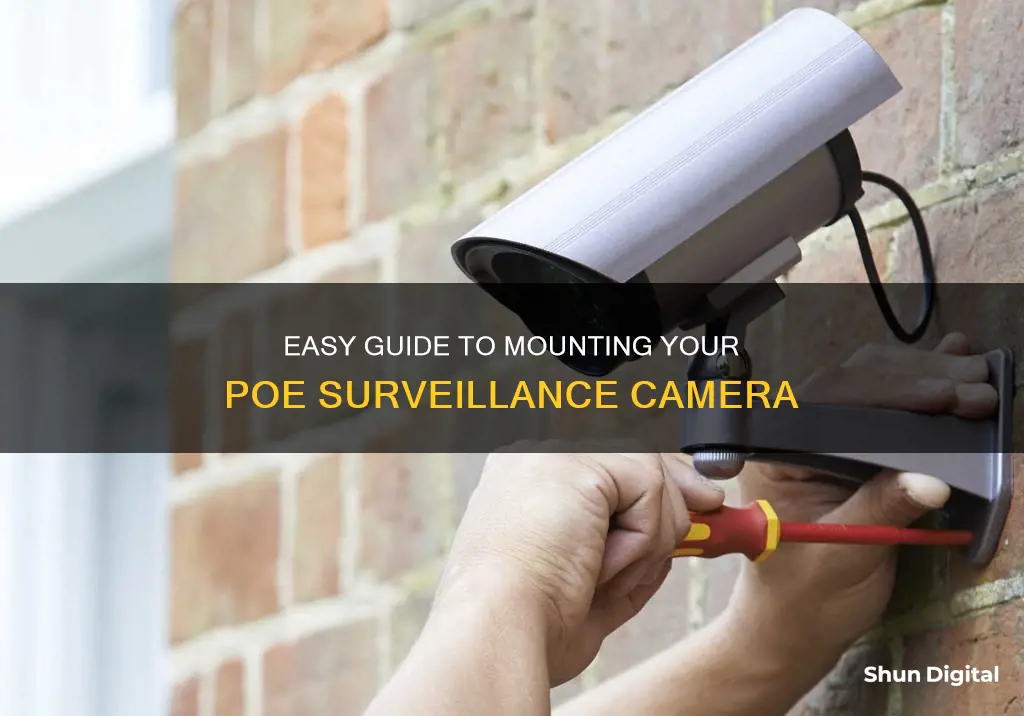
Decide on the camera placement
Deciding on the placement of your PoE surveillance cameras is a crucial step in ensuring effective monitoring and security. Here are some detailed guidelines and considerations to help you decide on the optimal camera placement:
Field of View (FOV) and Camera Positioning:
The field of view of a camera refers to the area it can capture, and this is influenced by factors such as the camera's position, angle, and zoom capabilities. Consider the specific areas you want to monitor and ensure your cameras are positioned to cover those areas effectively. For example, if you need to monitor a parking lot, consider using bullet cameras with long-range monitoring capabilities.
Camera Type and Features:
The type of camera you choose will impact its placement. For instance, dome cameras, also known as speed dome or mini-dome cameras, are ideal for outdoor use as they are vandal-resistant and less susceptible to IR bounce and glare. On the other hand, bullet cameras are suitable for long-range monitoring and act as a visible deterrent due to their size and shape. Additionally, consider cameras with features such as night vision, high resolution, and remote access capabilities to enhance the effectiveness of your surveillance system.
Lighting Conditions:
Pay attention to the lighting conditions in the areas you plan to monitor. If you need to capture footage in low-light or dark environments, ensure your cameras have infrared night vision capabilities or starlight technology, which enhances the image sensor's light sensitivity.
Camera Range and Distance:
Consider the distance between the camera and the areas or objects you want to monitor. For long-range monitoring, select cameras with powerful zoom capabilities or opt for motorized zoom or PTZ cameras. Additionally, ensure your cameras are positioned at an appropriate distance from the NVR or router, as Ethernet cables have a maximum effective range of 328 feet (100 meters).
Number of Cameras and Coverage:
Determine the number of cameras you need to achieve comprehensive coverage. For example, if you have a large property or multiple entry points, you may require multiple cameras to ensure all areas are monitored effectively.
Power and Network Infrastructure:
Ensure you have the necessary power and network infrastructure to support your camera placement. This includes factors such as the number of Ethernet ports available, network speed, and power supply. PoE cameras require a PoE switch or injector to provide power and network connectivity, so plan your placement accordingly.
Legal and Privacy Considerations:
Be mindful of any legal and privacy considerations when deciding on camera placement. Ensure you are not infringing on the privacy of others and that your cameras are placed in areas where you have the legal right to monitor and record.
By carefully considering these guidelines and factors, you can decide on the optimal placement for your PoE surveillance cameras to achieve effective monitoring and security.
Square Mode: Which Cameras Have This Feature?
You may want to see also
![]()
Connect your camera to the network
Connecting your PoE camera to the network is a crucial and relatively complex part of the setup process. There are several ways to do this, depending on your specific needs and setup.
Using a PoE Switch
PoE switches are network switches with PoE, which use a single cable to deliver power and data to connected devices. They are generally equipped with multiple PoE ports, allowing you to add multiple PoE cameras with ease. To connect your PoE camera to the network using a PoE switch, follow these steps:
- Plug the IP cameras into the PoE switch.
- Plug the PoE switch into the NIC 2 on the NVR.
- Plug the PoE switch into a power outlet.
- Follow the instructions provided by your NVR to add and record the cameras.
Using a PoE NVR and Router
A PoE NVR is a combination of an NVR (Network Video Recorder) and a PoE switch. It has built-in PoE switches and can connect directly to PoE cameras. To use this method:
- Connect the PoE NVR to a router.
- Connect the PoE camera to the PoE NVR using an Ethernet cable.
Using a PoE Injector
A PoE injector enables PoE-enabled devices to work with a non-PoE network. It injects power into the non-PoE network to create a PoE connection for installing PoE cameras. To use a PoE injector:
- Connect the PoE injector to a power source, such as a wall outlet.
- Connect the PoE injector to the non-PoE router or network switch using an Ethernet cable.
- Connect the PoE camera to the PoE injector using another Ethernet cable.
Direct Connection to a Computer
You can also connect your PoE camera directly to a computer without using a router. Here's how:
- Connect the camera to a power source using a PoE injector or a 12VDC power adapter.
- Use an Ethernet cable to connect the camera to your computer's Ethernet port.
- Configure your computer's network port to communicate with the camera by setting it to the same IP address scheme.
- Test the connection using the Ping command.
- Access the camera's web interface using Internet Explorer and log in using the camera's credentials.
Polaroid Cameras: Still Being Made, Still Capturing Moments
You may want to see also
![]()
Connect your camera to a recording device
Connecting a PoE camera to a recording device, such as a computer or a Network Video Recorder (NVR), offers several advantages for surveillance. PoE technology simplifies installation by allowing for the transmission of power and data through a single Ethernet cable, eliminating the need for separate power sources at the camera's location. This results in reduced costs and improved installation efficiency.
- Understand the Basics: PoE, or Power over Ethernet, is a technology that enables the transmission of power and data over a single Ethernet cable. This simplifies the setup process by reducing the need for additional power sources at the camera's location.
- Choose the Right Recording Device: You can connect your PoE camera to a computer or a dedicated NVR. An NVR is a device that records video from IP cameras to a hard drive. It offers advantages such as reliability and improved system security. However, using a computer as a recording device provides more flexibility for testing and temporary setups.
- Gather the Necessary Equipment: Ensure you have all the required components, including the PoE camera, Ethernet cables, and the recording device (computer or NVR). If using an NVR, ensure it is specifically designed for PoE switches to enhance cybersecurity protections.
- Connect the Camera and Recording Device: Use an Ethernet cable to connect your PoE camera to the recording device. If using a computer, connect the camera directly to the computer's network port. If using an NVR, you may need to connect the camera to a PoE switch, which is then connected to the NVR.
- Configure Network Settings: Set the IP address of your camera to match the network scheme of your recording device. This ensures that the camera and recording device can communicate effectively.
- Power On the Camera and Recording Device: Once the connections are secure, power on both the camera and the recording device.
- Test the Connection: Verify that the camera is receiving power and data from the recording device. Check the camera status indicators and ensure that data transmission rates are within acceptable ranges.
- Access the Camera Feed: Depending on your setup, you may need to use surveillance software or a web browser to access the camera feed. For computers, you may need to use Internet Explorer and enter the IP address of the camera.
- Adjust Camera Settings: After successfully accessing the camera feed, you can now modify the camera settings according to your requirements. This includes settings such as shutter rate and IR LED strength.
By following these steps, you will be able to connect your PoE camera to a recording device, enabling you to effectively monitor and record surveillance footage.
Surveillance Camera Reviews: Outdoor Security Options
You may want to see also
![]()
Configure your network
Configuring your network is a crucial and complex part of setting up a PoE camera system. Here are some detailed instructions to help you configure your network for your PoE surveillance camera:
Understand the Basics
Firstly, it is important to understand the basics of PoE camera network setups. PoE, or Power over Ethernet, is a technology that allows Ethernet cables to carry power and data simultaneously, simplifying the cabling process. PoE cameras are IP cameras with PoE capability, offering simplified installation and high performance. When setting up a PoE camera network, you will typically deal with networking devices like routers, switches, and network video recorders (NVRs).
Plan Your Setup
Before beginning any installation, it is crucial to make a plan that considers your specific needs and requirements. Determine the size of your system, the number of cameras, their locations, and your future expansion plans. This plan will guide your choices to ensure optimal performance and minimise unnecessary costs and labour.
Choose the Right Hardware
Selecting the appropriate hardware is vital for a successful PoE camera network setup. The three most common solutions/hardware options are:
- PoE Switches: These are network switches with PoE capability, allowing you to connect multiple PoE devices, like PoE cameras, using a single cable. PoE switches come in two main types: unmanaged and managed. Unmanaged PoE switches are plug-and-play, with fixed configurations, making them ideal for small systems and tight budgets. On the other hand, managed PoE switches offer advanced features for network management and control, making them suitable for medium-to-large systems with demanding requirements.
- PoE NVR and Router: A PoE NVR (Network Video Recorder) is a combination of an NVR and a PoE switch. It has built-in PoE ports, allowing direct connection to PoE cameras. PoE NVRs are typically used for home or small business setups as they reduce installation complexity by using less equipment.
- PoE Injector: A PoE injector enables PoE capability by injecting power into a non-PoE network system. It is a cost-effective solution if you only need to install one or two PoE cameras. PoE injectors come in two types: smart injectors, which function like PoE switches, and passive injectors, which are used for adding PoE capability to non-PoE cameras.
Connect Your Devices
Once you have selected the appropriate hardware, it's time to connect your devices:
- Using a PoE Switch: First, plug your IP cameras into the PoE switch. Then, connect the PoE switch to the NVR or router. Ensure you keep one port open for connecting the switch to the rest of the network. Finally, power on the PoE switch and assign IP addresses to each camera through the NVR user interface.
- Using a PoE NVR and Router: Use an Ethernet cable to connect the PoE NVR to your router. Then, use Ethernet cables to connect your IP cameras to the PoE NVR. Finish by connecting the NVR to a TV or monitor using an HDMI or VGA cable.
- Using a PoE Injector: Connect the PoE injector to a power source and your router using Ethernet cables. Then, use Ethernet cables to connect the PoE injector to your IP cameras.
Consider Network Requirements
When setting up your PoE camera network, it is essential to consider power and bandwidth requirements:
- Power: Ensure your PoE switch or injector can provide sufficient power for each PoE port and all the cameras you plan to connect.
- Bandwidth: Consider the number of cameras, camera types (HD cameras consume more bandwidth), and the distance between cameras and the main network. These factors will impact the bandwidth requirements of your system.
Additional Considerations
- Distance Limitations: PoE networks have a maximum transmission distance of 100 meters due to signal degradation and power loss. If you need to install cameras beyond this range, consider using PoE extenders to increase the distance.
- Network Security: To enhance network security and reduce cyber risks, use a commercial-grade NVR with built-in router functions. This will keep your camera network traffic separate from your main network traffic and protect your cameras from direct exposure to the internet.
- Placement: Consider the placement of your cameras to ensure they capture the areas you want to monitor.
- Advanced Network Setup: For larger camera systems or critical facilities, consider using managed PoE switches, which offer advanced features for improved performance and security, such as VLAN functionality to create a segregated LAN network for your camera system.
By following these detailed instructions, you can effectively configure your network for your PoE surveillance camera system.
Unlocking Galaxy S9+ Camera Modes: A Step-by-Step Guide
You may want to see also
![]()
Test the system after installation
Testing the system after installation is a crucial step to ensure that your newly installed PoE surveillance camera is functioning correctly and effectively. Here are some detailed instructions on how to test your PoE surveillance camera system:
- Check the Live Feed: Access the live feed from each camera to ensure that the video feed is clear and uninterrupted. Verify that there are no distortions or interferences in the video quality.
- Test Camera Angles: Examine the angle of view for each camera to ensure that it captures the desired field of view. Make any necessary adjustments to the camera positioning or lens settings to achieve the required coverage.
- Verify Motion Detection: Test the motion detection feature to ensure it is working as expected. Trigger the motion sensors and confirm that the system accurately detects and records motion events.
- Review Camera Settings: Access the camera settings through the NVR interface and fine-tune any necessary parameters. Optimize settings such as encoding, motion detection, AI settings (if applicable), and recording schedule to meet your specific requirements.
- Test Remote Viewing: If your system supports remote viewing, check that you can access the camera feed from authorised devices such as smartphones, tablets, or computers connected to your network or the internet.
- Evaluate Audio (if applicable): If your camera has audio capabilities, test the audio input and output to ensure that it captures and transmits sound clearly.
- Check Storage Functionality: Ensure that the camera system is properly saving video footage to the designated storage device, such as an NVR, cloud storage, or local server. Verify that the storage settings, such as recording schedules and retention periods, are correctly configured.
- Assess System Integration: If your PoE camera is integrated with other security systems or smart home devices, test the interoperability to ensure seamless communication and control between the various components.
- Conduct Final Checks: Once you have tested all the individual components and features, conduct a final system test to ensure that everything works harmoniously. This includes testing any system alerts, notifications, and automated functions.
Remember to refer to the user manual or seek guidance from the manufacturer's support resources if you encounter any issues during the testing process. By thoroughly testing your PoE surveillance camera system after installation, you can have peace of mind knowing that your security system is operating optimally and reliably.
How to Find the Crop Tool in Camera Raw?
You may want to see also
Frequently asked questions
You will need a network video recorder (NVR), a PoE switch or injector, and an Ethernet cable.
Consider high-traffic areas, main entrances, and areas prone to break-ins. Carefully planning the placement of your camera will ensure optimal coverage.
Connect one end of the Ethernet cable to your camera and the other end to your IP NVR, injector, or switch. Using a PoE switch allows you to connect multiple cameras to your network.
PoE simplifies the setup process by delivering both power and data over a single cable. This makes professional-grade security camera systems more accessible and flexible.