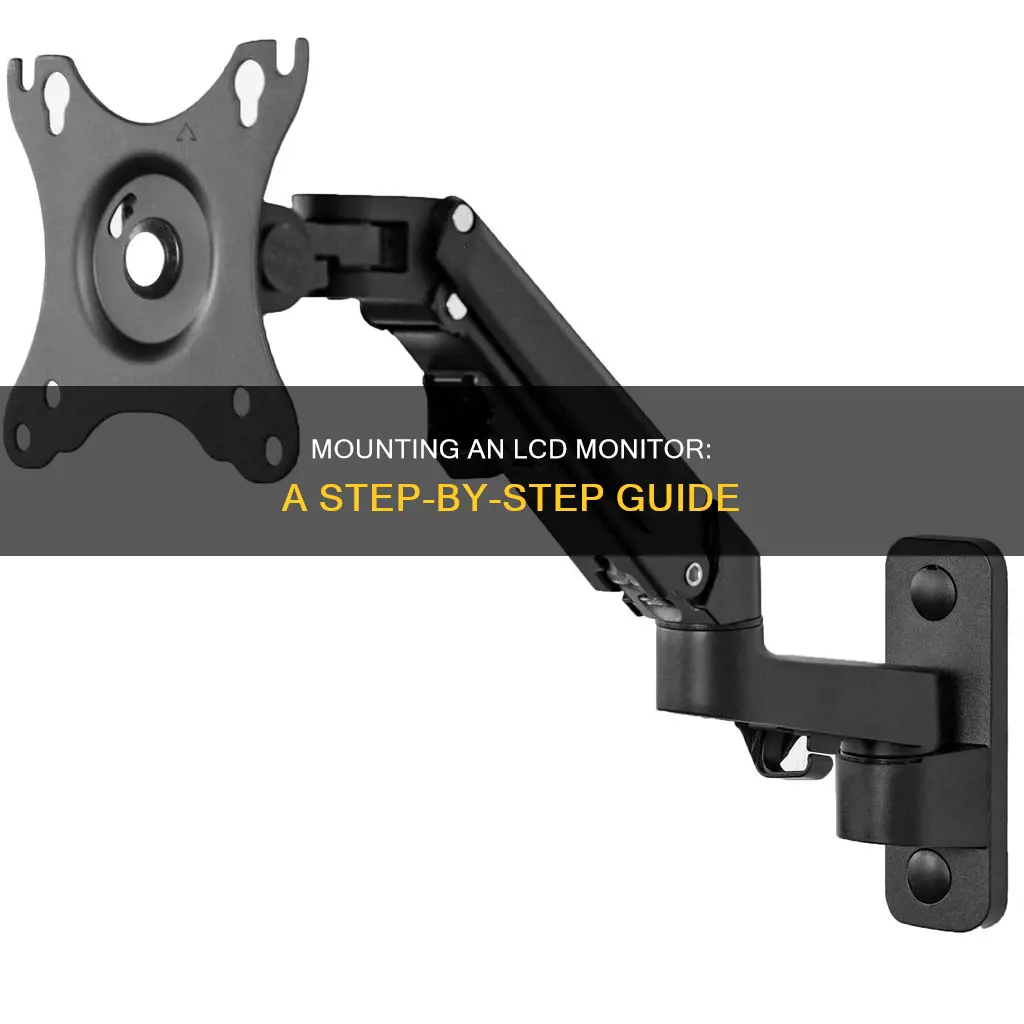
Mounting an LCD monitor can be done in a variety of ways, including panel mounting, VESA mounting, and wall mounting. The method you choose will depend on your specific monitor and your desired setup.
Panel mounting, also known as VESA mounting or wall mounting, is a popular option that allows for a sleek and clutter-free look. To determine if your monitor is compatible with this method, check for mounting holes on the back, usually found in the steel frame. If your monitor is not VESA-compatible, you may still be able to mount it with an adapter.
Another option is to use a desktop monitor mount, which can be freestanding or attached to the desk via a clamp or grommet. Freestanding mounts are affordable and highly adjustable, while clamp mounts clear up desk space and provide customization options. Grommet mounts offer the greatest stability but require drilling into the desk.
When mounting your LCD monitor, it is important to consider the weight and size of the monitor, the stability of the mounting surface, and the desired viewing angle and height. By choosing the right mounting option and following the manufacturer's instructions, you can achieve a secure and ergonomic setup.
| Characteristics | Values |
|---|---|
| Monitor Mount Type | Desktop, Wall, Clamp, Grommet, VESA |
| Monitor Size | Up to 32 inches or 38 inches (Ultrawide) |
| Mounting Options | VESA, Clamp, Grommet, C-clamp, Wall |
| Adjustability | Tilt, Swivel, Rotation, Height |
| Ease of Assembly | Easy, straightforward, user-friendly |
| Build Quality | Sturdy, solid, thick metal, stable |
| Cable Management | Detachable cable clips, cable holders, cable management brackets |
| Weight Capacity | Up to 17.6 lbs per screen |
What You'll Learn

How to mount an LCD monitor on a wall
To mount an LCD monitor on a wall, follow these steps:
Step 1: Choose the right wall
Select a sturdy wall that can support the weight of your monitor. Make sure the wall you choose is strong enough to bear the load.
Step 2: Select a VESA mount
Check your monitor for VESA mount compatibility. VESA, or the Video Electronics Standards Association, sets the standards for mounting monitors and other displays. Look for mounting holes on the back of your monitor, usually in its steel frame, or look up the VESA compatibility of your monitor online. If your monitor is not VESA-compatible, you may need to purchase an adapter.
Step 3: Attach the mount to the wall
Follow the instructions provided with your VESA mount to attach it securely to the wall. Ensure that the mount is level and firmly fastened.
Step 4: Remove the monitor stand
Detach the stand from the back of your monitor. This typically involves unscrewing a few screws or pressing a release button.
Step 5: Attach the monitor to the mount
Secure the VESA plate to the back of your monitor using the screws provided with your mount. Carefully align the VESA plate on the monitor with the mount, and slide it into place until it clicks securely.
Step 6: Adjust the angle
Adjust the monitor's angle to your desired position using any built-in adjustment knobs or levers. Ensure that the monitor is at a comfortable viewing angle and height.
Step 7: Check for stability
Gently wiggle the monitor to ensure it is firmly attached to the mount. Make sure it doesn't wobble or move excessively.
Step 8: Connect the cables
Connect any necessary cables, such as power and video cables, to your monitor. Neatly tuck away the cables so they don't interfere with the monitor's position or appearance.
Additional Tips:
- Consider the ergonomics of your setup. Your monitor should be about an arm's length away, with the top at or slightly below eye level.
- Keep your cables organised and tucked away to maintain a sleek look.
- Always follow the manufacturer's instructions for proper installation and safety.
- If you're renting or can't drill into walls, consider alternative mounting options like freestanding or clamp mounts for your desk.
Home Health Monitoring Market Size: Global Overview
You may want to see also

How to choose the right wall for mounting an LCD monitor
When choosing the right wall for mounting an LCD monitor, there are several factors to consider. Firstly, determine the type of wall you will be mounting your monitor on. Different walls have different weight-bearing capacities and require different types of mounting hardware. Common wall types include drywall with wooden or metal studs, concrete walls, brick walls, cinder block walls, and plaster walls (interior or exterior).
Secondly, consider the position of the wall in relation to your desired viewing angle. The wall you choose should provide a clear and unobstructed view of the monitor. Ensure that the wall is sturdy enough to support the weight of the monitor and mounting hardware. If you are using a desk mount, the wall must be able to accommodate the weight of the monitor and the desk must be sturdy enough to handle the added weight.
Additionally, check the electrical cable layout and ensure that the wall can support the necessary cable connections. Mark the location of electrical outlets or switches, as wall studs are typically located near them. Standard distances from these points can help you locate the studs.
It is also important to select a wall that allows for proper weight distribution. Distribute the weight across multiple wall studs or use anchors for additional support if mounting a heavy monitor. Refer to the manufacturer's instructions for specific weight distribution guidelines and mounting requirements.
Lastly, consider the aesthetics of the wall and the surrounding environment. Choose a mount that complements the interior design and takes into account the colour and visibility of the mounting hardware.
By carefully considering these factors, you can choose the right wall for mounting your LCD monitor, ensuring a secure and stable installation.
Utilizing Nvidia Surround with Multiple-Sized Monitors
You may want to see also

How to select a VESA mount for an LCD monitor
When selecting a VESA mount for an LCD monitor, there are a few key considerations to keep in mind.
First, it is important to determine the size and weight of your monitor. The VESA mount you choose should be able to support the weight of your monitor. Additionally, the VESA standard of your monitor should match the VESA standard of the mount. To find the VESA standard of your monitor, measure the horizontal and vertical distances between the centres of the four threaded holes on the back of the monitor. This measurement will give you your VESA recording. Common VESA standards include VESA MIS-D, VESA MIS-E, and VESA MIS-F, which correspond to different screen sizes.
Next, consider the desired position of the mount. Will it be fixed to a wall, ceiling, floor, or desk? For example, a wall mount may require drilling, while a desk mount can be attached with a clamp or through-desk solution. It is also important to check the carrying capacity of the chosen surface, such as the weight limit of a wall.
Another factor to consider is the flexibility of the mount. Do you need it to be rotatable, height-adjustable, tiltable, or swivelable? Motorized or electrical brackets are also available. If your monitor supports the pivot function, you may want a mount that allows rotation between landscape and portrait orientations.
Finally, think about the colour of the mount. If elements of the bracket, such as a swivel arm, will be visible, choose a colour that fits with your interior design.
With these considerations in mind, you can now search for a suitable VESA mount that matches your monitor's VESA standard and can support its weight. Online shops offer a variety of high-quality brackets from well-known manufacturers.
Backlight Basics: Do LCD Monitors Need It?
You may want to see also

How to attach a VESA mount to a wall
To attach a VESA mount to a wall, follow these steps:
Choose the Right Wall:
Start by selecting a sturdy wall that can support the weight of your monitor. Avoid walls with direct sunlight, heat, or vibrations, and ensure easy access to power outlets and cable input sources.
Select a VESA Mount:
Check your monitor for VESA mount compatibility, indicated by mounting holes drilled into the back, usually in the steel frame. Choose a VESA mount that matches your monitor's VESA pattern.
Attach the Mount:
Follow the instructions provided with your VESA mount to attach it securely to the wall. Ensure it is level and firmly fastened.
Remove the Monitor Stand:
Detach the stand from the back of your monitor by unscrewing the screws or pressing a release button. This step may vary depending on your monitor model.
Attach the Monitor to the Mount:
Using the screws provided with your mount, attach the VESA plate to the back of your monitor. Ensure a secure fit.
Mount the Monitor:
Align the VESA plate on the back of your monitor with the mount, and slide the plate onto the mount until it clicks into place. Adjust the angle as needed for optimal viewing.
Check for Stability:
Gently wiggle the monitor to ensure it is properly attached and secure. Make any necessary adjustments to the mount's position or angle.
Connect Cables:
Finally, connect the power, video, and any other necessary cables to your monitor. Neatly tuck away the cables to avoid interference with the monitor's position.
Monitoring Java Heap Usage: Tips for Performance Optimization
You may want to see also

How to adjust the angle of a wall-mounted LCD monitor
To adjust the angle of a wall-mounted LCD monitor, you can follow these steps:
- Ensure your monitor is VESA compatible by checking for mounting holes drilled into the back of the monitor, usually in its steel frame.
- Choose an appropriate VESA mount that is compatible with your monitor's VESA pattern.
- Attach the VESA mount to the wall, following the manufacturer's instructions. Ensure it is level and securely fastened.
- Remove the existing stand from your monitor by unscrewing it or pressing a release button.
- Attach the VESA plate to the back of your monitor using the screws provided with the mount.
- Mount the monitor by aligning the VESA plate with the mount and sliding it into place until it clicks.
- Adjust the angle of the monitor to your desired position using any built-in adjustment knobs or levers.
- Check for stability by gently wiggling the monitor to ensure it is securely attached.
- Connect any necessary cables, such as power and video cables, ensuring they are neatly tucked away.
The specific steps may vary depending on the type of mount and monitor you are using, so be sure to refer to the manufacturer's instructions for detailed guidance. Additionally, when adjusting the angle, consider the optimal viewing distance and height for comfort and to reduce eye strain.
Understanding Power Usage: Monitor Your Energy Consumption
You may want to see also
Frequently asked questions
VESA (Video Electronics Standards Association) sets the standards for mounting monitors, TVs, and other displays. Most modern monitors are VESA-compatible, but smaller, cheaper, or thinner monitors with curved backs may not be. You can check for VESA compatibility by looking for mounting holes drilled into the back of your monitor, usually in its steel frame. If your monitor is not VESA-compatible, you can purchase an adapter.
There are several mounting options available for LCD monitors, each with its own advantages and disadvantages. Here are some of the most common types:
- Wall mounts offer a sleek look by doing away with desk clutter, but they require drilling into walls, which may not be feasible in rental properties or offices.
- Desktop monitor mounts are freestanding mounts that rest on your desk without the need for clamps. They are affordable and highly adjustable but do not provide the same level of stability as other options.
- Clamp-mounted monitor arm desk mounts attach to the edge of your desk, providing more desk space and customization options. However, they may not be compatible with older, bulkier desks.
- Grommet mounts offer the greatest stability by drilling a hole into your desk or using an existing one. They are ideal for multiple-monitor setups but may limit your desk options.
When choosing a wall to mount your LCD monitor, ensure that the wall is sturdy enough to support the weight of your monitor. Also, check if your monitor has VESA mount compatibility and select a VESA mount that matches your monitor's VESA pattern.
The tools required to mount an LCD monitor may vary depending on the specific mount and monitor you are using. However, some common tools you may need include a Phillips-head screwdriver, a drill, and a level. Always refer to the manufacturer's instructions for specific tool requirements.
Proper ergonomics are essential for your overall health and comfort. Your monitor should be about 20 to 28 inches away from your face, with the top of the monitor at or slightly below eye level. The monitor should be tilted up to 20 degrees to reduce neck and eye strain. You can adjust the height and viewing angle of your mounted LCD monitor by loosening or tightening the adjustment knobs or levers built into the mount.


