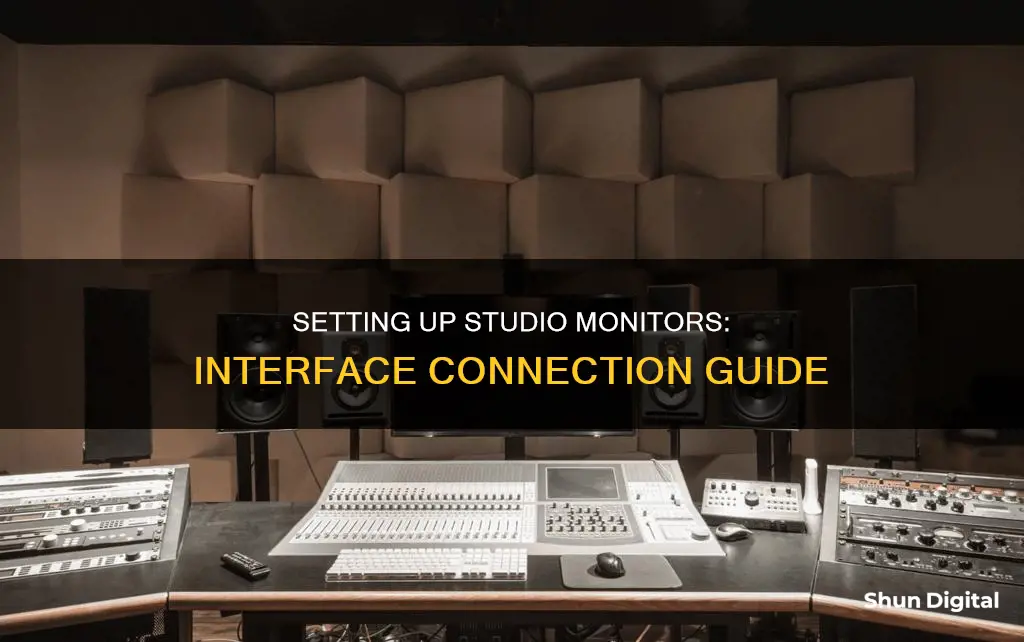
Studio monitors are an essential component of any home recording studio setup, delivering professional-quality audio that eliminates distortion and irregular frequencies. When connecting studio monitors to an audio interface, the first step is to connect the interface to your computer using a USB or Thunderbolt cable. Next, ensure that the output volume of the interface and monitors is turned down to prevent any unexpected pops or crackles. Identify the type of outputs on your interface, typically 6.35mm TRS jack sockets, and the inputs on your monitors, which could be TRS jack or XLR. Utilise balanced TRS cables to connect the left and right outputs of the interface with the corresponding inputs on the monitors. If your monitors feature XLR inputs, use a balanced TRS to male XLR cable. For interfaces with unbalanced outputs, use phono connectors and speakers with additional unbalanced RCA phono inputs. After connecting the equipment, adjust the speaker positioning to optimise sound quality, ensuring the tweeter driver is level with your head and forming an equilateral triangle with the speakers.
| Characteristics | Values |
|---|---|
| Monitor placement | Triangle formation with the listener, speakers facing inwards at a 30-degree angle, equidistant from the listening seat, at least 3 feet apart, at ear height |
| Monitor stands | Elevate speakers, free up surface space, isolate monitors from the desk |
| Cables | Balanced interconnect cables with different configurations of 1/4" and XLR depending on connections |
| Sound treatment | Prevent sound from leaving the room, contain and balance sound |
| Room size | Smallest ideal size: 14 by 8 feet |
| Room volume | Higher ceilings are better |
| Audio interface | Connect to computer via USB or Thunderbolt, select interface under DAW audio preferences |
| Volume | Turn down audio interface and studio monitor volume before connecting |
| Cables | TRS jack sockets, XLR outputs, RCA phono inputs |
| Speaker positioning | Tweeter (high-frequency) driver level with head, listener at the front point of an equilateral triangle with speakers at other points |
| Speaker distance from walls | 6-12" or 2-3 feet |
What You'll Learn

Connecting studio monitors to a laptop or PC without an audio interface
To connect studio monitors to a laptop or PC without an audio interface, you will need a 3.5mm jack to 2x XLR male cable. These cables are available in various lengths, and if the cable isn't long enough, you can extend it using a regular microphone cable. You will need two cables, one for each speaker, and you can also use this cable type to connect a DJ set to your active monitors.
It is also possible to amplify your DJ controller through the built-in speakers in your laptop or computer. To do this, adjust the settings in your DJ software to direct the Master Output to your computer's on-board sound card. However, these types of speakers are not capable of providing the full, dynamic sound you need for proper DJing.
Monitoring Bandwidth Usage: PRTG's Per-IP Address Insights
You may want to see also

Amplifying a DJ controller through built-in laptop or computer speakers
Amplifying a DJ controller through your laptop or computer's built-in speakers is a straightforward process. Here's a step-by-step guide:
- Equipment: Ensure you have the necessary equipment, which includes a DJ controller and a laptop or computer. The laptop should have a working USB port, access to DJ software, and good built-in speakers. Alternatively, you can use external speakers by plugging the AUX cord into the headphone jack of your device.
- Install Software: Download and install the manufacturer's software for your specific controller model. This software will allow you to map the controller, route audio signals, and test its functionality.
- Connect Devices: Use the included USB cable to connect your DJ controller to your laptop. Typically, the USB Type-A end will go into your laptop, while the Type-B end will connect to your controller. If there is a mismatch between the USB ports and cable, you may need an adapter.
- Install Controller Drivers: Once the controller is plugged in, your computer should recognize it as a new device. Install the controller's drivers according to your operating system. You can usually find these instructions in the manual or on the manufacturer's website.
- Configure Software: Launch your DJ software and access the settings or preferences area. Look for options like "Controller Manager," "External Devices," or "Audio Setup" to designate how the application maps to your connected controller. If your controller has onboard audio connectivity, you may need to route the internal software audio through it.
- Check Audio Settings: Ensure that the sound output from your DJ software is directed to your computer's stock audio interface or built-in speakers. This will allow you to play songs over your computer's speakers.
- Test and Optimize: With everything set up, test the functionality of your DJ controller by playing a track. Adjust any settings as needed for seamless control and audio playback.
By following these steps, you should now be able to amplify your DJ controller through your laptop or computer's built-in speakers. However, keep in mind that these speakers may not provide the full dynamic sound required for proper DJing. Investing in a set of studio monitors is recommended for a more professional setup.
Accessing the Boot Drive: ASUS Monitor Guide
You may want to see also

Understanding audio interface options
Audio interfaces are a vital part of any home recording studio setup. They bridge the gap between the analog and digital audio worlds, enabling seamless connectivity between your studio monitors and computer. While it is possible to connect studio monitors directly to your computer, an interface offers superior audio fidelity, lower latency, and expanded connectivity options.
When selecting an audio interface, you will come across various interface connectivity options. Here are some of the most common types:
- USB: USB interfaces are widely used due to their affordability and decent latency. They are typically compatible with most computers and are ideal for beginners or those on a budget.
- Thunderbolt: Thunderbolt interfaces offer faster data transfer rates and lower latency than USB interfaces, making them suitable for professional environments and larger projects. However, they tend to be more expensive.
- PCIe: PCIe interfaces are designed for high-end setups requiring ultra-low latency and maximum throughput. They are often used in professional studios or for high-performance audio applications.
In addition to connectivity options, there are several other factors to consider when choosing an audio interface:
- Physical inputs and outputs: Evaluate the number of physical inputs and outputs you will need, including balanced outputs for your monitors and any additional gear you plan to use.
- Interface compatibility: Not all interfaces are compatible with all monitor types, so be sure to check the specifications before purchasing.
- Practical features: Look for features such as headphone outputs and volume controls, which can be useful for precise monitoring and controlling your audio environment.
- Future expansion: Consider the possibility of future expansion and select an interface with room for growth, such as additional inputs or advanced features.
For beginners, entry-level audio interfaces like the Behringer U-Phoria UM2, Focusrite Scarlett 2i2, and PreSonus AudioBox USB96 offer a balance of affordability and functionality. These interfaces provide essential features such as 1-2 inputs, headphone outputs, and speaker controls, making them a great choice for those starting in audio production.
Desktops and Monitors: What Cables Are Included?
You may want to see also

Identifying cables and connections
Identifying the correct cables and connections is a crucial step in setting up your studio monitors and audio interface system. Here's a detailed guide to help you with this process:
- Step 1: Interface Outputs—Start by identifying the type of outputs available on your audio interface. Typically, these outputs are located around the back of the unit. Common output types include 6.35mm TRS jack sockets, which may be labelled as 'Main', 'Line', 'Monitor', or 'Outputs L R' (for left and right outputs).
- Step 2: XLR Outputs—Some more advanced or expensive interfaces may also feature XLR outputs. These are often found on larger models designed to double as mixers with multiple channel recording capabilities. While less common, XLR outputs offer a rugged and stable connection.
- Step 3: Monitor Inputs—With your interface outputs identified, it's now time to turn to your studio monitors. Check the inputs on the back of your monitors, ensuring the power is off and the volume is turned down. Common monitor inputs include TRS jack or XLR, but some monitors may offer both options.
- Step 4: Connecting Interfaces and Monitors—Now, you'll need to connect the outputs of your audio interface to the corresponding inputs on your studio monitors. If your interface has TRS jack outputs, you'll need two balanced TRS cables, each featuring two rings that mark the tip, ring, and sleeve areas. Connect one end of the cable to your interface and the other to your monitor inputs.
- Step 5: Handling XLR Inputs—If your studio monitors feature XLR inputs instead of TRS, don't worry. Simply use a balanced TRS-to-male XLR cable, which has one connector of each type on each end. This will allow you to connect your monitors and interface seamlessly.
- Step 6: Balanced vs. Unbalanced Outputs—Most audio interfaces feature 'balanced' outputs, but some rarer models have 'unbalanced' outputs. If you have an interface with unbalanced outputs, you'll need to use phono connectors and ensure your speakers have additional unbalanced RCA phono inputs.
- Step 7: Power and Volume—Once your connections are made, power up your studio monitors and slowly raise the volume. Start with the output level of your interface at zero to avoid unexpected pops and crackles, gradually increasing it as you adjust your speaker volume.
By carefully identifying your cables and connections, you can ensure your studio monitors and audio interface work harmoniously together.
LCD Monitors: Handling Both NTSC and PAL Signals
You may want to see also

Setting up studio monitors
Step 1: Connect the Interface to Your Computer
Use the supplied cable to connect your audio interface to your computer's USB or Thunderbolt port. Open your DAW (Digital Audio Workstation) and ensure that you select your interface under the audio preferences menu. This allows you to play music through the interface.
Step 2: Turn Down the Volume
Before proceeding, set the output volume of your audio interface and studio monitors to zero or a minimum level. This step helps prevent unexpected pops, crackles, or overly loud music from reaching your speakers.
Step 3: Identify Your Cables
Check the outputs on your interface, typically found around the back. These could be 6.35mm TRS jack sockets labelled as 'Main', 'Line', 'Monitor', or 'Outputs L R' for left and right outputs. Some more expensive or larger interfaces might also have XLR outputs.
Step 4: Check Your Monitor Inputs
As the audio interface transmits audio from your computer to your speakers, identify the inputs on your studio monitors, usually located at the back. These inputs could be TRS jack, XLR, or both.
Step 5: Connect the Interface Outputs to Your Speaker Inputs
Now, it's time to connect the left and right interface outputs to the corresponding left and right speaker inputs using the appropriate cables. If your interface has ''balanced' outputs, you will need two balanced TRS cables. These cables have two rings, marking the tip, ring, and sleeve areas. Alternatively, if your monitors have XLR inputs, use a balanced TRS to male XLR cable.
Step 6: Adjust Speaker Positioning
Once your interface and monitors are connected, power up the speakers and gradually increase the volume. Ensure that the tweeter (high-frequency) driver is level with your head. Position yourself at the front point of an equilateral triangle, with the speakers at the other two points. This ensures an equal distance from each speaker for a balanced mix. Additionally, place the monitors at least 30 cm away from walls and corners to minimise their impact on the EQ response of your speakers.
LED vs LCD Monitors: Which Option Saves You Money?
You may want to see also
Frequently asked questions
First, connect your interface to your computer using a USB or Thunderbolt cable. Open your DAW (Digital Audio Workstation) and select your interface under the audio preferences menu. Next, turn down the volume on both your interface and your studio monitors. Identify which cables you need by checking the type of outputs your interface has, which will usually be found around the back of the unit. These will typically be 6.35mm TRS jack sockets marked 'Main', 'Line', 'Monitor' or 'Outputs L R'. Now, connect the correct interface outputs with your speaker inputs.
You will need a 3.5mm jack to 2x XLR male cable. Cables are available in various lengths. If the cable isn’t long enough, you can easily extend it using a regular microphone cable. You will need two, one for each speaker.
You can amplify your DJ controller through the built-in speakers in your laptop or computer. To do this, adjust the settings in your DJ software to direct the Master Output to your computer’s on-board sound card. Bear in mind that these types of speakers are not capable of providing the full, dynamic sound you need to DJ properly.


