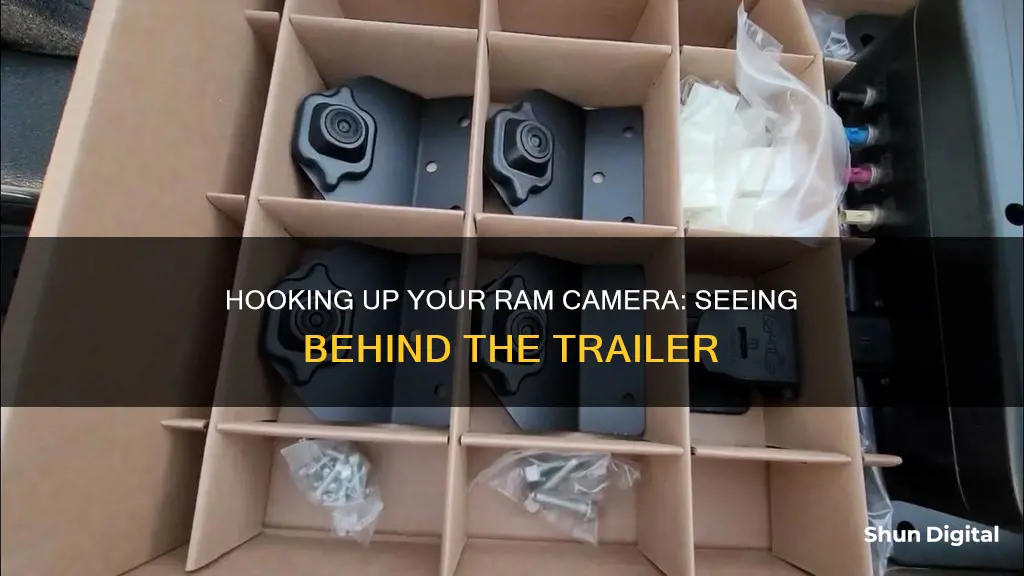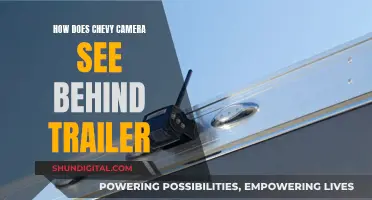
Hooking up a RAM camera to see behind a trailer is a simple process that can greatly improve safety and visibility while towing. To do this, you will need to purchase a compatible RAM camera kit and install the camera on the back of your trailer, ensuring it is securely mounted and angled correctly. The camera's wiring will need to be run from the back of the trailer to the front of the vehicle and connected to the vehicle's wiring harness. The camera monitor can then be installed in a convenient location, such as on the dashboard or rearview mirror, allowing you to see behind your trailer while driving.
What You'll Learn

Choosing the right camera
When choosing a camera to hook up to your RAM truck to see behind your trailer, there are several factors to consider. Firstly, it is important to select a camera that is compatible with your specific RAM truck model and trailer setup. Different trucks and trailers may have varying requirements in terms of camera type, mounting options, and wiring.
The camera you choose should provide a clear view of the area behind your trailer. Consider the camera's resolution, field of view, and low-light performance to ensure you get a detailed and well-lit image. Additionally, you may want to opt for a camera with infrared night vision or a wide-angle lens to enhance your visibility in various lighting conditions.
Another important consideration is the mounting location of the camera. Popular mounting options include license plate mount, bumper mount, roof mount, and hitch mount. Each option offers a different perspective and field of view, so choose the one that best suits your trailer and towing needs. For instance, a roof-mounted camera provides a bird's-eye view, while a hitch-mounted camera offers a clear view directly behind the trailer.
You also have the choice between a wired or wireless camera connection. A wired connection typically involves running cables from the camera to the monitor or display inside your vehicle. This ensures a reliable video signal but may require more intricate installation. On the other hand, a wireless camera system offers convenience and flexibility by eliminating the need for running cables through the trailer. Many wireless camera systems also provide a mobile app that allows you to view the camera feed on your smartphone or tablet.
Finally, consider the ease of installation. Some cameras may require drilling and complex wiring, while others may utilize existing holes and connections in your vehicle. If you prefer a simpler installation process, look for cameras that are plug-and-play or those that require minimal modifications to your vehicle.
Weird Camera Angles: TV Shows to Watch Out For
You may want to see also

Mounting the camera
To mount the camera, you will need to select the best location for your RAM camera. The camera should be installed in a position that provides a clear view of the area behind your trailer. Common mounting options include a license plate mount, bumper mount, roof mount, or hitch mount. Once you have chosen the mounting location, you will need to install the camera by drilling a hole in the mounting surface and securing the camera with screws. Ensure that the camera is securely mounted and angled correctly.
Next, you will need to connect the camera to your vehicle's electrical system. This typically involves running wires from the camera to the vehicle's battery or fuse box. Consult a professional installer or your vehicle's owner's manual to ensure that you are connecting the camera to the correct power source and following the proper wiring procedures.
After the camera is connected to the power source, you will need to run the camera's wiring from the back of the trailer to the front of the vehicle. Secure the wiring along the way to prevent any damage or interference. Finally, connect the camera's wiring to the vehicle's wiring harness by following the manufacturer's instructions.
It is important to note that the process may vary depending on the specific camera and vehicle model. Always refer to the manufacturer's instructions and seek professional assistance if needed.
Business Surveillance: Watching My Cameras from Home
You may want to see also

Connecting the camera to the monitor
To connect the camera to the monitor, you will need to establish a wired or wireless connection. If you opt for a wired connection, you will need to run a cable from the camera to the monitor. This typically involves drilling a hole in the mounting surface and securing the camera with screws. You can then connect the camera to the monitor using a cable such as an RG58 Fakra Z Female to Fakra Z Female Coaxial RF Cable.
Alternatively, you can opt for a wireless connection, which eliminates the need for running cables. Wireless camera systems often come with a mobile app that allows you to view the camera feed on your smartphone or tablet.
Once the camera is connected to the monitor, you will need to install the monitor in your vehicle. The monitor should be mounted in a location that is easy to see while driving, such as on the dashboard or rearview mirror.
After installation, it is important to test the camera to ensure it is working properly. This can be done by backing up your vehicle and checking the monitor to see if you have a clear view of the area behind the trailer.
Additionally, you may need to adjust the camera angle for an optimal view. This can be done by adjusting the camera's tilt and pan settings to ensure a clear view of the area behind the trailer.
Watching USB Cameras: A Beginner's Guide to Live Viewing
You may want to see also

Installing the monitor
To install the monitor for your RAM camera, you will first need to purchase a RAM camera kit that is compatible with your vehicle and trailer. This kit will typically include a camera, a monitor, and the necessary wiring and connectors.
Once you have the kit, you can proceed with the installation. Start by identifying the correct location for the monitor. The monitor should be installed in a location that is easy to see while driving, such as on the dashboard or rearview mirror. Make sure it is positioned in a way that does not obstruct your view of the road.
The next step is to connect the camera to the monitor. This can be done using a cable or wirelessly, depending on the type of camera and monitor you have chosen. If using a cable, connect one end to the camera and the other end to the monitor, following the instructions provided by the manufacturer. If you are using a wireless setup, pair the camera and monitor according to the manufacturer's instructions.
After the camera and monitor are connected, you will need to power the system. This can be done by connecting the camera to the vehicle's power source, typically by tapping into the trailer's wiring or running a separate power cable from the vehicle's battery. Ensure that the camera is properly grounded to prevent interference and ensure a clear signal.
Once the camera and monitor are powered, test the system to ensure it is functioning properly. Turn on the camera and monitor, and adjust the camera angle to get a clear view of the area behind the trailer. You may need to adjust the tilt and pan settings to get the optimal view. Test the system by backing up your trailer and checking the monitor to ensure you have a clear view.
Finally, once you are satisfied with the camera angle and the system is functioning properly, secure all the wiring and connectors to ensure they are safely out of the way. Make sure that all connections are tight and secure to prevent any issues while driving.
Apple Watch Series 4: Camera-Equipped Timepiece?
You may want to see also

Testing the camera
Initial Checks:
Before testing the camera, it's important to verify that you have completed the installation process correctly. Go through the following checklist to ensure that you haven't missed any important steps:
- Confirm that you have chosen a RAM camera kit that is compatible with your vehicle and trailer.
- Ensure that the camera is securely mounted on the back of your trailer and angled correctly to capture the desired field of view.
- Check that the camera's wiring is properly connected and secured from the back of the trailer to the front of the vehicle.
- Verify that the camera's wiring is correctly connected to the vehicle's wiring harness, following the manufacturer's instructions.
- Make sure that the camera monitor is installed in a convenient location, such as on the dashboard or rearview mirror, and is easily visible to the driver.
Once the initial checks are complete, it's time to test the camera feed:
- Turn on the camera and monitor.
- Start your vehicle and put it in reverse.
- Observe the monitor to see if you're getting a clear and unobstructed view of the area behind the trailer.
- Check the camera's field of view and ensure that it covers the necessary areas for safe maneuvering and parking. Look for any blind spots or obstructions in the camera's view.
- If your camera has additional features, such as night vision or motion detection, test them to ensure they are functioning correctly.
- Pay attention to the video quality and ensure that the image is clear and free of interference or distortion.
- Test the camera's performance in different lighting conditions, such as bright sunlight, low light, or at night, to ensure it provides a clear view at all times.
Testing Camera Functions:
Depending on your camera model, it may have additional functions that you should test:
- If your camera has a zoom function, test it to ensure that the zoom feature works smoothly and provides a clear view at different zoom levels.
- Test any built-in camera angle adjustment mechanisms to ensure that you can adjust the camera's tilt and pan settings for optimal viewing.
- If your camera has a built-in microphone, test the audio quality to ensure that it captures clear sound from behind the trailer.
- If your camera has motion detection or alert features, simulate scenarios to trigger these functions and ensure that they work as expected.
Troubleshooting:
If you encounter any issues during testing, here are some troubleshooting steps you can take:
- Check all connections again to ensure that the wiring is secure and correctly connected.
- Refer to the camera's user manual or seek support from the manufacturer if you encounter any specific issues or error messages.
- If the camera is not powering on, verify the power source and connections. Check the fuse or try replacing the camera's power cable.
- If the camera feed is distorted or unclear, check for any damage to the camera lens or cable. Ensure that the camera is properly grounded to prevent interference.
Remember, testing the camera is an important step to ensure your safety and confidence when towing a trailer. Take your time during the testing process and don't hesitate to seek professional assistance if you encounter any issues that you cannot resolve on your own.
Reality TV: Unveiling the Truth Behind the Cameras
You may want to see also
Frequently asked questions
Purchase a RAM camera kit that is compatible with your vehicle and trailer. Install the camera on the back of your trailer, making sure it is securely mounted and angled correctly. Run the camera's wiring from the back of the trailer to the front of the vehicle, making sure to secure it along the way. Connect the camera's wiring to the vehicle's wiring harness, following the manufacturer's instructions. Install the camera monitor in a convenient location in the vehicle, such as on the dashboard or rearview mirror. Turn on the camera and monitor to ensure that the setup is working properly.
A RAM camera provides a safer and more convenient way to see behind your trailer while driving or maneuvering. It can make parking and driving easier by improving visibility and reducing blind spots.
It is important to choose a camera that is compatible with your specific RAM truck model. Consider the mounting location and ensure that it provides a clear view of the area behind your trailer. Some popular mounting options include license plate mount, bumper mount, roof mount, and hitch mount.
RAM cameras can be connected to the monitor either through a wired or wireless connection. The wired connection typically involves running a cable from the camera to the monitor, while the wireless connection eliminates the need for cables and makes the installation process easier.
Once you have installed the camera and monitor, test the setup by backing up your truck and checking the monitor to see if you have a clear view behind your trailer. Adjust the camera angle as needed to ensure optimal visibility.


