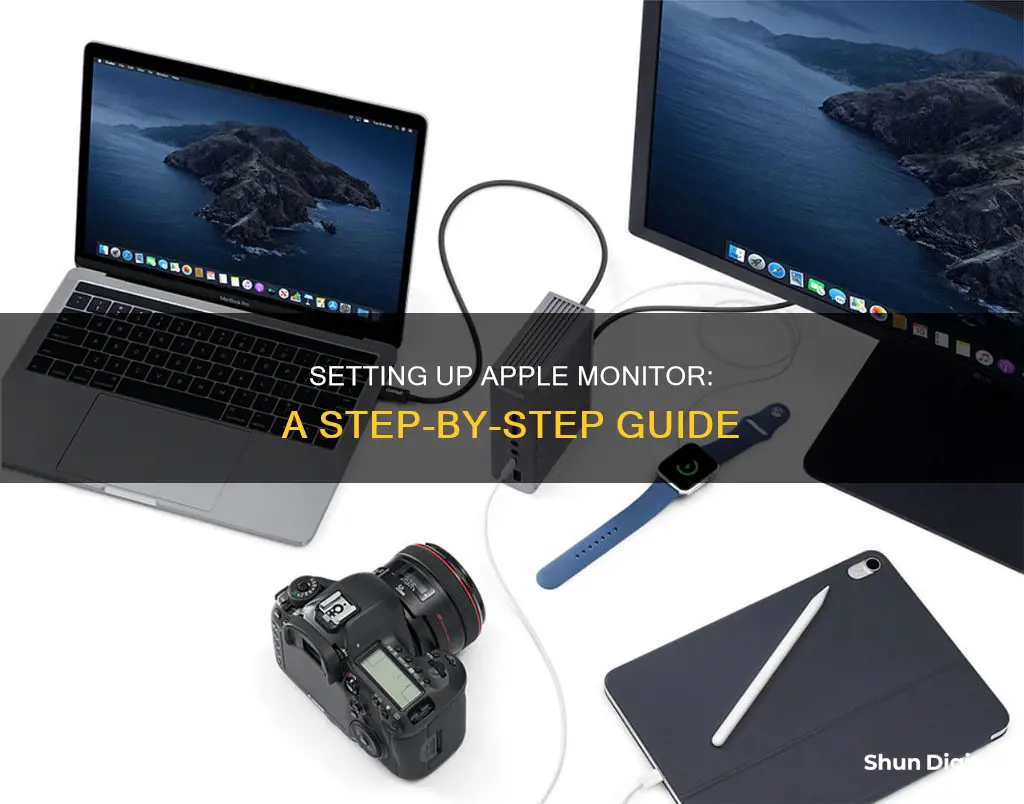
Setting up an Apple monitor can be a tricky process, especially with older models. Apple computers support one or more external displays, depending on the model of your Mac. To connect your Apple monitor to your Mac, you'll need to use the display's power cable and video cable, connecting it to your Mac through a Thunderbolt or HDMI port. If your monitor has a Mini DisplayPort plug, you may need a Mini DisplayPort-to-HDMI adapter. If your monitor has a Thunderbolt 2 port, you'll need a Thunderbolt 3-to-Thunderbolt 2 adapter.
What You'll Learn

Connecting an Apple monitor to a Mac
To connect an Apple monitor to a Mac, you'll need to identify the ports on both devices. The Apple monitor's cable might have a single connector, or it could split into three cables: DVI, FireWire, and USB.
The Mac computer will have one or more of the following ports: Thunderbolt 4, Thunderbolt 3, USB-C, Thunderbolt, Thunderbolt 2, Mini DisplayPort, HDMI, VGA, or DVI.
If the monitor's cable is compatible with the Mac's port, simply plug it in. If not, you may need an adapter. For example:
- If your Mac has a Thunderbolt 3 or 4 port, and your monitor uses a Thunderbolt or Thunderbolt 2 cable, you'll need a Thunderbolt 3 to Thunderbolt 2 adapter.
- If your Mac has a USB-C port, and your monitor uses a Mini DisplayPort cable, you'll need a USB-C to Mini DisplayPort adapter.
- If your Mac has an HDMI port, you can connect your monitor using an HDMI cable with a USB-C adapter.
- If your monitor uses a VGA cable, you'll need a USB-C to VGA adapter.
- If your monitor uses a DVI cable, you'll need a USB-C to DVI adapter.
Once you've connected the monitor to your Mac, you should be able to configure the display settings. Go to System Settings or System Preferences, then click Displays. From there, you can change the display resolution, choose a refresh rate, and arrange your displays.
Hooking Up 3 Monitors to a KVM: A Step-by-Step Guide
You may want to see also

Using an adapter to connect a monitor
To connect an Apple monitor to a PC, you will need to ensure that the PC has the correct connection type. Apple monitors use three connection types: VGA, DisplayPort, and Thunderbolt. The type of connection will depend on the age of your monitor. Older Apple monitors use VGA, while newer models use Thunderbolt.
If your monitor uses a different connection type than your PC, you may be able to use an adapter to connect the two. Here are some examples of adapters you can use:
- VGA to HDMI or DVI adapter: If your PC has HDMI or DVI ports, you can use a VGA to HDMI or DVI adapter to connect to an older Apple monitor that supports VGA.
- DisplayPort adapter: Apple monitors that use the DisplayPort connection are fully compatible with PCs. PCs that have built-in DisplayPort connections can use Apple's DisplayPort monitors without an adapter. However, if your PC has a different connection type, you can use a DisplayPort to HDMI, DVI, or VGA adapter.
- Thunderbolt adapter: Thunderbolt monitor support varies from computer to computer. PCs equipped with Thunderbolt ports on their motherboards can use Apple's Thunderbolt-supported monitors. Thunderbolt technology can be used to daisy-chain multiple external devices, not just monitors. Non-Thunderbolt-equipped PCs cannot use an adapter to convert an outgoing VGA, DVI, or HDMI signal into the Thunderbolt standard. However, a Thunderbolt display can connect to a PC that features PCI Express expansion ports.
- Thunderbolt 3 adapter: The latest version of Thunderbolt at the time of writing, Thunderbolt 3, uses a USB-C style connector. You will need an adapter to use a Thunderbolt 3 monitor with an earlier Thunderbolt PC. You can also find Thunderbolt 3 adapters for DisplayPort, DVI, HDMI, and VGA.
- DVI adapter: DVI-supporting PCs require extra attention when purchasing adapters and cables to connect to Apple VGA and DisplayPort monitors. There are five different styles of DVI connections, so ensure you get the right adapter for your specific DVI connection.
- USB-C to HDMI adapter: This type of adapter is suitable for connecting a MacBook Pro or MacBook Air to an external display.
- USB-C to VGA adapter: This adapter allows you to connect a MacBook Pro or MacBook Air to a VGA display or projector.
- Lightning to VGA or HDMI adapter: This adapter is suitable for connecting an iPad with a Lightning connector to a display, TV, or projector.
Monitoring App Usage: Regulating Screen Time and Freedom
You may want to see also

Connecting a monitor to a Thunderbolt port
- Connect your display to a power source using the power cable.
- Identify the correct port on your Mac (Thunderbolt ports may look similar to other ports).
- Use a compatible video cable to connect your display to the Thunderbolt port on your Mac. If your display uses a DisplayPort cable, you can connect it directly to the Thunderbolt port as they are backwards compatible.
- If your video cable requires a different port, you may need an adapter. For example, if your display uses a Mini DisplayPort cable, you will need a USB-C to Mini DisplayPort cable.
- Once properly connected, your Mac should automatically detect the display.
- You can then configure your display settings, such as resolution and refresh rate, by going to System Settings or System Preferences and clicking on Displays.
It is important to note that if your Mac only has one port, it does not support Thunderbolt connections. Additionally, Thunderbolt and Thunderbolt 2 are not the same as Mini DisplayPort, so be sure to check the symbols on the cable and port.
Connecting Toughbook to a Monitor: A Comprehensive Guide
You may want to see also

Connecting a monitor to a USB-C port
If your device has a USB-C port, you can connect it to a monitor with a USB-C cable. If your device has a Mini DisplayPort, you will need a USB-C to Mini DisplayPort cable. If your device has an HDMI port, you will need a USB-C to HDMI adapter or cable. For a DisplayPort connection, you will need a USB-C to DisplayPort adapter or cable. A VGA connection will require a USB-C to VGA adapter, and a DVI connection will need a USB-C to DVI adapter or cable.
Adapters and adapter cables are available to connect DisplayPort over USB-C to DisplayPort, HDMI, DVI, and VGA monitor inputs. However, USB-C/DP cables are directional, so you will need to ensure you have the correct cable for your setup. Bidirectional cables are available, but they tend to be more expensive.
If you are using a USB-C or Thunderbolt adapter to connect a display, the adapter must be compliant with DisplayPort Alt Mode, Thunderbolt 3, or Thunderbolt 4.
Customizing Your Monitor: Shrinking Sidebar Size
You may want to see also

Connecting a monitor to an HDMI port
First, identify the ports on your laptop or computer. Laptops typically have HDMI or Mini DisplayPort outputs, while desktops may offer a wider range of options. If your device doesn't have an HDMI port, you may need to purchase an adapter. For Apple devices, this could be a Thunderbolt 3 or 4 adapter, which uses a USB-C connector to enable connections to HDMI ports.
Once you've identified the ports, you'll need to gather the necessary cables. If your computer and monitor support HDMI, you'll simply need an HDMI cable. If your computer has only one HDMI port and you intend to connect multiple monitors, you may require an HDMI splitter or an adapter, such as VGA to HDMI, DVI to HDMI, or USB-to-HDMI. Ensure that any adapters or splitters are compatible with your specific port configurations.
Now, it's time to physically connect the monitor. Take the HDMI cable and connect one end to the HDMI port on your computer, and the other end to the corresponding port on the monitor. If you're using an adapter or splitter, connect your computer to the adapter or splitter first, and then connect the monitor to the available ports on the adapter or splitter.
After the monitor is physically connected, you'll need to configure its settings. On Windows, right-click on your desktop and choose Display Settings. From here, you can adjust the display resolution, orientation, and refresh rate. You can also choose between options like "Duplicate" (showing the same image on both screens) or "Extend" (using the monitors as one continuous desktop). For macOS, click on the Apple menu, select System Preferences, and then choose Displays. Here, you can adjust the display resolution, orientation, and arrangement.
Finally, turn on your computer and monitor. The monitor power button is often located on the middle or right side of the front or bottom edge of the monitor. If your monitor includes software, be sure to install it.
Scaling Virtual Machine Monitor Size: A Step-by-Step Guide
You may want to see also
Frequently asked questions
First, connect the display to a power source using the display's power cable. Then, use the display's video cable to connect it to your Mac. The cable should be connected to a Thunderbolt or HDMI port on your Mac. If your Mac does not have the correct port, you may need to purchase an adapter.
This depends on the type of cable you are using. If you are using a Thunderbolt 3 or 4 cable, no adapter is required. If you are using a USB-C cable, you will need a USB-C to USB-A adapter. For a Mini DisplayPort cable, you will need a USB-C to Mini DisplayPort cable.
Once your monitor is connected and has power, your Mac should automatically detect the display. You can then configure your display settings by going to System Settings or System Preferences and clicking on Displays. Here, you can change the display resolution, choose a refresh rate, and arrange your displays.
Yes. You can use AirPlay to stream your Mac to an iPad.
Yes, but it depends on the model of your MacBook Pro and the type of Apple monitor you have. For example, older Apple monitors may not be compatible with Thunderbolt 3 adapters. You may need to purchase a Mini DisplayPort adapter or a USB-C to Mini DisplayPort cable.


