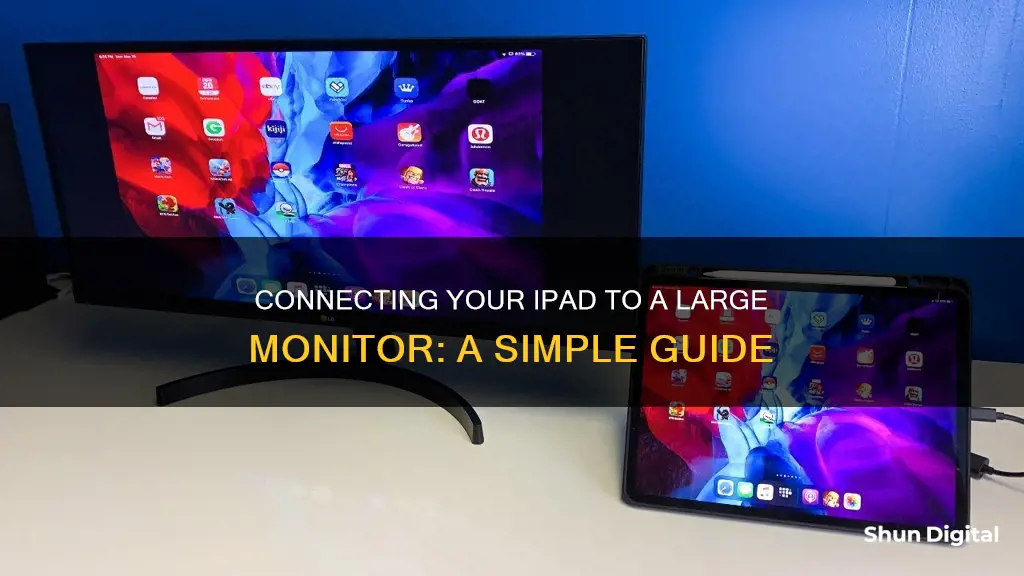
There are several ways to connect your iPad to a bigger display, such as a computer monitor or TV. You can use a cable connection or connect your iPad to a TV wirelessly by using AirPlay or third-party screen mirroring software.
If you want to use a cable connection, you will need to identify what kind of iPad you own and what kind of monitor you will be using. For example, if you own an M1-powered 11-inch or 12.9-inch iPad Pro, these make use of Thunderbolt 4. Meanwhile, the 2022 iPad Air uses USB-C. You will then need to identify which monitor you own and plan to use with the iPad. In most instances, all you will need is either an HDMI to USB-C cable, or you could use a dock or USB-C dongle.
If you want to connect your iPad to a TV, you can use AirPlay or Google Cast instead of Screen Mirroring or connecting an HDMI cable.
| Characteristics | Values |
|---|---|
| iPad models compatible with external monitor | iPad Air (5th generation and later), iPad Pro 11-inch (3rd generation and later), iPad Pro 12.9-inch (5th generation and later) |
| Connection type | Wired (Lightning, USB-C, Thunderbolt) or wireless (AirPlay or third-party screen mirroring software) |
| Wired connection requirements | Lightning Digital AV Adapter or Lightning to VGA adapter, HDMI or VGA cable |
| Wireless connection requirements | Same Wi-Fi network, AirPlay or third-party screen mirroring software |
| Wired connection downsides | Wired connection is less convenient, may result in resolution inconsistencies and softer images |
| Wireless connection downsides | May result in lag and frame skips for large video files |
| Audio | If the monitor has integrated or connected speakers, and you’re using USB-C, Thunderbolt, DisplayPort, or HDMI, audio routing is straightforward. Otherwise, open Control Center on your iPad, tap the AirPlay icon, then choose another output. |
What You'll Learn

Connect iPad to a display with a cable
You can connect your iPad to a bigger display, such as a computer monitor, to increase productivity and view content on a larger screen.
Connect your iPad using the USB-C connector
On models with a USB-C connector, you may be able to connect your iPad to a USB or Thunderbolt 3 port on the display. If the charge cable that came with your iPad isn’t compatible with the port on your display, TV, or projector, follow these steps:
- Plug a USB-C Display AV Adapter or USB-C VGA Multi-port Adapter into the charging port on your iPad.
- Connect an HDMI or VGA cable to the adapter.
- Connect the other end of the HDMI or VGA cable to the display, TV, or projector.
- If necessary, switch to the correct video source on the display, TV, or projector. If you need help, use the display’s manual.
- If the display doesn’t turn on when you connect it to your iPad, unplug it from your iPad, then plug it back in. If that doesn’t work, unplug the display from its power source, then plug it in again.
Connect your iPad if it has a Lightning connector
- Plug a Lightning Digital AV Adapter or Lightning to VGA Adapter into the charging port on your iPad.
- Connect an HDMI or VGA cable to the adapter.
- Connect the other end of the HDMI or VGA cable to the display, TV, or projector.
- If necessary, switch to the correct video source on the display, TV, or projector. If you need help, see the manual that came with your display.
- To charge your iPad while it’s connected to the display, insert one end of your charge cable into the extra port on the adapter, insert the other end of the charge cable into the power adapter, then plug the power adapter into a power outlet.
LCD Monitor Input Sensitivity: Amperage Impact
You may want to see also

Use iPad with a monitor
Using an iPad with a monitor is a great way to increase productivity and get a better view of your content. Here's a step-by-step guide on how to do it:
Step 1: Check Compatibility
First, make sure your iPad model supports external display connectivity. Most modern iPads equipped with USB-C or Lightning ports can be connected to external monitors.
Step 2: Identify the Ports
Check the ports on both your iPad and the monitor to determine the right connection method and adapters.
USB-C to USB-C:
If your iPad and monitor both have USB-C ports, you can connect them directly using a USB-C cable.
USB-C to HDMI/VGA:
If your monitor has an HDMI or VGA port, you'll need a USB-C to HDMI/VGA adapter.
Lightning to HDMI/VGA:
For older iPads with a Lightning port, you'll need a Lightning Digital AV Adapter or a Lightning to VGA Adapter.
Step 3: Connect the Devices
Plug the adapter into your iPad's charging port, and then connect the HDMI or VGA cable to the adapter. Finally, plug the other end of the HDMI/VGA cable into the monitor.
Step 4: Select the Correct Source
Switch to the correct video source on the monitor. You may need to refer to the monitor's manual to do this.
Step 5: Adjust Settings
On your iPad, go to Settings > Display & Brightness. Here, you can adjust various settings like Display Zoom, and if your monitor supports HDR content, you can switch between SDR and HDR.
Step 6: Use Stage Manager
With Stage Manager on iPadOS 16 and later, you can use your iPad apps on the external display. Open the iPad Control Center and ensure Stage Manager is enabled. Place your iPad in landscape orientation, and you're ready to open apps on the monitor.
Tips:
- Connect a mouse or trackpad to your iPad for easier navigation.
- You can use your Mac's keyboard, mouse, or trackpad wirelessly with your iPad.
- Use Stage Manager to resize and reposition app windows, create app sets, and move apps between the iPad and the monitor.
- For wireless connection, use AirPlay to mirror your iPad display to an Apple TV or a supported smart TV.
LCD Monitor Burn-In: Is It Still an Issue?
You may want to see also

Extend iPad screen to another display
The 'Stage Manager' feature in iPadOS 16 or later, such as iPadOS 17, allows you to connect your iPad to an external monitor. This feature goes beyond screen mirroring, enabling you to use your iPad apps on the external display as a secondary workspace.
To extend your iPad screen to another display, you will need to ensure compatibility and check the port on your iPad. Most modern iPads equipped with USB-C or Lightning ports can be connected to external monitors.
Step 1: Ensure Compatibility
First, verify if your iPad model supports external display connectivity. Here are the iPad models that support external monitor connections:
- IPad Air (5th generation and later)
- IPad Pro 11-inch (3rd generation and later)
- IPad Pro 12.9-inch (5th generation and later)
Step 2: Check the port on your iPad
When connecting your iPad to an external monitor, consider the following options based on your monitor’s compatibility:
#### For USB-C Monitors:
If your monitor has a USB-C port, you can connect it directly to your iPad without any additional adapters. Use a C-to-C cable, which usually comes included with the monitor, to connect them.
#### For Non-USB-C Monitors:
If your monitor doesn't have a USB-C port but has an HDMI or VGA port, you'll need a specific adapter:
- USB-C iPad Models: Use a USB-C to HDMI adapter for a seamless connection.
- Lightning Connector iPad Models: Opt for either a Lightning Digital AV Adapter or a Lightning to VGA Adapter to establish connectivity.
Step 3: Connect your iPad to the monitor
Now, you can connect your iPad to the monitor by following these steps:
- USB-C iPad Models: Plug a USB-C Display AV Adapter or USB-C VGA Multi-port Adapter into the charging port on your iPad.
- Lightning Connector iPad Models: Plug a Lightning Digital AV Adapter or Lightning to VGA Adapter into the charging port on your iPad.
- Connect an HDMI or VGA cable to the adapter.
- Connect the other end of the HDMI or VGA cable to the display.
- If necessary, switch to the correct video source on the display. If you need help, refer to the display's manual.
Step 4: Configure iPad Display Options
You can either mirror your iPad screen on the monitor or extend it for a dual-screen workspace:
- To extend the display, go to Settings > Display & Brightness > External Displays and configure your preferred setup.
- To mirror your display, navigate to Settings > Display & Brightness > Screen Mirroring and select your monitor.
Now, you're all set to enjoy your expanded workspace! With this setup, you can easily drag and move applications, windows, and content between your iPad and the external monitor.
Finding Volume Controls on Your ASUS Monitor
You may want to see also

Connect iPad to a monitor wirelessly
There are several ways to connect your iPad to a monitor, TV, or computer screen. If you want to do this wirelessly, you can use Apple's AirPlay, a third-party screen mirroring software, or a DLNA app.
Using AirPlay
AirPlay is the easiest way to connect your iPad to a monitor wirelessly. It comes built into your iPad's operating system and allows you to mirror or cast content from your iPad to an AirPlay-compatible smart TV, Apple TV, or certain Roku devices.
To use AirPlay, make sure your streaming device or smart TV is connected to the same Wi-Fi network as your iPad. Open the Control Center on your iPad, tap AirPlay Mirroring, then select the appropriate destination. Whatever is on your iPad's screen will be mirrored onto the monitor or TV screen.
You can also send individual pictures and videos to the television by selecting the Share icon inside the Photos app and tapping AirPlay from the pop-up menu.
Third-Party Screen Mirroring Software
If you don't have a smart TV with AirPlay support, you can use third-party screen mirroring software. For example, you can download Reflector 4, which turns a computer (Mac or PC) into an AirPlay receiver and works wirelessly over Wi-Fi.
Using a DLNA App
If you have an internet-enabled TV, it probably supports DLNA, a generic form of media streaming. You can check the DLNA database to make sure your television is compatible. With a DLNA app like VLC media player or Castify on your iPad, you can share media files and stream them to a smart TV.
Double Monitor Wallpaper: What Size Do You Need?
You may want to see also

Connect iPad to a monitor with sound
Connecting your iPad to a monitor with sound is a straightforward process, but the exact steps depend on the model of your iPad and the type of connector on the monitor. Here is a detailed guide on how to do it:
Step 1: Identify the Connector Type on Your iPad:
Firstly, you need to determine whether your iPad has a Lightning connector or a USB-C connector. Older iPad models typically have a Lightning connector, while newer models are equipped with a USB-C connector.
Step 2: Choose the Appropriate Adapter:
Based on the connector type on your iPad and the input options on your monitor, select the appropriate adapter:
- For Lightning Connector: If your iPad has a Lightning connector, you will need to use either the Lightning Digital AV Adapter or the Lightning to VGA Adapter. The choice depends on whether your monitor supports HDMI or only VGA.
- For USB-C Connector: If your iPad has a USB-C connector, you can use the USB-C Display AV Adapter or the USB-C VGA Multi-port Adapter. Again, this depends on whether your monitor supports HDMI or only VGA.
Step 3: Connect the Adapter to Your iPad:
Once you have the correct adapter, plug it into the charging port on your iPad.
Step 4: Connect the HDMI or VGA Cable:
Now, take an HDMI or VGA cable and connect it to the adapter. Ensure that you use the cable that matches the input option on your monitor.
Step 5: Connect the Cable to the Monitor:
Connect the other end of the HDMI or VGA cable to your monitor. Plug it into the corresponding port on the monitor.
Step 6: Switch to the Correct Video Source:
On your monitor, switch to the correct video source. Usually, you can do this by pressing the "Source" or "Input" button on your monitor or TV remote control. Select the input that matches the port you connected the cable to (HDMI or VGA).
Step 7: Power On the Monitor:
If the monitor doesn't turn on automatically, try unplugging and replugging the cable and power source, then power it on again.
Step 8: Enable Sound Output:
If the monitor has integrated or connected speakers, and you're using USB-C, Thunderbolt, DisplayPort, or HDMI, the audio routing should happen automatically. However, if you want to use different speakers, open the Control Center on your iPad, tap the AirPlay icon, and choose your desired output, such as Bluetooth or AirPlay. Note that you'll need to do this each time you connect to the monitor.
Additionally, if you wish to charge your iPad while it's connected to the monitor, simply connect a charging cable to the adapter.
Now you should be all set! Enjoy the expanded display and sound experience on your iPad.
Immersive Viewing: Optimal Size for 1800R Monitors
You may want to see also
Frequently asked questions
This depends on the type of iPad and monitor you have. If your iPad has a USB-C port, you can use a USB-C to HDMI or VGA cable. If your iPad has a Lightning port, you will need a Lightning Digital AV Adapter or a Lightning to VGA Adapter.
Yes, you can use AirPlay to mirror your iPad screen to a monitor or TV wirelessly. However, your monitor must support AirPlay or you will need an AirPlay video receiver.
Yes, if you are using a wired connection, you can use a multiport hub or dock that supports pass-through charging to charge your iPad while it is connected.
No, the touch functionality does not extend to the external monitor. You will need to use an iPad-compatible mouse or trackpad for navigation.


