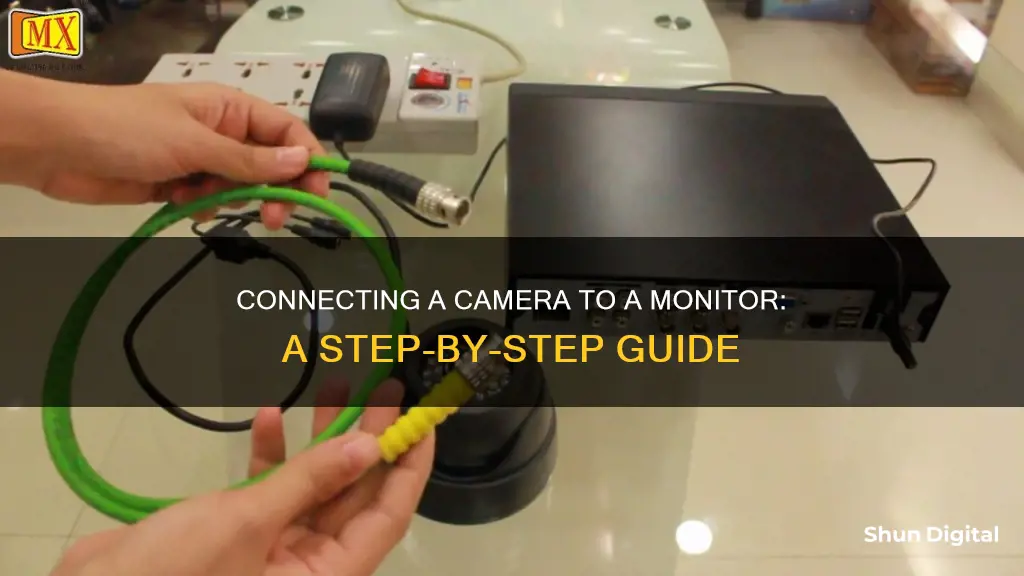
Connecting a camera to a monitor is a convenient way to view live security footage or to see yourself when filming. This setup is achievable with the correct cables, video inputs, and software. A wired connection via HDMI or VGA cables is the most direct method, allowing for smooth transmission of feeds to a monitor. For wireless connections, options like the DeX app, OBS, and vdo.ninja can be used to stream footage from a camera to a laptop.
What You'll Learn

Connecting a security camera to a computer monitor
In recent years, Closed-Circuit Television (CCTV) security camera systems have become more affordable and accessible for home use. One convenient way to view your home security footage is by connecting the camera system to a computer monitor. This allows you to monitor the camera feeds in real-time without having to install a dedicated security monitor.
Step 1: Connect cameras to DVR/NVR
The first step is to connect the security cameras to the DVR/NVR base station. The rear of the DVR/NVR will have multiple BNC or RCA inputs that the cameras plug into. Refer to the instruction manual to identify the channel inputs.
For wired security cameras, run a video cable such as coaxial or CAT5e from the camera location back to the DVR/NVR. Connect the cables to the corresponding channel input.
For wireless cameras, power them on and pair them to the DVR/NVR according to the provided instructions. The system will detect their wireless signal.
Step 2: Connect DVR/NVR to Computer Monitor
Next, connect the base station DVR/NVR to the computer monitor where you want to view the camera feeds.
The two main methods for connecting the two components are HDMI and VGA cables. HDMI is the best option if available on both devices as it can transmit HD video and audio signals. If HDMI is not available, VGA can be used to transmit a video signal only.
Step 3: Install Viewing Software
To view and control the DVR/NVR system on your computer, you will need to install the manufacturer-provided software. This usually consists of simple video management software that is included with the system or downloaded from the company website.
Common steps include:
- Install the software on the computer that is connected to the monitor displaying the cameras.
- Open the software and select “Add Device”. Input the DVR/NVR IP address and credentials.
- The software will now connect to the system and show the connected cameras.
Step 4: Configure Display View
Once everything is connected and the software is operational, you can configure the display view on the monitor based on your preference.
Typical options include:
- Cycle through full-screen views of individual cameras
- 2x2 quad view showing 4 cameras
- 3x3 grid with 9 cameras
- 4 or more cameras displayed at once
- Single camera continuously displayed full screen
Troubleshooting
If you are having trouble getting the camera feeds to transmit properly to your connected computer monitor, here are some things to check:
- Make sure all video cables are securely connected at both ends.
- Try different video cables in case the cable itself is faulty.
- Verify the monitor input source is set correctly (HDMI, VGA, etc).
- Check the video output settings on the DVR/NVR if the image looks distorted.
- Reinstall the viewing software and confirm the IP address is entered properly.
- Power cycle the DVR/NVR and monitors if the feeds are frozen.
- Adjust camera channel assignments if feeds are displaying on the wrong channel.
- Update DVR/NVR and camera firmware if connectivity is inconsistent.
- Contact the manufacturer if issues persist for further troubleshooting.
Monitoring Electricity Usage: A Guide to Tracking Your Power Consumption
You may want to see also

Using an HDMI cable
First, ensure that your camera and monitor are compatible with HDMI cables. Check that your camera has an HDMI output port and your monitor has an HDMI input port. Most computers have an HDMI port, but if yours does not, you can use an adapter, such as a display port to HDMI adapter or a mini display port to HDMI adapter.
Next, connect one end of the HDMI cable to the HDMI output on your monitor and the other end to an available port on your camera. If your camera does not have screws, clamps, or another way to tighten the connection, you can use tape or rubber bands to secure the cable.
Now, turn on your camera and access the menu settings. Look for the "Playback" or "Camera Tabs" and scroll down to "HDMI Output Resolution." Here, you can select your preferred resolution. Common options include 720p50/60, 1080i50/60, and 480p60/1080p24. Choosing the right resolution will ensure that your images are clear and sharp on the monitor.
After setting the resolution, press the "Menu" button to save and exit. If you don't see the option to adjust the resolution, your camera's firmware may need an update.
That's it! You should now be able to view your camera footage on the monitor. This setup is excellent for viewing photos, watching videos, or even live-streaming from your camera.
Unlocking LCD Monitor Cases: A Step-by-Step Guide
You may want to see also

Using a VGA cable
Firstly, you will need to ensure you have the correct type of camera and monitor. The camera can be a wired or wireless surveillance camera, and the monitor should be a computer monitor with a VGA input. Once you have confirmed that your camera and monitor are compatible, you can proceed to the next step.
If you are using a wired camera, connect it to the monitor by plugging one end of the VGA cable into the VGA output port on the camera and the other end into the VGA input port on the monitor. If you are using a wireless camera, you will need to power it on and pair it with the monitor according to the provided instructions.
In the case of using a converter box, such as when connecting an RCA composite video cable to a VGA input, you will need to connect the camera to the converter box and then the converter box to the monitor. The converter box can enhance the video quality and resolution, making it a valuable addition.
Finally, you may need to adjust the settings on your monitor to ensure the correct input channel is selected. This step may vary depending on the specific monitor you are using, but it typically involves switching the input channel to the assigned VGA source.
By following these steps, you can easily hook up a camera to a monitor using a VGA cable, providing a reliable and budget-friendly solution for monitoring your surveillance camera footage.
Monitor Sizes: Common Display Dimensions for Your Setup
You may want to see also

Using a TV monitor
Connecting a camera to a TV monitor is a great way to view your camera feed on a larger screen. The process will differ depending on the type of camera and TV you have, so it's important to understand the different options available.
Older Security Cameras
If you have an older security camera, it may output to an RCA/S-Video or Coax connection. In this case, you can use a cheap adapter to convert the feed to either VGA or HDMI, which are more common inputs on modern TVs. An RCA Converter Box, such as the one offered by Amalink, can be used to connect an RCA video signal to your TV through a VGA input. However, this option is limited by the camera's resolution, which is typically only 480 pixels for RCA outputs.
For cameras with Coax cables, you can use a BNC to HDMI Video Converter Box, such as the E-SDS model, to connect to your TV and achieve a higher resolution of 1080p. This setup is ideal for older cameras that used coaxial cables to handle the video stream.
HD Security Cameras
If you have an HD security camera, you can connect it to the HDMI input of your TV using a BNC to HDMI converter. This setup supports a range of HD video formats and resolutions, including AHD, HD-TVI, and HD-CVI, with resolutions from 720p up to 4K. Simply connect the BNC output of your camera to the BNC input on the converter and then use an HDMI cable to connect the converter to your TV.
Wireless Camera Systems
Wireless camera systems, such as the Nest Cameras, offer a modern and convenient way to connect your camera to a TV. These cameras often come with dedicated apps that can be downloaded on smart TVs, allowing for easy access to your camera feed. Additionally, wireless cameras provide a range of advanced features, including cloud recording, facial recognition, and smart alerting.
CCTV Cameras
For CCTV cameras, there are specific solutions available to connect them directly to a TV monitor. One option is to use a CCTV multiplexer, which allows you to display multiple camera feeds on a single TV screen. The cameras are hard-wired to the multiplexer using RG59 coax cable, and the multiplexer's output is then connected to the TV using an RCA connection.
Alternatively, you can connect an analog CCTV camera directly to a TV using a pre-made Siamese security camera cable or RG59 Siamese cable. However, you will need a BNC to RCA connector to convert the BNC output of the camera to the RCA input on your TV.
Adjusting Monitor Size with DisplayFusion: A Simple Guide
You may want to see also

Using a laptop as an external monitor
Step 1: Check Compatibility
Before you begin, ensure your laptop has the necessary inputs or outputs to connect to your camera. Most modern laptops have HDMI, VGA, or USB ports, which are commonly used for video transmission. Check your camera's user manual or specifications to see if it supports any of these connection types.
Step 2: Connect the Camera to the Laptop
If your camera supports a direct connection to your laptop, use the appropriate cable (HDMI, VGA, or USB) to physically connect the two devices. Ensure that the cable is securely connected at both ends.
Step 3: Configure Display Settings
Once the camera and laptop are connected, you may need to adjust your laptop's display settings to recognise the input from the camera. This can typically be done by pressing specific function keys (e.g., Fn + F5 or similar) to cycle through display options until the camera feed appears on the laptop screen.
Step 4: Install Necessary Software
Depending on your camera model, you may need to install additional software to view and control the camera feed on your laptop. Check your camera's manufacturer website for any recommended software or drivers that need to be installed.
Step 5: Adjust Display Layout and Settings
With the camera connected and the feed visible on your laptop, you can now adjust the display layout and settings according to your preferences. This may include options such as full-screen mode, picture-in-picture, or multiple camera views, depending on your camera's capabilities and the software you are using.
Step 6: Troubleshooting
If you encounter any issues with the video transmission, there are several troubleshooting steps you can take. These include checking cable connections, trying different cables, verifying display settings, updating firmware, and consulting the camera's user manual or manufacturer support resources for additional guidance.
Cleaning LCD Monitors: Removing Dust Easily
You may want to see also
Frequently asked questions
You will need a Security DVR or NVR (base station), a monitor with an HDMI or VGA input, and video cables. First, connect the security camera to the DVR/NVR base station. Then, connect the base station to the monitor using an HDMI or VGA cable.
You will need a small PC to pull the video stream, such as an Android HDMI dongle or a small Windows/Linux PC. Plug the camera into the network, then connect the dongle to the monitor using an HDMI or VGA cable.
Yes, you can use a laptop or desktop monitor as an external monitor for your camera. You will need the right HDMI cables.


