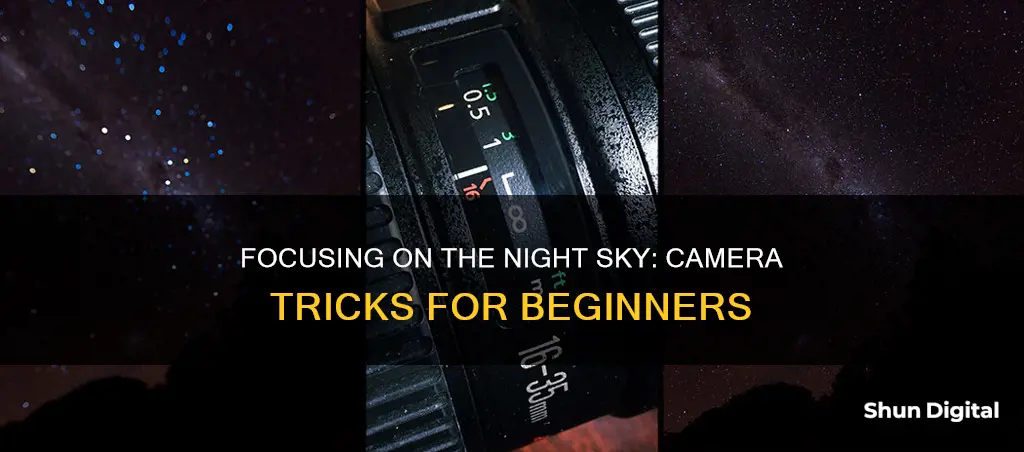
Focusing a camera on the night sky can be challenging, especially when it comes to capturing sharp images of stars and other celestial objects. Here are some tips to help you focus your camera effectively in low-light conditions:
- Set your camera to manual focus (MF) mode, as autofocus may not work reliably in dark environments.
- Find a bright star or planet, such as Vega, Rigel, or Sirius, and centre it in your frame.
- Use the live view mode on your camera to see a live video of what your sensor detects.
- Zoom in on the star or planet using the digital zoom function, and adjust the focus until it appears as a small, sharp pinpoint of light.
- Take test shots and review them at full magnification to ensure the stars are in focus.
- Use a flashlight or distant lights, such as buildings or car headlights, to help with focusing if there are no bright stars or planets visible.
- Consider using a tool like a bahtinov mask, which creates a star diffraction pattern to help achieve precise focus.
- Tape the focus ring of your lens to prevent accidental adjustments and maintain focus throughout your shooting session.
| Characteristics | Values |
|---|---|
| Camera mode | Manual or Bulb |
| Aperture | F/4 or below (as low as it goes) |
| White balance | Daylight or Auto |
| Exposure | 30-seconds or Bulb |
| ISO | 1600 or above |
| Lens mode | Manual focus |
| Focusing technique | Use a bright star, planet, moon, or distant light source |
| Focusing technique | Use a bahtinov mask |
| Focusing technique | Use a star tracker |
What You'll Learn

Use manual focus mode
Capturing the night sky in a photograph can be a challenging task, especially when it comes to focusing your camera. Autofocus rarely works in such low-light conditions, so you'll need to switch your camera to manual focus mode. Here are some tips to help you master manual focusing for night sky photography:
Switch to Manual Focus Mode
The first step is to set your camera to manual focus mode. This will give you more control over the focusing process and allow you to make precise adjustments. Even the best autofocus systems can struggle in extremely dark conditions, so it's best to take matters into your own hands. By switching to manual focus, you can carefully scrutinize and fine-tune your focus to ensure it's spot on.
Preset the Lens to Infinity
If your lens has an infinity mark, this is a good starting point. Set your focus to infinity, which will help you frame a bright star or light source. However, don't solely rely on this mark, as lens markings might not be perfectly accurate. You'll likely need to make further adjustments to achieve true infinity focus.
Enable Live View
If you're using a DSLR camera, enable Live View mode. This will allow you to use the LCD monitor to frame your shots. The eye-level viewfinder might be too dark to see through, so Live View can help by amplifying the scene and letting you magnify the image. Using the magnified Live View is an accurate way to focus on the stars. If you're using a mirrorless camera, you'll already be composing with the LCD, so make sure your screen is turned on.
Preset the Exposure
Before you start framing your shot, set your camera to Manual mode and choose the desired exposure settings. If you're unsure about the settings, you can refer to online resources or use a Milky Way Exposure Calculator. In some cases, using a very high ISO, such as 6400 or 12800, can make the stars more visible and aid in focusing.
Find the Brightest Star
Now, it's time to point your camera towards the brightest star or planet you can find in the night sky. Center this celestial body in your frame. If you're having trouble spotting dimmer stars, use your camera's magnification feature to zoom into the live view feed. Planets like Venus and Jupiter can also work well for focusing.
Use Artificial Light Sources
If you can't find a bright enough star or celestial body, you can use artificial light sources. Look for distant buildings, towns, roadways, or even your own headlamp. Just make sure that the light source is at least 100 feet or 30 meters away. This distance is crucial for achieving true infinity focus with most standard or wide-angle lenses.
Adjust Focus Manually
Use Live View and the digital magnification function to zoom in on the star or light source. Now, adjust the manual focus ring until the object appears sharp and pinpoint-like. A perfectly focused star will look small, sharp, bright, and nearly white. You may need to go back and forth, adjusting the focus multiple times, to find the sweet spot.
Lock in Your Focus
Once you're confident you've achieved the right focus, consider locking it down to prevent accidental adjustments. You can do this by carefully taping your focus ring with gaffer tape, which won't leave any residue. This way, you can be sure your focus remains consistent throughout your photo session.
Mastering Camera Focus for Creative Forced Perspective Shots
You may want to see also

Set the lens to the infinity mark
Setting the lens to the infinity mark is a good starting point for focusing on the night sky. However, it is important to note that infinity focus marks on lenses are often not perfectly accurate, and you may need to make some adjustments to get the sharpest image.
Manual focus lenses typically have a hard stop at infinity, but autofocus lenses do not, as they need room for the autofocus motor to move in and out. In addition, the point of infinity focus can change with temperature and focal length on zoom lenses. Therefore, it is a good idea to test your lens ahead of time to see if its infinity mark is accurate. Take a photo of the focus distance scale on your lens when focused at infinity during the day, and use that as a reference point when setting up your night shots.
When setting up for a night of photography, it is a good idea to arrive early and use the remaining daylight to focus your lens on a distant object. This can be a mountain, tree, building, or the horizon. Move your focus point to the centre of the lens and switch to manual focus mode once you have achieved focus. You can then use gaffer tape to secure the focus ring and prevent accidental adjustments.
If you are using a zoom lens, set your preferred focal length before focusing, as the focus at infinity can change as you zoom in and out. Take a photo of the focus distance scale at the focal length you plan to use, and use this as a reference when setting up your night shots.
While the infinity mark on your lens can be a good starting point, you will likely need to make some adjustments to get the sharpest image. You can do this by using live view and zooming in on a bright star or planet, then manually adjusting the focus until it looks sharp. Alternatively, you can take a series of test shots with a high ISO and short exposure time and review them at full magnification to see if the stars are sharp.
Replacing the Battery in Your Kangaroo Doorbell Camera
You may want to see also

Enable Live View
If you're using a DSLR, you'll want to enable Live View mode so that you can use the back LCD monitor to frame your shots. The eye-level viewfinder will usually be too dark to see through. Live View can help by amplifying the scene electronically and allowing you to magnify the image on the LCD.
Using Live View, you can use your camera's magnification feature to zoom into the live view feed and help you spot dimmer stars. Point your camera towards the brightest star you can find in the sky and put it in the very centre of your frame.
Using Live View and the digital magnification function, zoom in on the star or distant light source and adjust the manual focus ring until the star or light appears in focus.
When focusing on a bright star or artificial light source, look at its size. Perfect focus is when the star looks as small and pinpoint-like as possible. Out-of-focus stars will appear softer and may show a little more colour. When in focus, most stars, even the dimmer ones, should look small, sharp, bright and nearly white.
Look adjacent to your bright focusing star. As you near perfect focus, you should be able to start seeing some of the dimmer stars on the LCD. Dim stars will become very diffuse and will nearly disappear from view if you're not properly focused, so try to find the point of focus where the dimmer stars are most visible.
Many fast, large-aperture lenses exhibit a form of spherical aberration called spherochromatism. Spherochromatism causes high-contrast out-of-focus highlights to shift in colour to create green or magenta halos. When focusing on a bright star, it's often possible to notice a star shift in colour from green when focused too close to magenta when focused too far. Perfect focus is usually very close to the point in between when the star appears neutrally coloured, with neither a predominantly green nor magenta hue.
If you're having trouble getting the star to be completely neutral, err on the side of the magenta shift, as magenta halos tend to appear more natural around a star than green ones. Ideally, the star should look neutral in colour. It's usually okay if your stars are a little bit stretched due to star trailing. If this bothers you, just reduce your shutter time a little bit.
Tennessee Camera Tickets: What Happens if You Don't Pay?
You may want to see also

Pre-set the exposure
Presetting the exposure is a crucial step in capturing stunning images of the night sky. Here are some detailed instructions to guide you through the process:
Understanding Exposure Triangle:
The exposure of an image is determined by three elements: shutter speed, aperture, and ISO. Mastering the balance between these settings is essential for achieving well-exposed photographs.
- Shutter Speed: This controls the duration of time that the camera's shutter remains open, allowing light to reach the sensor. In night sky photography, longer shutter speeds are often used to capture the faint light from distant stars. However, it's important to avoid exceeding 30 seconds, as longer exposures can result in blurred stars due to the Earth's rotation.
- Aperture: This refers to the size of the opening in the lens through which light enters the camera. It is measured in f-stops, such as f/2.8 or f/4. A wider aperture (lower f-stop value) allows more light to enter the camera, helping to capture brighter images.
- ISO: ISO measures the camera sensor's sensitivity to light. In low-light conditions, a higher ISO value is required to capture brighter images. However, increasing the ISO too much can introduce unwanted noise into your images.
Preset Exposure Settings for Night Sky Photography:
Now that you understand the exposure triangle, here are some recommended settings to preset your camera for capturing the night sky:
- Shutter Speed: Set your shutter speed in the range of 10 to 30 seconds. This will allow you to capture the light from distant stars while avoiding excessive blurring due to the Earth's rotation.
- Aperture: Use the widest aperture your lens allows. Most night sky photographers use an aperture setting of f/2.8 or wider. This allows as much light as possible to enter the camera, resulting in brighter images.
- ISO: The ideal ISO setting depends on your location and lighting conditions. If you're in a very low-light area, such as a rural location away from city lights, set your ISO between 1600 and 3200, or higher if necessary. In areas with more light pollution, such as cities, keep your ISO around 800 to reduce noise in your images.
Additional Tips:
- Manual Mode: Set your camera to manual mode so that you can independently adjust the shutter speed, aperture, and ISO. This gives you full control over the exposure settings and allows you to make adjustments as needed.
- White Balance: Use a white balance setting between 4000K and 5500K. This will help you achieve a colour temperature that closely resembles the colour of the night sky as perceived by your eyes.
- Test Shots: Take multiple test shots at different ISO settings to determine the ideal level for your specific camera and lighting conditions. Each camera model performs differently at high ISOs, so it's important to familiarise yourself with your equipment.
- Noise Reduction: Keep in mind that higher ISO settings can introduce noise into your images. If you find that your images have excessive noise, you can use noise reduction techniques in post-processing software to minimise this effect.
Remember, these are general guidelines, and you may need to make adjustments depending on your specific camera, lens, and lighting conditions. Experiment with different settings and review your photos to find the ideal exposure settings for your night sky photography.
Unlocking Portrait Mode on Your Moto Z Play
You may want to see also

Find the brightest star
Focusing a camera lens on the night sky can be challenging. Modern cameras with advanced autofocus capabilities can help, but they are not always reliable in very dark conditions. Here are some tips for finding the brightest star to help you focus your camera:
Finding the Brightest Star:
- Look for Sirius: Sirius is the brightest star in the night sky and is easily identifiable. It is visible during autumn, winter, and early spring in the northern hemisphere. To locate Sirius, follow the line of Orion's belt stars towards the southeast, and you will find it shining brightly.
- Arcturus: Arcturus is the second brightest star and becomes visible towards the end of February. It is an old red giant located about 35 lightyears away. To find Arcturus, follow the curve of the Plough's handle away from its blade.
- Vega: Vega is the third brightest star and appears in the early spring. It is part of the constellation Lyra and is also the brightest star in the Summer Triangle asterism. Vega can be found by locating the Summer Triangle in the night sky.
- Capella: Capella is a prominent star visible year-round in the northern hemisphere. It is located in the constellation Auriga and is often referred to as the "goat star." Capella is one of the few stars that can be seen from both the northern and southern hemispheres.
- Use a Star-Finding App: If you are unsure or unable to identify the stars, you can download a star-finding mobile app. Simply point your phone towards the sky, and the app will identify the stars for you. Alternatively, you can use a star chart, which is a map of the sky, to help you locate the brightest stars.
Remember, the key to successful night sky photography is patience and experimentation. By using these tips to find the brightest star, you will be well on your way to capturing stunning astrophotography images.
Charging Vintage Camera Gear: 1990s Battery Revival
You may want to see also
Frequently asked questions
Use the live view function and zoom in on a bright star or planet. First, switch your lens to manual focus and set the focus ring to infinity. Then, turn on live view and find a bright star or planet. Zoom in and adjust the focus ring until the object is sharp.
Use these settings to let as much light reach the sensor as possible:
- Mode: Manual or Bulb
- Lens Mode: Manual Focus
- Aperture: f/4 or below
- White Balance: Daylight or Auto
- Exposure: 30-seconds or Bulb
- ISO: 1600 or above
You can also use a manmade light source like a distant streetlamp, but an actual star is best. If you're still having trouble, you can use a flashlight to illuminate an object in the distance.


