Charging a 1990s camera battery pack can be a challenge, especially if you don't have the original charger. The good news is that there are alternative ways to charge your camera's battery pack without a dedicated charger. Here are some options to consider:
- Using a Power Bank: If you don't have access to a wall outlet, you can use a power bank to charge your camera battery. Make sure the power bank has enough capacity, a compatible interface (D-tap or USB-C), and can deliver the appropriate voltage for your camera.
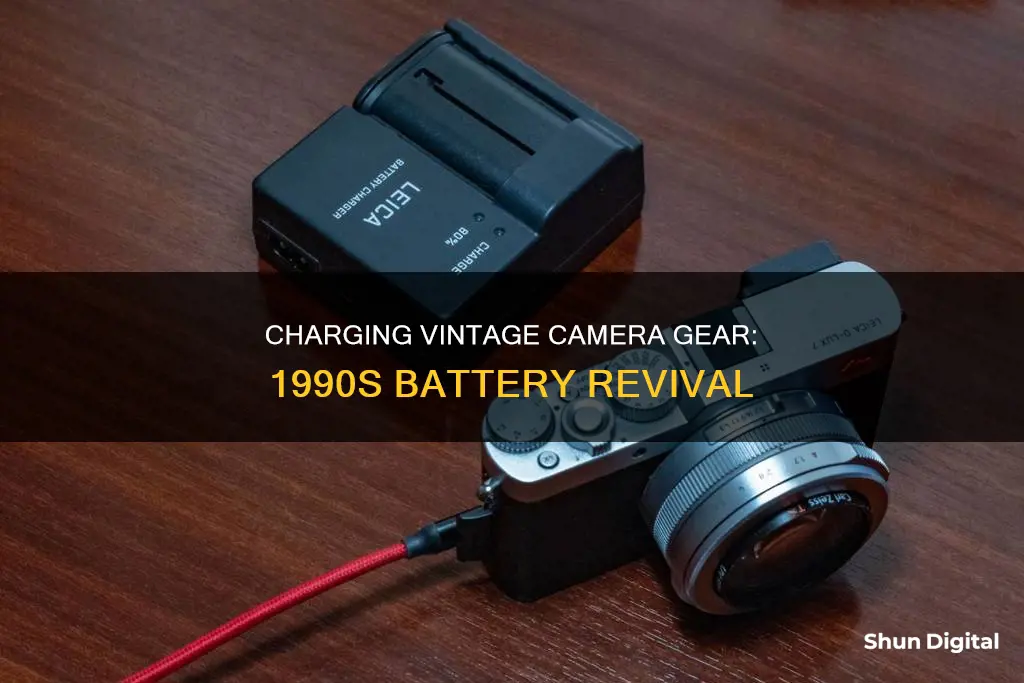
- Charging via USB: Some cameras can be charged via a USB connection. Simply connect your camera's USB port to an external battery pack or a power source, such as a computer. Ensure that your USB cable is compatible with your camera in terms of connectors, voltage range, and current.
- Computer Charging: You can also charge your camera battery by connecting it to a computer. First, turn off your camera and ensure it has a memory card installed. Then, connect your camera to the computer using the USB cable. Refer to your camera's manual to check if it supports this charging method.
- Original Charger: If you have the original charger that came with your 1990s camera, you can use it to charge the battery pack. Connect the camera with the battery pack inserted to the charger and then plug the charger into a wall outlet. Allow sufficient charging time, typically around 2-3 hours for a full charge.
| Characteristics | Values |
|---|---|
| Charging method | USB, power bank, computer |
| Charging time | 2 hours 5 minutes - 2 hours 25 minutes |
| Charging cable | USB cable |
| Power source | Wall outlet, computer, power bank |
What You'll Learn
![]()
Charging via USB-C port
Charging your 1990s camera battery pack via a USB-C port is a convenient and effective way to ensure your camera is always ready to capture the perfect shot. Here is a comprehensive guide to help you through the process:
Step 1: Understand the Basics
First, it is important to know that not all camera batteries can be charged via USB-C. Some older camera models may not support this charging method, so it is crucial to consult your camera's manual or the manufacturer's instructions before attempting to use this approach. Additionally, some batteries may require a specific type of USB camera battery charger.
Step 2: Check Compatibility
To charge your camera battery via USB-C, you need to ensure your camera has a USB-C port. Many modern cameras are equipped with this type of port, which offers faster charging and greater power output compared to older USB types. If your camera does have a USB-C port, you can proceed to the next step.
Step 3: Prepare the Right Equipment
For this method, you will need a USB-C cable and a power source. The cable should be of good quality to ensure efficient and safe charging. As for the power source, you have a few options:
- Power Bank: This is a convenient option when you're on the move. Look for power banks with a higher capacity and power output to ensure they can effectively charge your camera battery.
- Wall Outlet: If you're at home or have access to a wall outlet, you can simply plug your USB-C cable into the outlet using a USB plug adapter.
- Laptop: You can also use your laptop as a power source by connecting the USB-C cable to one of its USB ports. However, keep in mind that charging from a laptop may drain its battery, so avoid leaving the camera connected for extended periods.
Step 4: Connect and Charge
Now, it's time to start charging! Follow these simple steps:
- Turn Off the Camera: Before beginning the charging process, make sure your camera is turned off. This ensures the battery charges efficiently and prevents any potential issues.
- Connect the Cable: Take your USB-C cable and connect it to the USB-C port on your camera. If you're using a power bank or wall outlet, connect the other end of the cable to the power source. If you're using a laptop, connect the cable to one of its USB ports.
- Initiate Charging: Once the connections are secure, initiate the charging process by turning on the power source (if applicable). Some power sources may start the charging automatically.
- Monitor the Charging Process: Depending on your setup, you may see charging indicators on your camera, power source, or both. For example, some cameras have a charge lamp that lights up during charging and turns off when charging is complete.
- Safe Removal: Once your battery is fully charged, remember to safely remove the cable connections. If using a laptop, avoid turning it off or putting it to sleep before disconnecting the camera.
Tips and Precautions:
- Charging Time: USB-C charging may be slower than using a specialised charger, especially if the power output of the USB port is limited.
- Battery Compatibility: If you're using a third-party battery, ensure it is compatible with your camera model. Some batteries, like the Nitecore UFZ100, are designed as direct replacements for specific camera batteries and offer built-in USB-C charging.
- Charging Indicators: Keep an eye on the charging indicators to ensure the process is going smoothly. A steady charge lamp typically indicates normal charging, while flashing or blinking lights may signal an issue or pause in charging.
Charging Camera Batteries: Alternative Methods to Try
You may want to see also
![]()
Charging via power bank
Charging your 1990s camera battery pack via a power bank is a convenient way to power your camera during outdoor recording and field photography activities. Here is a step-by-step guide on how to do it:
First, ensure that your power bank has enough power to charge your camera. Check the specifications of your camera battery to determine the number of milliamperes (mAh) it uses, and choose a power bank with sufficient capacity.
Secondly, verify that the power bank has a compatible interface. Most digital camera batteries can be charged via a D-tap or USB-C connection. Ensure that your power bank has a compatible output port and that you have the appropriate charging cable.
Next, check the voltage range and maximum current of the power bank's output ports. Your camera's manual should specify the voltage and current requirements. Using a power bank with incompatible voltage may damage your equipment.
Now, turn off your camera. Most cameras cannot charge while they are turned on.
Then, connect one end of the USB cable to the camera's input port, and the other end to the power bank's output port. Ensure that you are using a compatible cable; some cameras use proprietary connectors, so check your camera's manual to confirm.
Finally, monitor the charging process by checking the indicated LEDs or screen display on your camera or power bank. This will indicate whether the battery is charging properly.
Please note that not all camera models support USB charging, especially older ones. Always refer to your camera's manual before attempting to charge via a power bank. Additionally, some cameras may require specific types of power banks, so it is important to check compatibility.
GoPro 6 Black: Charging and Camera Functionality
You may want to see also
![]()
Charging via computer
Charging a 1990s camera battery pack via a computer is possible, but it depends on the type of camera and whether it supports this charging method. Some older camera models do not support USB charging, so it is important to consult the manufacturer's instructions before attempting to charge via a computer.
To charge your camera battery via a computer, follow these steps:
- Ensure that your camera can be charged via a computer. Refer to the handbook or specifications of your camera model to determine if it supports USB charging.
- Turn off the camera. Charging is not possible when the camera is turned on.
- Connect the camera to the computer:
- Use the supplied micro USB cable to connect the camera to an activated computer.
- Ensure you do not force the connection, as it may damage the camera or the computer.
Allow the battery to charge:
- The charging time may vary depending on the battery type and conditions, but a full charge via a computer typically takes around 2 hours.
- The charging is complete when the POWER/CHG (Power) lamp turns on or the USB charge lamp turns off.
Disconnect the camera from the computer once the battery is fully charged.
It is important to note that when connecting the camera to a notebook computer that is not connected to an AC power source, the battery of the notebook computer may be depleted rapidly. Therefore, it is recommended not to leave the camera connected to the computer for an extended period.
Simplesafe Camera Costs: Monthly Fees or One-Time Payment?
You may want to see also
![]()
Charging via AC Adaptor
To charge your 1990s camera battery pack via AC adaptor, you'll first need to check if your camera model supports this charging method. Not all camera models come with an AC adaptor, so refer to your camera's manual for model-specific information.
Assuming your camera model does support AC adaptor charging, here are the steps to follow:
- Ensure your camera is turned off. Charging will not work if the camera is on.
- Insert the battery pack into the camera if it is not already inserted.
- Close the LCD monitor of the camera.
- Pull out the built-in USB cable from the camera.
- Connect the camera to a wall outlet using the USB connection support cable and the AC adaptor. Use a nearby wall outlet to avoid potential malfunction due to voltage drop.
- If your camera has a built-in USB cable, use it for charging. Otherwise, use the supplied micro USB cable.
- The POWER/CHG (charge) lamp should light up orange, indicating that charging has started.
- Allow the battery pack to charge. The recommended charging time for a fully depleted battery pack is approximately 150 minutes, but this may vary depending on the remaining capacity and charging conditions.
- Once the battery pack is fully charged, the POWER/CHG lamp will turn off.
- Disconnect the USB connection support cable from the camera.
- To store the built-in USB cable, put it back into the pocket on the grip belt.
Note that the shape of the AC adaptor may vary depending on the country or region. Additionally, always follow the manufacturer's recommendations for charging temperature range and safety precautions to avoid malfunction or damage.
Charging Your GoPro Ultra HD Camera: A Step-by-Step Guide
You may want to see also
![]()
Charging via solar panels
Charging a 1990s Camera Battery Pack via Solar Panels
Charging a 1990s camera battery pack using solar panels is a great way to keep your camera powered up while on the go or in remote locations. Here are some detailed instructions on how to do it:
Step 1: Choose the Right Solar Panel
The first step is to select an appropriate solar panel for your camera. Consider the power requirements of your camera and choose a solar panel with a suitable wattage output. You can calculate the required wattage by multiplying the camera's power rating in watts by the number of hours you need to power it. Also, ensure that the solar panel has the correct voltage output, which is usually 12V or 24V.
Step 2: Select a Compatible Battery
The next step is to choose a battery that is compatible with your camera and solar panel. You have two main options: deep cycle lead-acid batteries or lithium-ion batteries. Lead-acid batteries are cheaper and have a lifespan of 2 to 5 years, while lithium-ion batteries are more expensive but offer faster charging and are lightweight. Calculate the required battery capacity by multiplying the camera's power rating in watts by the number of hours you need to power it, then divide this by the battery voltage. It is recommended to operate the battery at 50% of its cycle to extend its lifespan.
Step 3: Gather Other Components
In addition to the solar panel and battery, you will need other components such as a solar charge controller, crimp connectors, a battery enclosure, and a DC jack. The solar charge controller regulates the voltage and current from the solar panel to prevent overcharging the battery. Make sure to select a charge controller with a suitable current and voltage rating for your system.
Step 4: Connect the Components
Now, you can connect all the components together. Use appropriate cables to connect the solar panel to the solar charge controller, and then connect the battery to the charge controller. Finally, connect your camera to the battery terminals via the charge controller. Ensure that you match the positive and negative terminals correctly during the connections.
Step 5: Position the Solar Panel
To get the maximum power from the solar panel, position it in a location that receives direct sunlight. Orient the panel towards the equator and adjust the tilt angle to be approximately equal to your latitude angle. This will ensure that the panel captures the maximum sunlight throughout the day.
Step 6: Test and Maintain the System
Once you have everything set up, test the system to ensure it is working correctly. Monitor the battery charging process and adjust the solar panel position if needed. Regularly clean the solar panel to keep it free of dust and debris, which can reduce its efficiency. Also, keep the battery protected in a weatherproof container to prolong its lifespan.
By following these steps, you can effectively charge your 1990s camera battery pack using solar panels, allowing you to capture memories wherever your adventures take you!
Is Your Webbie HD Camera Charging?
You may want to see also
Frequently asked questions
You can charge your camera battery using a USB cable and a wall plug, a power bank, or a computer.
First, put the rechargeable lithium battery into the camera slot. Then, switch off the camera. Attach the USB charging cord to the camera or the external battery pack, and then attach the USB wall adapter to your USB cord. Plug the adapter into the wall. When the light on the camera or the external battery goes off, it means that it is completely charged and you can pull out the cable.
All you need is a compact power bank and a PD cable. Attach one end of the USB cord to the camera's input port and the other end to the power bank's output slot.
First, check your camera's handbook to make sure it can be charged by a computer. Put the battery in, switch off the camera, and make sure it has a memory card installed. Attach your camera to the USB cord and connect the wire to your computer's USB port. A pop-up may appear on your screen; follow the instructions to agree to charge through the port.