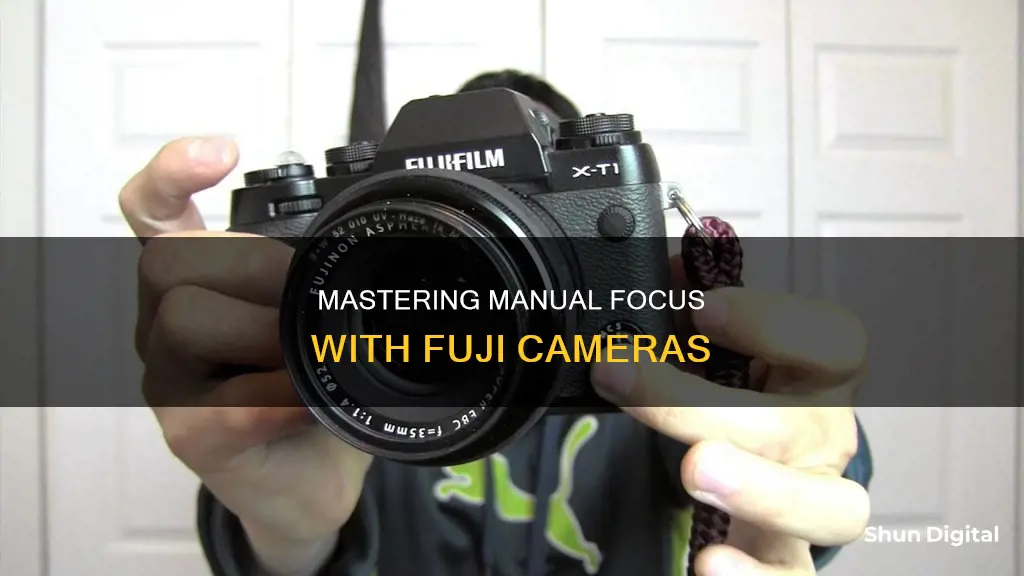
Focusing manually on a Fujifilm camera can be a great option in several situations, such as when you want maximum foreground-to-background sharpness in landscapes or when working with extremely shallow depths of field. To enable manual focus on a Fujifilm camera, you need to slide the focus mode selector to 'M' or select MANUAL in the AF/MF SETTING > FOCUS MODE. Once in manual focus mode, you can adjust the focus using the focus ring. Rotating the ring to the left reduces the focus distance, while rotating it to the right increases the distance. You can also reverse the direction of rotation for the focus ring through the FOCUS RING option in the setup menu.
What You'll Learn

Slide the focus mode selector to M
To focus your camera manually, the first step is to slide the focus mode selector to M. This will activate the manual focus mode, which is indicated by the symbol "M" on the camera's display. Once in manual focus mode, you can adjust the focus distance by rotating the focus ring. The focus ring is typically located on the lens barrel, and it allows you to fine-tune the focus of your image.
The direction of rotation for the focus ring can be customised to suit your preference. In the setup menu, you can adjust the FOCUS RING option to reverse the direction of rotation. This means that you can choose whether rotating the ring left reduces or increases the focus distance. Regardless of this setting, the camera will always use manual focus when the lens is set to manual focus mode.
The display will also show a white line, indicating the distance to the subject in the focus area. This distance can be measured in meters or feet, depending on your selected option in the SCREEN SET-UP > FOCUS SCALE UNITS in the setup menu. Additionally, a blue bar will represent the depth of field, which is the distance in front of and behind the subject that appears to be in focus.
If you need to focus on a specific area within the frame, you can use the zoom function. By pressing the centre of the rear command dial, you can zoom in on the current focus area for more precise adjustments. Pressing the centre of the dial again will cancel the zoom. Alternatively, you can adjust the zoom by rotating the rear command dial when STANDARD or FOCUS PEAK HIGHLIGHT is selected for MF ASSIST.
Understanding Raw Camera Link Data: Unlocking the Power
You may want to see also

Focus manually using the focus ring
To focus manually using the focus ring, first, make sure you are in manual mode by sliding the focus mode selector to M. This will bring up the manual focus indicator in the display. The white line on the indicator shows the distance to the subject in the focus area, and the blue bar indicates the depth of field, or the distance in front of and behind the subject that appears to be in focus.
The focus ring is used to adjust the focus distance. Rotating the ring left will reduce the focus distance, and rotating it right will increase it. You can reverse the direction of rotation for the focus ring by using the FOCUS RING option in the setup menu.
If you want to zoom in on the current focus area for more precision, you can do so by pressing the centre of the rear command dial. Pressing it again will cancel the zoom. You can also adjust the zoom by rotating the rear command dial when STANDARD or FOCUS PEAK HIGHLIGHT is selected for MF ASSIST in the shooting menu.
The MF ASSIST option in the shooting menu can be used to check the focus when framing your shot in the LCD monitor or electronic viewfinder. To display the MF ASSIST menu, press and hold the centre of the rear command dial. There are several different modes available:
- FOCUS PEAK HIGHLIGHT: This mode highlights high-contrast outlines. Rotate the focus ring until the subject is highlighted.
- DIGITAL SPLIT IMAGE: This mode displays a split, black-and-white image in the centre of the frame. Frame your subject in the split-image area and rotate the focus ring until the three parts of the image are correctly aligned.
- DIGITAL MICROPRISM: This mode, found on newer Fujifilm cameras, simulates how you would manually focus older film cameras. It involves a bunch of little digital split images in the centre of the screen that are accentuated when the image is out of focus and nearly disappear when the image is in focus.
Charging Your Panasonic Lumix DMC-FZ70 Camera Battery: A Guide
You may want to see also

Use autofocus to focus on the subject
To use autofocus to focus on your subject when in manual mode, press the AF-L button. This will allow you to quickly focus on your chosen subject. You can also choose the size of the focus area by using the rear command dial.
There are two autofocus settings: AF-S and AF-C. AF-S is single AF, which means that focus is adjusted each time the button is pressed. AF-C is continuous AF, which means that focus is adjusted continuously while the button is pressed. Continuous AF is best used for subjects that are in motion.
If you are in an area of low contrast or low light, autofocus may be inaccurate, so switching to manual focus may be a better option.
Staples: Your One-Stop Shop for Camera Battery Needs
You may want to see also

Check focus in manual focus mode
To check focus in manual focus mode, Fujifilm cameras offer a range of tools and settings to help you achieve precise focus. Here are the steps and features to help you check focus when using manual focus mode:
Manual Focus Indicator
The Manual Focus Indicator is a useful visual guide to achieving proper focus. On your display, you will see a white line that indicates the distance to your subject in the focus area. This distance can be set to meters or feet in the setup menu. Additionally, a blue bar represents the depth of field, showing the distance in front of and behind the subject that appears sharp.
Zooming In
To aid in precise focusing, you can zoom in on the current focus area. Press the centre of the rear command dial to zoom in, and press it again to cancel the zoom. This feature allows you to fine-tune the focus by providing a more detailed view of your subject.
MF ASSIST Options
The MF ASSIST options provide additional ways to check focus in manual focus mode. To access these options, press and hold the centre of the rear command dial to display the MF ASSIST menu. Here are the available options:
- FOCUS PEAK HIGHLIGHT: This option highlights high-contrast outlines. Rotate the focus ring until the subject is highlighted, indicating that it is in focus. You can adjust the highlight colour and intensity in the AF/MF Setting menu.
- DIGITAL SPLIT IMAGE: This feature displays a split, black-and-white image in the centre of the frame. Align the three parts of the split image by framing your subject in the split-image area and rotating the focus ring until they are in focus.
- SCREEN SET-UP Options: In the setup menu, you can adjust settings such as the focus scale units (meters or feet) and enable the MF Distance Indicator to display the distance scale on the screen.
Dual Displays
Some Fujifilm cameras offer a Dual Display feature, providing two windows with different views. One window displays the entire composition, while the other shows a magnified view of the focus area. This feature is useful for checking focus in manual mode and can be enabled by cycling through the DISP button while in MF mode.
Manual Focus Zoom Magnification
You can also use manual focus assist modes to magnify the focus area for more precise focusing. On cameras with a pushable rear command dial, push it in to enable/disable magnification. Ensure that the R-DIAL is set to FOCUS CHECK in your Function (FN) Setting menu.
These tools and settings provide a comprehensive set of options to help you achieve precise focus when shooting in manual focus mode with your Fujifilm camera. Experiment with these features to find the ones that work best for your specific photography needs.
Samsung Galaxy S10: Night Mode Camera Feature Explained
You may want to see also

Use Fujifilm's Manual Focus Assist Modes
Fujifilm has four Manual Focus Assist modes that combine cutting-edge technology with old-school principles. These modes are especially useful when autofocus is not the best option, such as when you want maximum foreground-to-background sharpness in landscapes, or when working in areas of low contrast and/or low light.
Standard/None
In this mode, you will have a clean image without any overlays or special algorithms. This works best when the other focus assist modes are too distracting. You can get the most out of this by zooming in or using Dual Displays.
Focus Peak Highlight
The Focus Peak Highlight mode highlights areas of strong contrast between edges, or in other words, areas in focus. You can adjust the highlight colour and intensity in AF/MF Setting -> MF Assist -> Focus Peak Highlight. Four colours are available – white, red, blue, and yellow. Each colour has a High and Low selection available. Low has a higher focus threshold and will be harder to see, while High is less sensitive to sharpness and brighter.
Digital Split Image
This mode is the digital equivalent of using an old SLR film with a split prism in the centre of the screen to help you focus. Things won't line up when your scene is out of focus, and straight lines will be broken up. They will be brought back into alignment as you get everything in focus. You can set either a colour digital split image or a monochrome split image.
Digital Microprism
The Digital Microprism is Fujifilm’s newest manual focus assist tool, found on cameras released after the X-T3 (X-T30, X-Pro3, X-T4, etc). This, too, simulates how you would manually focus older film cameras. If you understand Digital Split Image, Digital Microprism is like a bunch of little digital split images in the centre of the screen. You’ll see the boxes accentuated when the image is out of focus and then nearly disappearing when the image is in focus.
Eufy Camera Battery Life: Replace or Recharge?
You may want to see also
Frequently asked questions
Slide the focus mode selector to M. Focus manually using the focus ring. Rotate the ring left to reduce the focus distance and right to increase it.
Use the FOCUS RING option in the setup menu.
Press the AF-L button.
Select AF-S for single AF or AF-C for continuous AF in the AUTOFOCUS SETTING > INSTANT AF SETTING option in the shooting menu.
Use the Manual Focus Indicator. The white line indicates the distance to the subject in the focus area, and the blue bar indicates the depth of field.


