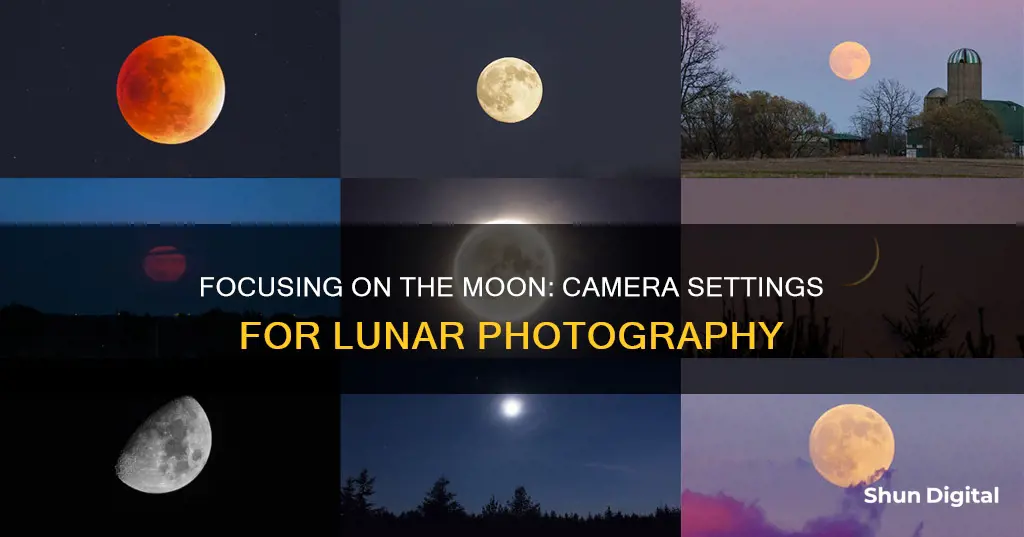
Capturing the moon in a photograph can be challenging, but with the right equipment and knowledge, it can be a rewarding experience. Here are some tips to help you focus your camera on the moon:
- Understand the phases of the moon: The moon goes through different phases during its 29.5-day orbit around the Earth, including new moon, first quarter moon, full moon, and last quarter moon. The moon rises approximately 45 minutes later each day, and the best time to view it is during moonrise or moonset, when it is less bright and appears as a pale orangey-yellow colour.
- Use the right equipment: A DSLR or mirrorless camera with manual settings is essential. For close-up shots of the moon, a telephoto lens of at least 200mm is recommended, with longer lenses providing greater detail. A tripod is also crucial to stabilise your camera and reduce blur.
- Focus manually: While autofocus can work, manually focusing your lens to infinity or using the live view feature to zoom in and focus on the moon will give you sharper results.
- Experiment with settings: Start with an aperture of f/5.6 to f/11, ISO 100 or 200, and a shutter speed of around 1/100. Adjust these settings based on the lighting conditions and your specific camera and lens combination.
- Consider the environment: The moon can be challenging to photograph against a dark sky, so try capturing it during moonrise or moonset when it is less bright, or include foreground elements like trees, buildings, or water reflections to add context and interest to your shot.
| Characteristics | Values |
|---|---|
| Camera | DSLR, mirrorless or bridge camera |
| Lens | Telephoto lens, at least 200mm focal length |
| Tripod | Sturdy |
| Shutter release | Remote cable or timer |
| Mode | Manual |
| Focus | Manual, set to infinity |
| Aperture | Between f/5.6 and f/11 |
| ISO | 100 or 200 |
| Shutter speed | 1/125sec to 1/250sec |
What You'll Learn
- Use a telephoto lens to capture the moon's details, including its craters
- Take landscape photos with the moon as a small but important element
- Create a composite image by combining a previously captured image of the moon with another subject
- Understand the basics of moon phases to know when to expect a full moon
- Use a tripod to stabilise your camera and avoid blurry photos
![]()
Use a telephoto lens to capture the moon's details, including its craters
Capturing the details of the moon, including its craters, requires a telephoto lens. This type of lens is ideal for high-resolution lunar photography, allowing you to zoom in on the moon's surface and reveal its intricate features. Here are some tips to help you capture stunning images of the moon's craters using a telephoto lens:
- Choose the Right Camera and Lens: While a top-end expensive camera is not necessary, investing in a good-quality telephoto lens is crucial. Look for lenses with a focal length of 200-400mm or more to capture fine details across the lunar disk. Some popular options include zoom lenses from Sigma and Tamron in the 150-600mm range or the Nikon 200-500mm f/5.6E VR lens.
- Stabilize Your Setup: Using a tripod is essential when working with telephoto lenses to minimize camera shake and ensure sharp images. Make sure your tripod is sturdy and stable, especially if you're shooting with longer lenses.
- Manual Focus: While autofocus can work well, manually focusing your lens will give you more control and precision. Use the live view feature on your camera to zoom in on the moon and adjust the focus until the craters appear sharp and defined.
- Camera Settings: Set your camera to manual mode and experiment with different settings based on lighting conditions. A good starting point is ISO 100, aperture between f/5.6 and f/11, and shutter speed between 1/125s and 1/250s. Adjust these settings as needed to achieve the desired exposure.
- Plan Your Shoot: The moon's phase greatly impacts the appearance of its craters and topography. For more defined shadows and surface details, consider photographing the moon when it's not at the full moon stage. The half-phase or the "terminator line" can be excellent times to capture dramatic shadows and bring out the rugged texture of the lunar surface.
- Post-Processing: Basic post-processing can enhance your images and bring out the details of the moon's craters. Adjust contrast, highlights, shadows, and clarity in your photo editing software to refine your lunar photographs.
Polaroid Camera Battery Replacement: A Step-by-Step Guide
You may want to see also
![]()
Take landscape photos with the moon as a small but important element
Capturing the moon as part of a landscape photograph is a challenging but rewarding endeavour. Here are some tips to help you get started:
Planning
Before heading out, it is important to plan your shoot. Check the weather forecast and moon phase schedule. Full moons can be a great time to shoot as they showcase the moon in all its glory, but don't underestimate the beauty of a crescent moon. Cloudy skies may obstruct the moon, but if the forecast calls for clouds, be patient and wait for the moon to be partially or fully uncovered.
Timing
The "blue hour", just before sunrise or after sunset, is a magical time to capture moon landscapes as the sky transforms into a canvas of blue, purple, and pink hues. This soft, diffused light will enhance the ethereal atmosphere of your photos.
The best time for landscape photos with the moon is a few days before or after a full moon. During this time, you can capture the moonrise or moonset along with your chosen subject, such as a mountaintop or a tree, lit by the sun. Aim for 20 minutes to 5 minutes before sunset or 5 to 20 minutes after sunrise to capture the moon and foreground in a single shot, both perfectly exposed.
Equipment
You will need a camera with a telephoto lens or a wide-angle lens. A sturdy tripod is essential to keep your camera steady during long exposures. You may also want to use a remote shutter release or the two-second timer on your camera to minimise camera shake.
Technique
Use a long-exposure technique to ensure your image is sufficiently bright. Dial in a longer shutter speed while making sure it isn't too long, as the movement of the earth will cause the moon to blur.
Composition
Incorporate both near and distant foreground elements, such as trees or mountains, to add depth and visual interest to your photograph. Experiment with different angles and perspectives to find the perfect arrangement that brings harmony to the elements within your frame.
Exposure
Achieving a well-exposed image can be challenging due to the stark contrast between the dark foreground and the bright moon. Try using High Dynamic Range (HDR) techniques by setting your camera to Manual mode and adjusting the aperture, shutter speed, and ISO settings accordingly.
Focus
You may encounter situations where maintaining sharpness throughout the frame is difficult, especially when using a telephoto lens or shooting at wide apertures. Focus stacking is a solution where you capture multiple images with different focus points and blend them together during post-processing.
With these tips in mind, you're ready to start capturing breathtaking moon landscapes that showcase the beauty of Earth's closest celestial neighbour.
The Last Polaroid 600 Camera: When Did It End?
You may want to see also
![]()
Create a composite image by combining a previously captured image of the moon with another subject
Creating a composite image by combining a previously captured image of the moon with another subject is a unique way to express your creativity and produce stunning visuals. Here are some detailed instructions to guide you through the process:
Planning and Equipment:
- Decide on the subject or scene you want to include with the moon in your composite image. It could be a landscape, an object, or even a person.
- Choose the right camera equipment for the desired result. For a close-up of the moon, you will need a long telephoto lens or a telescope attached to a high-resolution digital camera. If you want to include the moon as a smaller element, a wide-angle lens or even a smartphone camera will suffice.
- Plan your shoot by scouting a suitable location away from light pollution. Use apps like PhotoPills to determine the moon's position and plan your composition accordingly.
Capturing the Images:
- Set up your camera on a tripod to ensure stability and reduce camera shake.
- For photographing the moon, use a fast shutter speed to avoid blur. Adjust your camera settings, including ISO, aperture, and shutter speed, accordingly.
- Capture multiple images of the moon, focusing on different phases or details to have a variety of options for your composite.
- Take several shots of your chosen subject or scene, ensuring proper exposure and focus.
Creating the Composite:
- Use photo editing software like Adobe Photoshop, GIMP, or Figma to create your composite image.
- Open each image as a separate file in your chosen editing software.
- Create a new project or document with a black background, ensuring it's large enough to accommodate your composite.
- Select and copy the moon from your images using tools like the Lasso Tool or Magic Wand Tool.
- Paste the moon into your new document, creating a new layer for each moon image.
- Adjust the positioning and spacing of the moon layers to create a visually appealing composition.
- Repeat the process for your subject or scene images, carefully selecting and copying the desired elements.
- Play around with blending modes, layer masks, and editing tools to create seamless transitions and hide unwanted parts of the images.
- Adjust colours, brightness, contrast, and other enhancements to create a cohesive and visually appealing composite.
By following these steps, you can create captivating composite images that combine the beauty of the moon with other subjects or scenes. Experiment with different images and editing techniques to develop your unique style.
Unlocking the Free Camera Mode in Conan Exile
You may want to see also
![]()
Understand the basics of moon phases to know when to expect a full moon
The moon goes through eight phases in a lunar month, four primary and four intermediate phases. The four primary phases are the new moon, first quarter, full moon, and last quarter. The lunar cycle, or the time it takes for the moon to go through all its phases, is about 29.5 days, just under a calendar month.
The moon's phases change depending on its position relative to the Earth and the Sun. The moon's orbit around the Earth means that we see varying fractions of its illuminated side. Half of the moon is always illuminated by the sun, but the amount of the illuminated half that we can see from Earth changes as the moon orbits the planet.
The new moon phase occurs when the moon is closest to the sun in its orbit around Earth. From our perspective, the new moon is invisible because the side of the moon illuminated by the sun faces away from us. The new moon rises and sets at roughly the same time as the sun. The first quarter, or half moon, occurs when the moon has travelled about a quarter of the way around the Earth. From our perspective, half of the moon's surface is illuminated, but this is actually half of the illuminated half. The first quarter rises around midday and sets around midnight.
The full moon is the most dazzling stage of the lunar cycle. It occurs when the moon is at its farthest point from the sun in its orbit and the side of the moon facing Earth appears as a perfectly round disk. The moon appears full for a couple of days before and after its peak. The full moon rises around sunset and sets around sunrise.
The last quarter, or third quarter, occurs when the moon has travelled about three-quarters of the way around the Earth. Again, half of the moon's surface appears illuminated, but this is the other half of the moon compared to the first quarter. In the Northern Hemisphere, the left half of the moon is illuminated during the last quarter. The last quarter rises around midnight and sets around midday.
The intermediate phases between the primary phases are the waxing crescent, waxing gibbous, waning gibbous, and waning crescent. The waxing crescent occurs between the new moon and the first quarter, as the visible illuminated area of the moon gradually widens. The waxing gibbous occurs between the first quarter and the full moon, as the moon becomes more than half illuminated, but not yet fully. The waning gibbous occurs between the full moon and the last quarter, as the illuminated area of the moon gradually diminishes. The waning crescent occurs between the last quarter and the new moon, as the illuminated portion of the moon becomes smaller each day until it is only a sliver, and then disappears from our view.
You can use a moon phase calendar to find out when the next full moon will be.
Understanding Camera Raw Histogram: A Beginner's Guide
You may want to see also
![]()
Use a tripod to stabilise your camera and avoid blurry photos
Using a tripod is essential for moon photography to keep the image steady and sharp. Here are some tips to stabilise your camera and avoid blurry photos:
- Use a sturdy tripod with a ball head mount to help you point the lens up into the night sky toward the moon. Ensure that your camera and lens are securely fastened to the tripod.
- Place your tripod on level ground with a clear view of the moon.
- Avoid windy areas or uneven terrain as these can cause vibrations that will blur your photos.
- Use a remote shutter release cable or the timer function on your camera to take the picture without touching the camera, reducing the chance of camera shake.
- Keep your camera strap taut and loop it around your neck, body or upper arm to provide additional stability.
- Tuck your arms inwards and keep your elbows against your hips for further stability.
- Brace your body against a flat, firm surface such as a wall, or sit or lie down to provide a stable base.
- Use a small bean bag or a bag of uncooked rice as a cradle to stabilise your camera on various surfaces.
- Turn off any image stabilisation or anti-shake functions on your camera or lens, as these can cause issues when used with a tripod.
Unlocking Manual Mode: How to Identify Camera Settings
You may want to see also
Frequently asked questions
Although astrophotographers specializing in the Moon usually photograph it through a powerful telescope, a telephoto lens of almost any focal length is good enough to get a good Moon shot. You can even get surprising results from a smartphone, as long as you find a way of keeping it stable.
The Moon looks its best when it’s full, but it is very difficult to photograph. The answer is to find out the exact time of moonrise and catch it as it appears behind and between buildings, trees and/or clouds on the eastern horizon. The Moon rises on average 45 minutes later each day. In the week before a Full Moon, you can look for it in a daytime sky in the east during the afternoon, and the week after a Full Moon, a daytime Moon can be seen in the west in the morning.
Although you can autofocus on the Moon as it rises, or as it becomes visible just before sunset, it's a good idea to focus manually. With your lens set to manual focus, set the focusing ring to infinity. It takes some practice since most cameras can focus beyond infinity, and finding the exact point that works for your lens takes trial and error.
Set your camera mode to full manual mode. Set your ISO to your camera’s base ISO, which is typically ISO 100 on most cameras. Set your aperture to f/11. Set your shutter speed to 1/100. Set your lens to manual focus and focus manually.