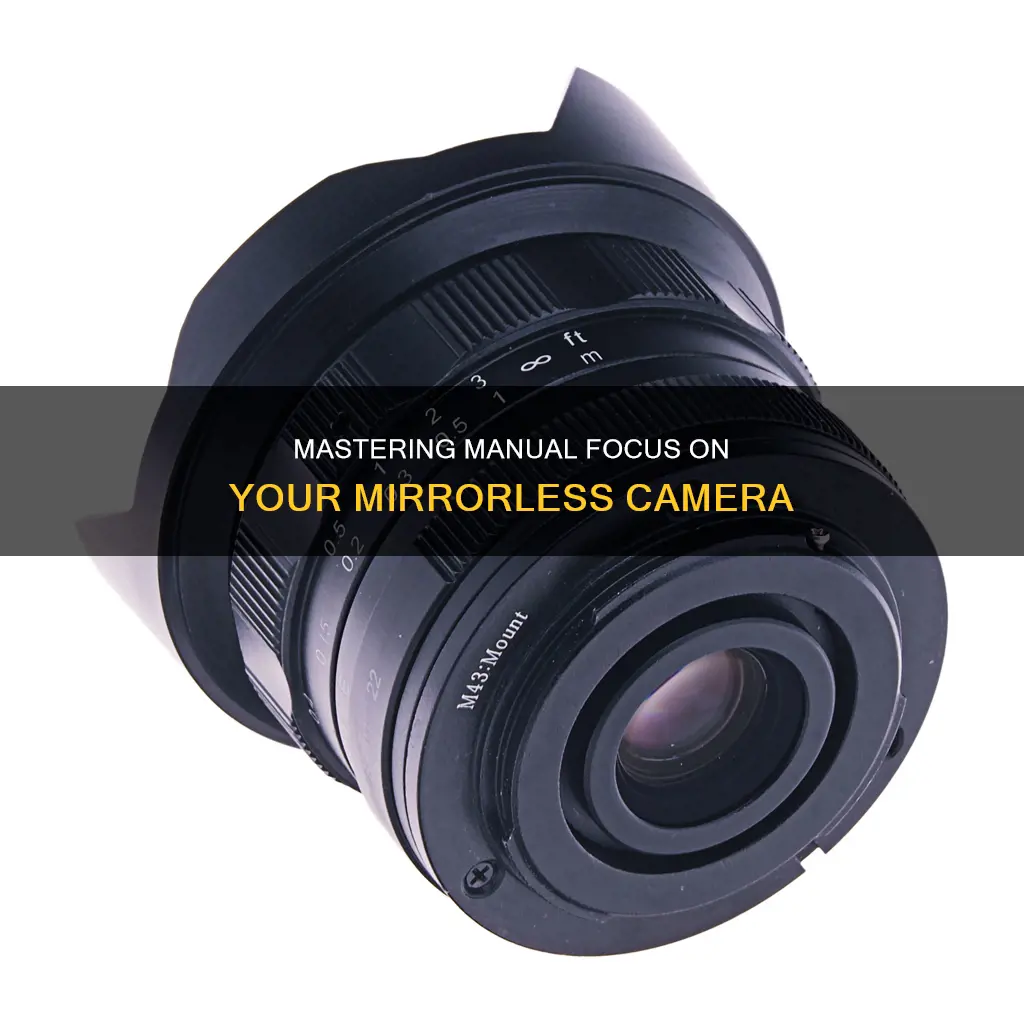
Manual focusing on a mirrorless camera is a great way to gain more control over your images and can be easier than on a DSLR. Mirrorless cameras have features such as focus peaking, which highlights areas of the image that are in focus, and magnification, which lets you zoom in on the image to check your focus. Some cameras also have large LCD screens and bright EVFs, which can aid manual focusing. Additionally, mirrorless cameras have a shorter flange distance, which means you can adapt almost any old SLR lens to your camera with a simple adapter.
| Characteristics | Values |
|---|---|
| Manual focusing on mirrorless cameras vs DSLRs | Accurately manually focusing on a modern mirrorless camera is significantly easier than on a normal DSLR. |
| Focus by wire | Some people find focus by wire challenging, impractical, and poorly implemented. |
| Focus confirmation | The focus confirmation dot, flanked by rangefinder arrows, turns from red to green when PDAF says things are good. |
| Focus peaking | Focus peaking highlights areas of the image that are in focus, usually in bright red. |
| Magnification | Zooming in is a more accurate way to focus than focus peaking. |
What You'll Learn

Focus peaking
Most cameras have adjustable focus peaking parameters, and you should change these depending on the scenario. The two most common parameters are the sensitivity and the colour of the focus peaking overlay. For instance, if you're doing macro photography at f/1.8, you will only have a small portion of the image in focus, so a higher sensitivity might be useful. On the other hand, if you're doing landscape photography at f/22, a lower sensitivity might be better so that you can see more of the image itself.
While focus peaking is a valuable tool, there are some cases where it is not recommended. For example, if your camera lens's depth of field is very shallow (e.g. 1.2 on a full frame), it's best to stay away from focus peaking as even the best algorithms may not be able to display the sharpest areas precisely.
How to Rehearse Slideshows with Camera Access
You may want to see also

Using vintage lenses
Adapters
If you want to use vintage lenses on your mirrorless camera, you'll need to purchase an adapter. Adapters are available from first-party camera makers, such as Canon, Nikon, and Sony, as well as third-party manufacturers like Fotodiox and Metabones. The most basic adapters are light-proof tubes with the proper mounts on both sides.
When choosing an adapter, you should consider whether you want to use autofocus or manual focus. Adapters with autofocus support tend to be more expensive. If you're using vintage lenses, you'll need to use manual focus, as these lenses have their own manual focus support and aperture control ring.
Finding the right adapter
To find the right adapter, you'll need to know the type of lens you have. Lenses typically have branding and mount information printed around the front glass. You can also search for your lens online or look up your camera's brand and model number. Online resources like Camera-Wiki and 35mmc can help you identify the type of lens you have.
Once you have your adapter, using vintage lenses on a mirrorless camera is simple. Attach the adapter to your lens, ensuring a secure connection. Then, attach the adapter and lens to your camera body. You may need to twist a switch on the lens to control the aperture blades manually. Go into your camera's menu and enable release without a lens, as vintage lenses don't have electronics, so your camera won't recognize if a lens is attached.
To make manual focusing easier, turn on focus peaking in your camera's settings. If you have an external monitor, enable focus peaking on that as well. You can also use the manual focus assist feature to get critical focus by quickly zooming in.
Image quality
Vintage lenses can give your images a unique look, rendering images differently than modern lenses. They may introduce chromatic aberration or sensor reflections, but they can also take off the digital edge without additional filtration. Some vintage lenses may produce softer images, so it's important to test them out before relying on them for critical shots.
Specialty adapters
There are also specialty adapters available for specific use cases. For close-up work, helicoid extension adapters allow you to keep the lens spaced properly for infinity focus and move it closer to the image sensor for macro photography. Speed Boosters are popular for APS-C and Micro Four Thirds systems, giving you an angle of view closer to what you'd get with a full-frame camera. Tilt-shift adapters add movements to your SLR lens, letting you adjust the angle at which light hits the sensor or correct perspective.
Fight Camera Tickets in Arizona: Your Legal Options
You may want to see also

Manual focus for video
Manual focus is best for video. It gives you control over the focusing in the scene and means you don't have to rely on technology. Most pro filmmakers use manual focusing as their go-to method and it's probably best to use it around 90% of the time.
That said, there are some scenarios where autofocus (AF) is useful for shooting video. For example, if you're chasing kids around the yard, trying to capture camera-shy pets, or filming a junior league soccer game.
AF systems can be sluggish to adjust, and if a subject is moving, there's a risk that an AF system may hunt for it or suddenly pop from one plane of focus to another. To avoid this, you'll have to focus manually.
If you're shooting video with a mirrorless camera, you can use the rear screen to manually focus, just as you would with a DSLR.
- Lock your focus and keep the same distance from yourself or your subject at all times. If you're on the move, use a gimbal or easily movable steady support, such as a Glidecam, and maintain the same speed and relative distance as your subject to keep them in focus.
- Use a shallow depth of field to focus on and isolate your subject. Use a wide aperture, usually around f/2.8 or f/4.
- Use a follow focus rig to mark the points of focus so you can execute a smooth focus pull to exact points.
- Use a loupe or external monitor to help you see and focus accurately.
Yashica Cameras: Still in Production or a Thing of Past?
You may want to see also

Manual focus for astro
Achieving the right focus is one of the first big challenges to overcome when getting into astrophotography. The magnification and scale of your image will vary depending on the optical instrument used. Your focus must be precise for a sharp image, whether you're photographing the moon, planets, or the Milky Way.
Lenses with fast optics (f/2 or below) are the most difficult to focus as they demand critical focus. To focus your camera lens, you will need to find the brightest star in the night sky and turn on the "live-view" mode of your camera. This will turn the display screen into a live video of what your sensor sees. You can also use a man-made light source like a distant street lamp, but a star is preferable.
Use the following camera settings for focusing the lens:
- Mode: Manual or Bulb
- Lens Mode: Manual Focus
- Aperture: f/4 or below (as low as it goes)
- White Balance: Daylight or Auto
- Exposure: 30 seconds or Bulb
- ISO: 1600 or above (higher will show more stars)
These settings will allow the maximum amount of light to reach the sensor. You will then need to zoom in on the star at 5x and 10x zoom. While in 10x zoom mode, slowly adjust the focus on your lens until the star becomes a small pinpoint of light.
A Bahtinov mask is a useful tool for focusing your camera for astrophotography. This simple accessory sits in front of the camera lens or telescope to create a star diffraction pattern. As you adjust the focuser of your telescope or lens, the central spike in the pattern will move in and out of the X pattern. When the central spike is centred between the X, your camera is in focus.
Some other practical insights from amateur astrophotographers include:
- Focusing to hyperfocal distance or a few centimetres past it.
- Using a bright star with a less bright companion star for focusing.
- Marking your focus tube with a Sharpie to help you get near focus quickly.
Polaroid Camera Battery: Where is it Located?
You may want to see also

Manual focus for macro
Manual focusing in macro photography can be challenging but rewarding. It gives you full control and precision over the focus point and depth of field, allowing you to capture the details and beauty of small subjects, such as insects, flowers, or jewellery. Here are some tips for achieving sharper and more creative results with manual focus in macro photography:
When to Use Manual Focus
Autofocus may not lock on the subject accurately, switch focus to the background or foreground, or allow you to fine-tune the focus as desired. If your subject is about four inches (10 centimetres) or larger, autofocus can be used effectively. However, for smaller subjects, manual focus is often the better option.
Setting Up Your Camera for Manual Focus
First, switch your lens to manual focus mode using a switch on the lens barrel or through the camera's menu. Then, set your camera to a mode that allows manual or semi-automatic adjustment of aperture and shutter speed, such as aperture priority, shutter priority, or manual mode. This gives you control over depth of field and exposure. Finally, enable features like live view, focus peaking, or magnification to assist with manual focusing.
Using Live View for Manual Focus
Live view lets you see the image on your camera's LCD screen or an external monitor. To use it for manual focus, activate live view, frame your subject, and turn the focus ring until the subject appears sharp. You can also use zoom buttons or the touchscreen to magnify the image and fine-tune the focus.
Using Focus Peaking for Manual Focus
Focus peaking highlights in-focus areas with a coloured overlay, making it easier to see where the focus is. To use this feature, enable it in your camera's settings and choose a colour for the overlay. Then, turn the focus ring to see the overlay on the focused areas, adjusting the sensitivity as needed.
Using Magnification for Manual Focus
Magnification enlarges a portion of the image, making it easier to check the focus and details. To use magnification, press the dedicated button, usually with a magnifying glass icon, and move the cursor or use the touchscreen to select the area you want to magnify. Then, turn the focus ring to adjust the focus.
Tips and Tricks for Manual Focus
- Use a tripod or stabilizer to avoid camera shake and maintain focus.
- Use a remote shutter release or self-timer to prevent vibrations caused by touching the camera.
- Set a small aperture (high f-number) to increase depth of field and sharpness.
- Use a focus rail or slider to adjust the focus without changing the composition.
- Consider focus bracketing or stacking, taking multiple shots with different focus points to combine in post-processing for maximum sharpness.
Evolution of Casio Cameras: First Screens Unveiled
You may want to see also
Frequently asked questions
Manual focusing on a mirrorless camera gives you more control over the final image and can result in sharper, more precise focus. It also allows you to use cheaper, vintage lenses.
Most mirrorless cameras have a "focus peaking" feature that highlights areas of the image that are in focus, usually in bright red. This makes it easier to adjust the focus precisely.
Familiarize yourself with the camera's focus peaking settings and zoom functions. Use a tripod or image stabilization to reduce camera shake. Take your time and make fine adjustments as needed.
Yes, mirrorless cameras typically have a shorter flange distance, allowing for simple adapters to be used with vintage manual lenses. However, some cameras may not support certain vintage lenses as well as others.
Autofocus is generally better for fast-moving subjects or situations where you need to capture a quick shot. Manual focus is ideal when you have more time to compose your shot and want precise control over the focus.


