Dash cameras are an essential part of modern-day driving, providing security and accountability on the roads. While most dash cameras do not record when the car is turned off, some advanced models offer round-the-clock protection, even when the engine is off. These dash cams are usually hardwired to the car's battery and come with features like parking mode, which allows them to continue recording when the car is parked and unattended. This can be particularly useful in capturing incidents such as vandalism, hit-and-runs, or theft, providing invaluable evidence for insurance claims and police investigations. While these specialist dash cams come with a higher price tag and may require professional installation, they offer enhanced security and peace of mind for drivers.
| Characteristics | Values |
|---|---|
| Power Source | Car's cigarette lighter port |
| Power Source When Car is Off | Car's battery |
| Camera Positioning | Front and rear of the car |
| Camera View | 180° or 360° |
| Installation | Professional installation or a specific hardwiring kit |
| Features | Parking mode, motion detection, impact detection, eco parking mode, programmable voltage thresholds, GPS tracking, two-way talk, etc. |
What You'll Learn
![]()
Use a specialist dash cam that can be hardwired to your car's battery
Hardwiring a dash cam to your car's fuse box is a common installation method to keep your dash cam powered when the car is off. This method is preferred by many motorists due to the neat cable management when hardwired correctly. A hardwire kit can also provide additional features (depending on the dash cam specifications). For example, a Road Angel dash camera that has been hardwired will allow additional features to be accessed including Parking Mode and Winter Mode.
To hardwire your dash cam, you will need to purchase a hardwiring kit, which typically includes a fuse tap, a ground wire, and a power wire. The hardwiring kit will allow you to connect the camera to a 12V power source in your car. Before you begin hardwiring your dash cam, it is important to read the instructions carefully and make sure you understand the process. If you are not comfortable working with electrical systems, it is best to have a professional install the camera for you.
- Prepare the necessary tools and materials. You will need a dash cam, a hardwiring kit, a fuse tap, a ground wire, a power wire, electrical tape, zip ties, wire cutters, and a circuit tester.
- Locate your car's fuse box. The fuse box is usually located under the steering wheel, in the glove box, or in either front footwell.
- Choose a suitable fuse slot. Select a fuse with a current between 7.5A and 15A. Refer to your vehicle's manual to determine the correct fuse slot that will provide enough power for the dash cam. Some fuse slots are designed to only deliver power when the ignition is turned on.
- Remove the selected fuse using a fuse puller or pliers.
- Insert the original fuse into the empty slot of the fuse tap cable. If you are using an advanced hardwire kit, follow the specific instructions provided with the kit.
- Find a proper grounding spot. Look for a solid metal bolt or screw around the fuse box to connect the ground wire.
- Connect the fuse tap into the fuse slot. Plug the fuse tap cable back into the fuse slot you removed earlier.
- Tie up any excess wire. Use zip ties to secure any loose wires and tuck them away neatly.
- Test your dash cam installation. Insert your key into the ignition and turn it on. If your installation was successful, your dash cam should turn on and begin recording.
By following these steps, you can successfully hardwire your dash cam to your car's fuse box, providing it with a constant power supply even when the car is turned off.
Surveillance Cameras: Evading the All-Seeing Eye
You may want to see also
![]()
Set the camera to parking mode
To set your dashcam to parking mode, you will first need to ensure that it is connected to a constant power source. This is because dashcams typically operate in unison with the vehicle's engine, so they need to be connected to a power source that works even when the engine is off.
There are a few ways to connect your dashcam to a constant power source:
- Hardwire it: This involves connecting the dashcam to the fuse box, which is usually done by a professional. This method keeps the installation tidy, with no loose wires. It is recommended to use a power magic pro or similar brand-specific hard-wire kit to ensure safe use of the parking mode feature.
- Use a dedicated battery pack: This option involves plugging a battery pack into your cigarette lighter socket or hardwiring it to your vehicle's battery. The battery pack will charge as you drive and then power the dashcam when the engine is off. This option is slightly easier to install and has zero chance of draining your car battery, but it can be less tidy and may require additional purchases.
- Plug into your car's 12V socket or USB port: Some dashcams can be powered by simply plugging them into your car's 12V socket or USB port. However, this may not be an option if your car's sockets turn off with the engine.
Once your dashcam is connected to a constant power source, you can enable parking mode. The steps to do this will depend on your specific dashcam model, but here are some general guidelines:
- Consult your dashcam's manual: The manual should provide instructions on how to set up and use the parking mode feature.
- Adjust the settings: In the dashcam's settings, look for an option to enable parking mode. This may be called "parking mode," "parking surveillance," or something similar, depending on the brand.
- Set the voltage threshold: If using a hardwired dashcam or a battery pack, you may need to set the voltage threshold to ensure the dashcam doesn't drain your car battery. For example, it is recommended to set the Power Magic Pro's power threshold to cut off at 12 volts.
- Configure motion detection: Many dashcams in parking mode will only record when motion or impact is detected. You may need to adjust the sensitivity of the motion detection feature to ensure it captures the desired events.
With parking mode enabled, your dashcam will continue to monitor your vehicle even when it is parked and the engine is off, providing peace of mind and valuable evidence in the event of any incidents.
Capturing Camera HDMI Output: Stream to Your Computer
You may want to see also
![]()
Use a dual-camera dash cam to record inside and outside the car
Using a dual-camera dash cam to record inside and outside the car can be very useful. Here's a guide on how to use one and some recommended models:
Setting Up a Dual-Camera Dash Cam
- Decide on the placement of the cameras. The front camera should be mounted high in the center of the windshield, near the rearview mirror, to get a good view of the road ahead. The inside camera can be adjusted to capture the interior of the car, including the driver and passengers.
- Connect the cameras to a power source. Most dash cams can be plugged into the car's 12V DC outlet (cigarette lighter) or hardwired to the car's fuse box. Some models also support external battery packs.
- Adjust the camera settings. Set the resolution, frame rate, and other preferences according to your needs. Most dash cams have buttons and a small screen for adjusting settings, while others may require you to use a smartphone app.
- Test the cameras to ensure they are recording properly. Review the footage to make sure the cameras are capturing clear and detailed video, both during the day and night.
Recommended Dual-Camera Dash Cams
- Vantrue N2 Dual Dash Cam: This dash cam has a front camera that records in 1080p resolution and a cabin camera that records in 720p resolution. It offers a wide viewing angle, capturing more lanes and reducing blind spots. It also has a parking mode that can be triggered by motion detection or time-lapse, making it ideal for monitoring your car when it's parked.
- Nexar Pro: The Nexar Pro is a dual-camera solution that records both the interior and exterior of the vehicle. It captures video in 1080p resolution and performs well in various lighting conditions. The Nexar app allows you to fine-tune settings, generate incident reports, and back up recorded clips to the cloud.
- Viofo A139 Pro: This dash cam has a built-in 4K front camera and an interior camera. It doesn't have a screen, but it offers a compact design and is easy to set up. The rear camera uses an older 1080p sensor, so it may not be ideal if you need the highest resolution for the rear view.
- Miofive Dual Dash Cam: This dash cam features a 4K front camera and a 2K rear camera. It offers built-in GPS, collision warnings, and super capacitor power. It provides clear video quality during the day and night and is easy to set up and use.
Surveillance Camera: Re-installation and Optimization Guide
You may want to see also
![]()
Ensure your dash cam has a built-in voltage monitoring system
To ensure your dash cam is always ready to capture any incidents on the road, it is important to consider its power source. While most dash cams are designed to operate using your vehicle's power, there are models that offer round-the-clock protection, even when your car is off. These dash cams are usually connected directly to your car's battery, but you may want to consider a model with a built-in voltage monitoring system to avoid any unnecessary drain on your vehicle's battery.
A built-in voltage monitoring system in your dash cam will ensure that it automatically shuts off when it detects that your car battery is running low. This is an important feature because leaving your dash cam plugged in when your car is off can lead to increased wear and tear on your car's battery and electrical system. Over time, this could cause your battery to drain faster or even damage your car's wiring.
By choosing a dash cam with a built-in voltage monitoring system, you can leave it plugged in without worrying about battery drain. This feature ensures that the dash cam will only consume a very low amount of power when your vehicle is turned off, and it will automatically shut off before the battery is completely drained.
Additionally, some dash cams with built-in voltage monitoring systems offer a parking mode feature. This means that the dash cam will only activate and start recording when it detects motion or an impact, even when your car is turned off. This can be extremely useful if you want to capture footage of any incidents that occur while your car is parked, without having to worry about constantly monitoring your dash cam or battery life.
Long Exposures: How They Affect Your Camera's Battery Life
You may want to see also
![]()
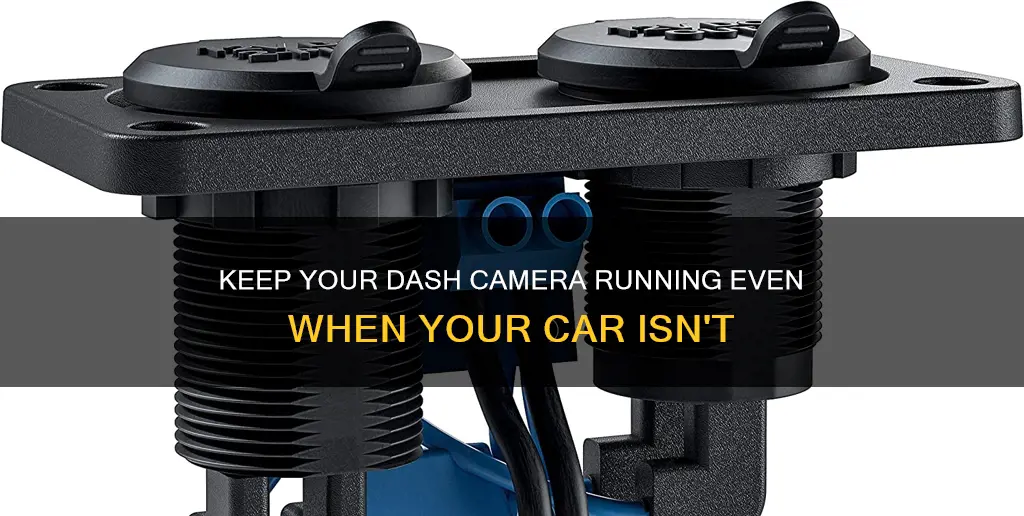
Hardwire your dashcam to the vehicle's electrical system
Hardwiring your dashcam to your vehicle's electrical system is a great way to ensure your dashcam is always on and recording, even when your car is off. This method bypasses the need for a constant power source, like a cigarette lighter, and instead draws power directly from your car's fuse box. Here's a step-by-step guide on how to hardwire your dashcam:
Step 1: Gather Your Tools and Locate the Fuse Box
Before you begin, make sure you have all the necessary tools, such as a circuit tester, fuse puller or pliers, zip ties, and electrical tape. Then, locate your vehicle's fuse box, which is usually found underneath the dashboard on the driver's or passenger's side. You may need to remove some panels or covers to access it.
Step 2: Determine the Correct Fuse Slot
Not all fuse slots are created equal. Avoid slots that control critical functions like airbags, stability control, or the horn. Instead, look for slots that control non-essential functions like the radio, cigarette lighter, or sunroof. Use your circuit tester to find a constant fuse and an ignition-switched fuse.
Step 3: Connect the Hardwire Kit
Once you've identified the correct fuses, it's time to connect the hardwire kit. Typically, the red wire goes to the constant fuse, the yellow to the ignition-switched fuse, and the C-shaped wire is the ground wire. However, some kits may vary, so follow the labels on each cable. Use add-a-fuses and fuse-taps for a more secure and professional installation.
Step 4: Test Your Dashcam
After connecting the wires, plug the kit into your dash cam and start your vehicle. Check if your dashcam powers on and adjust the angle as needed. Ensure that the camera has a clear view of the road and doesn't obstruct your line of sight.
Step 5: Tidy Up the Wires
Once you've confirmed that the dashcam is working properly, it's time to tidy up the cables. Use zip ties and electrical tape to secure loose wires and route them neatly along the interior panels of your car. Make sure no wires are dangling from the dashcam or the fuse box.
Hardwiring your dashcam may seem daunting at first, but with the right tools and instructions, it can be a straightforward process. Always refer to your vehicle's user manual and exercise caution when working with your car's electrical system. If you're unsure, it's best to consult a professional installer.
Loading Camera Batteries: A Step-by-Step Guide
You may want to see also
Frequently asked questions
Most dash cameras do not record when the car is off as they are powered by the car’s cigarette lighter port, which is inactive when the car is not running. However, some dash cams have a "parking mode" feature that allows them to continue recording when the engine is off. These dash cams are typically hardwired to the car's battery.
First, check if your dash cam supports the parking mode feature. If it does, you can enable this feature by activating it in your dash cam settings. Make sure your dash cam is hardwired to your vehicle's electrical system to draw power when the ignition is off. You may need to hire a professional for installation.
Having your dash cam record when your car is off can provide added security and peace of mind. It can capture incidents such as vandalism, hit-and-runs, or theft that may occur when your vehicle is parked, providing invaluable footage for insurance claims and police investigations. Continuous recording also offers around-the-clock surveillance, enhancing the security of your vehicle and parking lot.