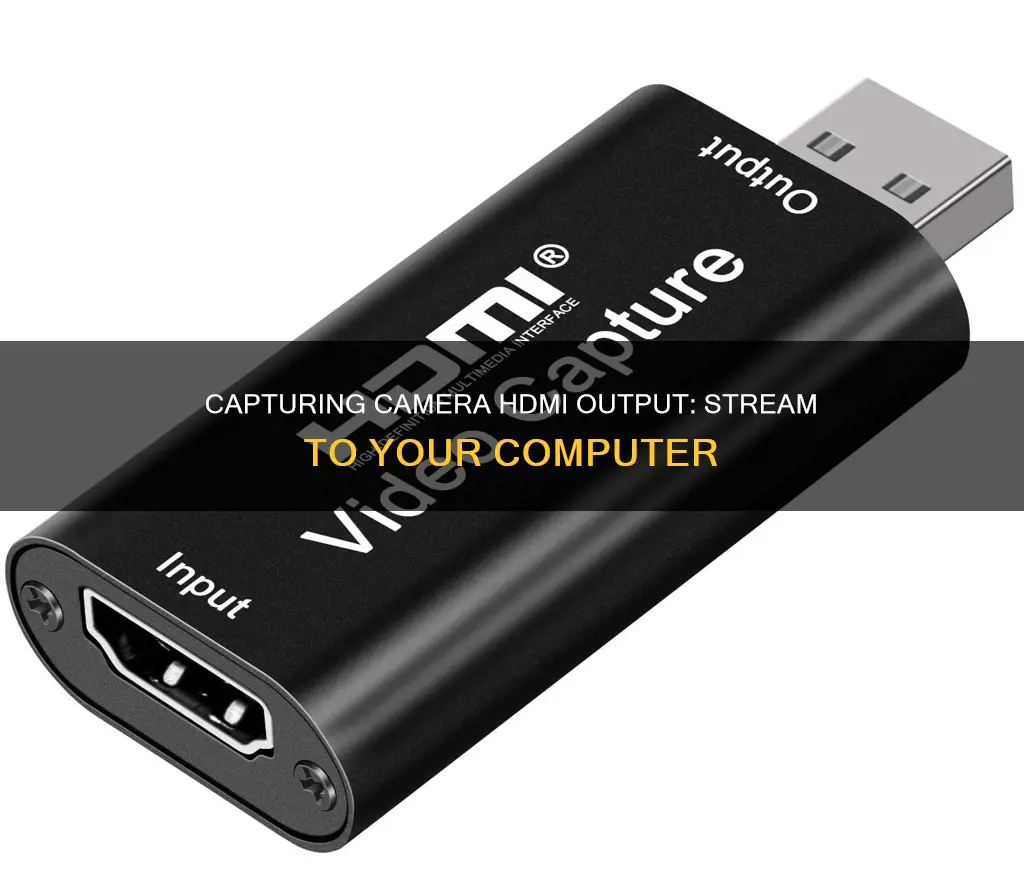
If you want to capture your camera's HDMI output to your computer, you'll need a capture device that connects your camera to your computer via USB. This will allow you to use your camera as a webcam. You'll also need to ensure your camera can output a clean video signal without any UI or graphical menu elements over HDMI. Most modern cameras, from point-and-shoot to professional cinema cameras, should support this. Once you've connected your camera to the capture device and the capture device to your computer, you can use streaming software or your video conferencing app's settings to select the capture device as your video source.
| Characteristics | Values |
|---|---|
| Required hardware | HDMI to USB video capture device, HDMI cable, computer with streaming software installed |
| Camera requirements | Clean HDMI output (without any UI or graphical menu elements) |
| Cable selection | Appropriate length, no adapters needed |
| Capture device | Dongles (plug-and-play, single input/output, limited to Full HD), PCIe cards (require installation in a desktop or separate enclosure) |
| Software | OBS Studio, VirtualCam (Windows), CamTwist (macOS), webcam software provided by camera manufacturer |
What You'll Learn

Use a capture card and recording software
To capture camera HDMI to a computer, you can use a capture card in conjunction with recording software. This method is ideal for streaming and recording high-quality video from your PC. A capture card is a piece of hardware that acts as a broker between your camera and your computer, allowing you to record or stream camera footage.
Step 1: Choose and Set Up Your Capture Card
First, you need to choose a capture card that is compatible with your camera and computer. There are two types of capture cards: external and internal. External capture cards connect to your computer via USB, USB-C, Thunderbolt, or FireWire, while internal capture cards use a PCIe slot on your computer's motherboard. Refer to your capture card's instructions to set it up correctly. Ensure you have the necessary cables, such as HDMI and USB cables, for the setup.
Step 2: Install Necessary Software
Your capture card may require specific software or drivers to function correctly. Download and install any necessary software provided by the manufacturer. Additionally, if you plan to use streaming or recording software, such as OBS Studio, ensure that it is installed on your computer.
Step 3: Connect the Camera to the Capture Card
Use an HDMI cable to connect your camera to the capture card. Plug one end of the HDMI cable into the HDMI output port on your camera, and connect the other end to the HDMI input port on the capture card.
Step 4: Connect the Capture Card to the Computer
Use another HDMI cable to connect the capture card's HDMI output to your computer's HDMI input. Additionally, use a USB cable to connect the capture card to your computer, providing both a video and data connection.
Step 5: Launch the Recording Software
Open the recording software you plan to use, such as OBS Studio or similar programs. In the software, create a new scene or source and select the capture card as the input device. This will allow the software to receive the video feed from the camera through the capture card.
Step 6: Start Recording
Once you have everything set up and connected, you can start recording. Ensure that your camera is turned on and that the capture card is receiving the video feed. Adjust any necessary settings, such as resolution, frame rate, and audio sources, within the recording software.
Step 7: View and Edit the Captured Video
After completing your recording, view the captured video within the recording software or using a separate video player. If needed, you can use video editing software to edit the recorded footage, adding transitions, music, or cutting out unwanted parts.
Using a capture card and recording software provides a reliable and high-quality method for capturing camera HDMI to your computer. This setup is commonly used for streaming and recording gameplay, but it can also be applied to capturing camera footage for video production, archiving, or any other purpose requiring a direct feed from a camera to a computer.
Capturing Sports Action: Keeping Your Camera in Sports Mode
You may want to see also

Use a USB cable to connect the camera to the computer
To connect your camera to your computer using a USB cable, you will need to ensure you have the correct USB cable, a computer with an open USB slot, and your camera. Most point-and-shoot cameras use mini-USB connectors, so ensure you have the correct connector for your camera. Your camera manufacturer should have included the correct USB cable in the box.
First, ensure your computer is on. Next, turn on your camera. The method for doing this will vary depending on the model of your camera, but most cameras allow you to do this from a dial near the top of the camera.
Now, plug the small end of the camera's cable into your camera. The port for this may be hidden under a plastic flap, which may say something like "Video Out". Then, plug the other end of the USB cable into your computer. The USB end is rectangular and should fit into a port on the side of your computer. Ensure that the hollow side of the USB end is on top.
Once the cable is connected to both devices, your camera's drivers should install automatically. You may then see a pop-up window asking what you want to do with the device. You can then choose to import photos, open a folder, or launch software.
Traffic Camera Tickets: Enforceable in AZ?
You may want to see also

Set up a video capture device
To set up a video capture device, you'll need a capture card (hardware) and recording program (software).
If you're using a Windows PC, Bandicam is a recording program that supports almost all video capture cards. It allows you to record various external video sources, including a smartphone, iPhone, or iPad, on your computer.
- Start Bandicam and choose "Device Recording" mode.
- Click the "Device Settings" button and select the device you want to record.
- Click the "Format Settings" button and select the video size, FPS, and color space. If you can't see the screen of the device, install a device driver and select another video size.
- If you can see the screen of the device, click the "REC" button to start/stop the recording.
If you're using a Mac, you can download and install Debut Video Capture Software. Once installed, open the program and click on the webcam icon. The live feed of the camera should now display. If this doesn't work, go to Preferences, then Video. Under Webcam, select 'AV to USB'. Now go to Audio and select the same thing. If it still doesn't work, try using the device in a different USB port on your Mac.
For live streaming using a camcorder with an HDMI output port, you'll need the following:
- A camcorder with an Auto Shut Off (A. Shut Off) Power Save option in the menu. Set the Auto Shut Off feature to "Off" or "Never" to prevent it from turning off while live streaming.
- An HDMI to USB video capture device and an HDMI cable.
- A computer with streaming software installed.
- Connect one end of the HDMI cable to the camcorder's HDMI output and the other end to the HDMI input of the video capture device.
- Connect the video capture device to the computer using a USB cable.
- Turn on the camcorder by moving the POWER switch to the CAMERA position.
- Open the video/audio settings of the capture/streaming software on your computer. The software should recognize the video capture device and your camcorder as a webcam.
- You should then see the live stream from the camcorder on your computer display.
Additionally, if you're using an external microphone, select the proper device in the audio settings of your computer. If the camcorder menu appears on the stream, turn off the display by navigating to HDMI Settings > HDMI Info. Display > Off.
Instax Cameras: Where Are They Manufactured?
You may want to see also

Use a mount or tripod
Using a mount or tripod is a great way to stabilise your camera and improve the quality of your images. Here is a step-by-step guide on how to use a tripod:
Step 1: Check your camera has a tripod mount
Most modern cameras are tripod-capable, with a small hole with screw threads located on the bottom of the camera. This is usually about 1/4 inch in diameter. If your camera has no mount, you won't be able to attach it to a tripod.
Step 2: Prepare the tripod
Remove the camera plate from the tripod. The plate is the piece that fixes the camera to the tripod. It should have a quick-release clip or lever. Check that the plate has the same size screw as your camera. If not, you may need to buy a new plate.
Step 3: Set up the tripod
Adjust the legs so that the tripod stands stably on the ground. Release the tensioners and raise the legs to the desired height. You can attach the camera before setting up the tripod, but it will be safer if you set up the tripod base first.
Step 4: Mount the camera
Screw the camera onto the tripod, either directly or by clamping it into place. Tighten any screws to hold the camera steady. The connection should be snug, but not overtightened. Some tripods have a screw-head on the underside of the plate, which you will need to tighten.
Step 5: Re-attach the camera plate
If you removed the camera plate, make sure to re-attach it so that you can use the tripod. Pull back the quick-release lever, fit the plate onto the tripod head, and release the lever.
Step 6: Take your pictures!
You should be able to swivel the camera on the tripod for pan shots. Before taking photos, check that the lens is angled as you want it and that the tripod is stable and level.
Tips:
- If you're still having trouble with unsteady images, try hanging your camera bag from the centre column of the tripod to stabilise it.
- If you don't have a tripod, stabilise your camera by holding it with both hands, or by resting it against a wall, on the ground, or on a bag or beanbag.
Hacking Computer Cameras: Easy Access or Secure?
You may want to see also

Use a dummy battery to plug the camera into power
Dummy batteries are a great solution for powering your camera without the hassle of constantly changing or charging batteries. They are especially useful for live streaming and long video shoots. A dummy battery is a power adapter that fits into your regular camera battery slot. It has a cable that can be plugged into a power outlet, such as a wall plug or a USB outlet. This provides a constant power supply to your camera, preventing it from shutting off unexpectedly or overheating due to battery issues.
When choosing a dummy battery, it is important to ensure that it is compatible with your camera. Check the voltage and power requirements to make sure they match your camera's specifications. Using an incompatible dummy battery can damage your camera. You can find dummy batteries on Amazon, at your local camera shop, or directly from your camera's manufacturer.
Some popular dummy batteries include:
- F1TP AC-PW20 Dummy Battery Kit: Compatible with Sony Alpha A6500, A6400, A6300, and other models. It offers multiple protections such as overcharge, overvoltage, and short circuit protection.
- Kimaru LP-E10 Dummy Battery: Compatible with Canon cameras. It features an anti-interference magnetic ring, an LED indicator, and a long cable. It also has various certifications and protections.
- Gonine AC-PW20: Compatible with Sony Alpha NEX-5, NEX-3, and other models. It is made of high-quality plastic and offers two voltage settings. It has a capacity of 4,400mAh, providing up to 6 hours of continuous use.
- Raeisusp EH-5A: Compatible with Nikon V1, D850, D810, and other models. It is made of durable ABS plastic and has an LED indicator. It also offers overcharge and short circuit protection.
- Gonine DMW-DCC8: Compatible with Panasonic Lumix DMC-G7, DMC-G85, and other models. It has a slim and lightweight design, a 7.4V DC output, and a capacity of 1800 mAh. It includes overcharge, over-discharge, and short circuit protection.
It is important to note that while dummy batteries are convenient, they should not be left plugged in 24/7. Always turn off all equipment when not in use. Additionally, be cautious when turning off your camera by disconnecting the power cord, as it may cause unpredictable behaviour and potential damage. It is recommended to use the camera's power switch to shut it down properly.
Fighting Camera Tickets: Your Rights in New Orleans
You may want to see also
Frequently asked questions
You will need a capture device to connect your camera to your computer. Look for an HDMI capture device that connects to your computer via USB and is designed for live video.
A capture device takes a video input via HDMI and outputs data to a computer via USB. The video coming through the capture device can then be used instead of a webcam, output to streaming software, or recorded.
Bandicam Device Recorder supports almost all video capture cards that work in Windows 7, 8, or 10. Blackmagic Design UltraStudio 4K Mini Thunderbolt™ 3 Capture & Playback Unit is another option that can be used with a dongle or PCIe card.


