Connecting a camera to a computer can be useful for transferring photos, editing videos, or using it as a webcam. The process may vary depending on the type of camera and computer you have, but here are some general steps to connect a camera to a computer:
First, check the ports on your camera and computer. Most digital cameras have a USB port, while some may also have an HDMI or mini-HDMI port. For the computer, you may need a USB-A, USB-C, or HDMI port to connect to the camera. If the ports don't match, you may need an adapter or a cable that can convert the signals.
Once you have the right ports and cables, turn off your camera and turn on your computer. Plug one end of the cable into your camera and the other end into your computer. Then, turn on your camera and switch it to the appropriate mode, such as playback, PC, or webcam mode. Your computer should automatically detect your camera and install the necessary drivers. You may see a pop-up window asking what you want to do with your camera, such as importing photos, opening a folder, or launching software.
If you need to transfer photos, you can use built-in photo apps like Windows Photos or Mac Photos. For video editing, you can use software like Windows Movie Maker or iMovie. If you want to use your camera as a webcam, you can use software like SparkoCam or Camera Live.
Additionally, make sure you have the correct USB cable for your camera. Most point-and-shoot cameras use mini-USB connectors, so be sure to get the right cable for your camera model.
| Characteristics | Values |
|---|---|
| Connection type | USB cable, wireless Wi-Fi, wired LAN |
| Camera power | On |
| Computer power | On |
| Camera mode | Playback, PC, or webcam |
| Computer OS | Windows or Mac |
| Software | Windows Photos app, Mac Photos app, SparkoCam, Camera Live, EaseUS RecExperts |
What You'll Learn
![]()
Connect camera and computer with a USB cable
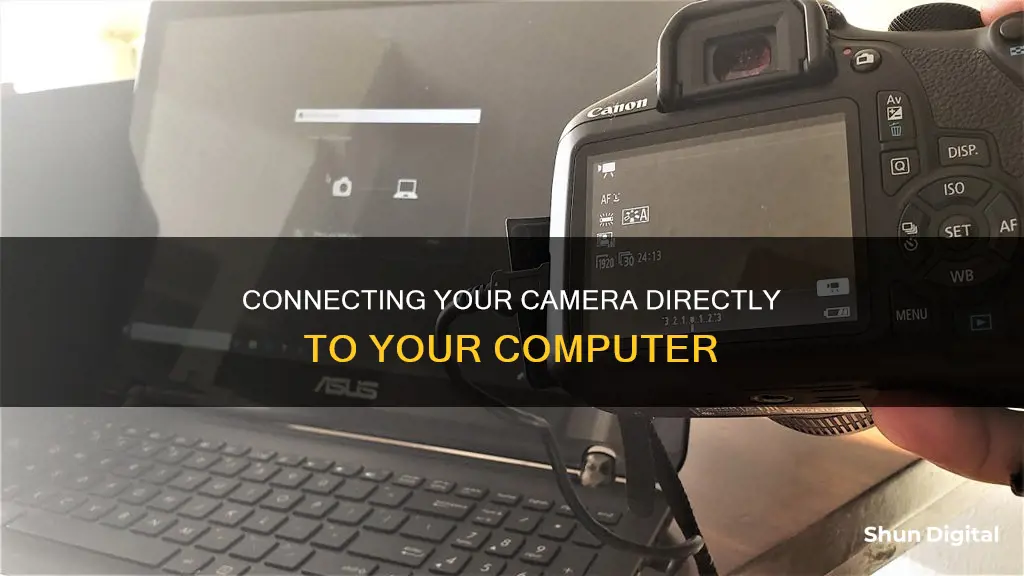
Connecting your camera to your computer is a great way to transfer photos and videos, or even use your camera as a webcam. Here is a step-by-step guide on how to connect your camera and computer with a USB cable.
Firstly, ensure that your camera is turned off and your computer is powered on. Check that your camera and computer have compatible USB ports. Most digital cameras have a USB port, and some may also have an HDMI or mini-HDMI port. For computers, you may need a USB-A or USB-C port. If you don't have matching ports, you may require an adapter or a cable that can convert the signals.
Now, let's connect the devices. Gather the correct USB cable for your camera. Most point-and-shoot cameras use mini-USB connectors, so ensure you have the right cable for your camera model. The camera manufacturer should have included the correct cable in the box. If not, you may need to purchase one.
Next, locate the USB slot on your camera. This can sometimes be hidden behind a panel or door, so refer to your camera's user guide if needed. With the correct cable, connect one end to your camera. Ensure that the USB connector is aligned correctly with the USB slot; forcing it may damage the cable and camera.
Then, connect the other end of the USB cable to your computer. The USB port is usually located on the side of the computer or CPU for desktop units. Once the cable is connected to both devices, turn on your camera. You may also need to press the photo playback button, which is usually marked with a play icon.
If everything is connected correctly, your camera may display a “connecting” message on its LCD screen. On your computer, a pop-up window may appear with photo-downloading instructions. Follow the prompts and select "Download" or "Save".
You may also need to install the necessary software for your camera. Most newer computers should automatically recognize and find the camera, but if not, you can insert the CD that came with your camera and follow the on-screen installation instructions. Alternatively, you can usually find the required software on the manufacturer's website.
Once the connection is established, you can transfer photos, edit videos, or use your camera as a webcam. Enjoy the benefits of having your camera connected to your computer!
Understanding AE Mode: Camera's Auto Exposure Explained
You may want to see also
![]()
Use software to access your camera
Once you have connected your camera to your computer, you may need to use software to access its features and functions. The software you use will depend on what you want to do with your camera.
If you want to transfer photos, you can use the built-in Windows Photos app or the Mac Photos app. If you want to edit videos, you can use video editing software like Windows Movie Maker or iMovie. If you want to use your camera as a webcam, you can use software like SparkoCam or Camera Live, which can turn your camera into a virtual webcam.
If you are using a Windows PC, you can also use the Camera app to take photos and videos. To find the Camera app, select Start > Camera. You can also change some options for your camera in Settings, like showing grid lines to help you compose a photo or including location information in your photos.
If you are using a Mac, you can use the Preview app to view and edit images. You can also use an editing application like Adobe Photoshop to perform edits.
Additionally, if you are using a security IP camera, you can use surveillance software like Reolink Client to view and manage your camera on your computer.
Disrupting Surveillance Cameras: Effective Ways to Distort Their Vision
You may want to see also
![]()
Check your camera and computer ports
Before connecting your camera to your computer, it is important to check what kind of ports they have. Most digital cameras have a USB port that can be used for connection. Some cameras may also have an HDMI or a mini-HDMI port that can transmit video and audio signals. Depending on your computer, you may need a USB-A, USB-C, or HDMI port to connect to your camera.
If your camera and computer do not have matching ports, you may need to use an adapter or a cable that can convert the signals. For example, if your camera has a mini-HDMI port and your computer only has a standard HDMI port, you will need an adapter or a cable that can convert the mini-HDMI signal to HDMI.
Additionally, different types of USB cables exist, such as mini-USB connectors, so ensure you have the correct type of USB cable for your camera and computer. Your camera manufacturer should have included the correct USB cable in the box. If not, you may need to purchase the correct cable.
Once you have the right ports and cables, you can proceed with connecting your camera and computer.
Spare Camera Battery: Safe and Easy Transport Tips
You may want to see also
![]()
Install the drivers for your camera
To install the drivers for your camera, follow these steps:
Firstly, ensure that your camera is connected to your computer via a USB cable. The small end of the cable plugs into your camera, while the rectangular USB end plugs into a port on your computer.
Next, turn on your camera. The process for turning on a camera varies depending on the model, but typically, you can do this by using a dial near the top of the camera.
With the camera turned on and connected, your computer should now begin installing the necessary drivers. This may take a few minutes, especially if it is your first time connecting the camera.
Once the drivers are installed, a pop-up window will usually appear, asking you what action you would like to take with the connected device. You may be given options such as importing photos, opening a folder, or launching specific software.
If your computer fails to recognise your camera, you may need to install the camera's software manually. This can often be done by inserting the CD that came with your camera and following the on-screen installation instructions. Alternatively, you can usually find the necessary software on the manufacturer's website.
By following these steps, you should be able to successfully install the drivers for your camera and establish a connection between your camera and computer.
Charging Vintage Camera Gear: 1990s Battery Revival
You may want to see also
![]()
Install the required app
To install the required app for connecting your camera to your computer, follow these steps:
Firstly, identify the make and model of your camera. Different camera models may have different connection methods and requirements. Check your camera's user manual or website for specific instructions.
Next, locate the necessary components. You will typically need a USB cable, a computer with an available USB slot, and your camera. Ensure you have the correct type of USB cable for your camera. Many point-and-shoot cameras use mini-USB connectors, so be sure to get the right one. The correct cable should have been included in the box with your camera.
Now, find the USB slot on your camera. This step can be a little tricky, as camera manufacturers sometimes hide the slot behind a panel or door, designed to blend in with the camera's overall style. Look for a USB logo on the camera, or near the panel. The USB slot may be in the same compartment as the battery and memory card, so check the sides and bottom of the camera. If all else fails, consult the camera's user guide.
Connect the USB cable to your camera. The USB connector should slide in fairly easily without needing to be forced. Ensure that the connector is aligned correctly with the slot, as forcing it in the wrong way can damage the cable and the camera. Make sure that any panel or door protecting the USB slot is fully open, so that it doesn't get pinched by the cable.
Now, connect the other end of the USB cable to your computer. It should have a standard USB connector, which will fit into a standard USB slot.
With the cable connected to both devices, power on your camera. You may also need to press the photo playback button, usually marked with a play icon.
Your camera may now give you a "connecting" message on its LCD screen. Your computer should also recognise the new connection and attempt to install the necessary drivers. You may see a pop-up window with photo-downloading instructions, or asking what you want to do with your camera.
If your computer does not automatically recognise your camera, you may need to install the camera's software manually. This may have been included on a CD that came with your camera, or you can likely find it on the manufacturer's website.
Once the connection is established and any necessary software is installed, you can launch your camera's software and begin using your camera with your computer.
Waterproof Camera Secrets: How Are They Made?
You may want to see also
Frequently asked questions
You can connect your camera to your computer using a USB cable, a wireless Wi-Fi connection, or a wired LAN connection. First, check that your camera is turned on and that your computer is powered up. Then, plug the small end of the camera's cable into the camera, and the other end into your computer's USB port.
You can purchase a USB cable at most electronics stores. Be sure to check your camera's user manual to find the correct type of cable for your camera.
Once your camera is connected, you should see a pop-up window on your computer that will give you options for downloading photos. Select an option and follow the prompts to download or save your photos.