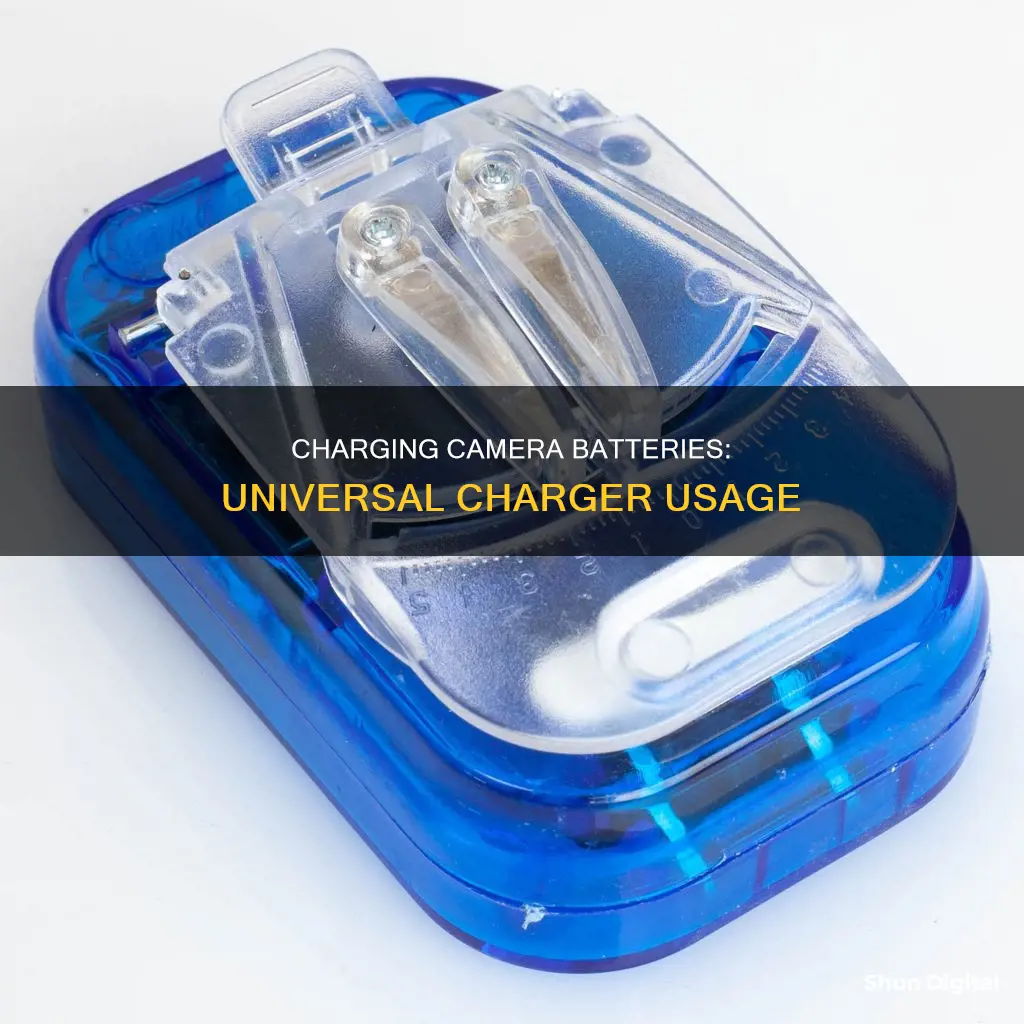
Universal camera battery chargers are a convenient way to charge your camera batteries, especially if you have different types of camera batteries or are always on the move. These chargers are compatible with a variety of camera batteries of different sizes and brands and can be a lifesaver when you are travelling or on a shoot with limited access to multiple chargers. Here is a simple guide to help you charge your camera battery using a universal charger.
| Characteristics | Values |
|---|---|
| Compatibility | Confirm the compatibility of the universal charger with your camera battery. Check the manufacturer's compatibility list and set the correct voltage and current parameters. |
| Charging Connector | Identify the negative and positive ends of the charging connector, usually marked with + and - signs. |
| Charging Slot | Place the camera battery into the charging slot, ensuring it fits securely and won't slip out. Some universal chargers have spring-loaded slots for wider adaptability. |
| Power Source | Plug the charger into a wall outlet to start charging. |
| Charging Status | Monitor the charging status through an LED indicator or LCD screen, which shows the progress and helps prevent overcharging or undercharging. |
| Self-Protection | Check for safety features like temperature control, reverse polarity protection, and automatic shut-off to prevent overcharging, overheating, or short circuits. |
| Charging Environment | Charge the battery in a cool, well-ventilated space, avoiding extreme heat, combustible objects, and direct sunlight. |
| Battery Maintenance | Keep battery connections clean, store batteries in a cool, dry place when not in use, and avoid continuous charging of fully charged batteries to prevent deterioration in performance. |
What You'll Learn
- Confirm compatibility: Check the manufacturer's compatibility list and set the correct voltage and current parameters
- Identify charging connector: Locate the positive and negative ends, usually marked with + and – signs
- Insert battery: Place the camera battery into the charging slot, ensuring it won't slip out
- Plug into power: Connect the charger to a wall outlet and begin charging
- Monitor charging: Keep an eye on the LED indicator to track the charging progress and prevent overcharging

Confirm compatibility: Check the manufacturer's compatibility list and set the correct voltage and current parameters
When using a universal charger, it is important to confirm compatibility with your camera battery. While universal chargers support a wide range of camera batteries, it is crucial to verify the manufacturer's compatibility list. This is because different camera batteries have different voltage and current requirements. By checking the compatibility list, you can ensure that the charger's voltage and current parameters are set correctly for your specific camera battery.
To confirm compatibility, start by identifying your camera battery model and the manufacturer's compatibility list. This list will specify the supported battery types and provide information on the required voltage and current settings. It is essential to match the voltage and current settings of the universal charger to those specified for your camera battery.
Most camera batteries have a voltage range between 3.7 and 7.4 volts. However, it is always advisable to consult the specifications of your particular battery brand. By setting the universal charger to the correct voltage, you can ensure safe and effective charging, preventing any potential harm to your camera or battery.
In addition to voltage, it is crucial to select the appropriate current setting for your camera battery. The current configuration determines the rate at which the battery charges. Choosing a current setting within the recommended range is vital to avoid overcharging or overheating the battery. If the current being charged is higher than recommended, it can lead to overheating and possible damage to the battery. Conversely, charging at a lower current may result in slower charging times.
By taking the time to confirm compatibility and set the correct voltage and current parameters, you can safely and effectively charge your camera battery using a universal charger. This will protect your equipment and ensure optimal charging performance.
Charging Vintage 8mm Cameras: A Step-by-Step Guide
You may want to see also

Identify charging connector: Locate the positive and negative ends, usually marked with + and – signs
When identifying the charging connector of your camera battery, it is important to locate the positive and negative ends, usually marked with + and – signs. These markings are standard across most batteries and are essential to know when charging to avoid mixing up the connectors, which could lead to damage.
The positive terminal is typically marked with a plus sign (+) or coloured red. On some batteries, the positive terminal may be slightly raised or have a different shape or size compared to the negative terminal. For example, the positive terminal on a car battery is usually larger in size than the negative terminal, with a wider diameter and thicker conductive metal. This distinction is important as it increases stability and contact for the charge-delivering cable.
The negative terminal, on the other hand, is marked with a minus sign (-) or coloured black. In some cases, the negative terminal may be slightly recessed compared to the positive terminal.
In addition to the markings and colour-coding, you can also look for other indicators such as size, shape, and position. The positive terminal may have a larger or more prominent metal contact area. It is also important to ensure that the battery and its compartment are clean and dry before charging to avoid poor connections or corrosion.
If the markings on your battery are unclear or difficult to read, you can use a multimeter or voltmeter to confirm the polarity. Set the multimeter to DC voltage mode and touch the red probe to one terminal and the black probe to the other. If the multimeter shows a positive value, the red probe is on the positive terminal, and vice versa.
By carefully inspecting the markings, colour-coding, size, and shape of the terminals, you can accurately identify the positive and negative ends of your camera battery, ensuring safe and proper charging.
Charging Your 808 Camera: How Long is Too Long?
You may want to see also

Insert battery: Place the camera battery into the charging slot, ensuring it won't slip out
When charging a camera battery with a universal charger, there are several steps to follow. One of the most important is inserting the battery correctly to ensure it charges efficiently and securely.
First, confirm the compatibility of the universal charger with your camera battery. Most universal chargers are compatible with multiple battery types, but it is always worth checking the manufacturer's specifications. You should also ensure the charger's voltage and current parameters are set correctly for your battery.
Once you have confirmed compatibility, you can prepare to insert the battery. Find the charging connector and distinguish the negative and positive ends. The camera battery contacts are usually marked with a plus (+) and minus (-) sign. Some chargers may have spring-loaded slots for wider adaptability.
Now you are ready to insert the battery. Place the camera battery into the charging slot, ensuring it fits snugly and won't slip out. Check that the battery is securely seated in the slot. Some batteries may not fit perfectly, so it is important to make sure it is firmly in place before proceeding.
Once the battery is securely in the slot, you can proceed to the next step of plugging the charger into a power source, such as a wall outlet. Always follow the manufacturer's instructions and recommendations for charging times and safety precautions to ensure the best performance and longevity of your camera battery.
By carefully inserting the battery and following the charging instructions, you can ensure your camera battery charges effectively and securely, keeping your camera powered and ready for use.
Charging Eufy Cameras: A Step-by-Step Guide
You may want to see also

Plug into power: Connect the charger to a wall outlet and begin charging
To charge your camera battery with a universal charger, you'll need to plug the charger into a power source. Here's a detailed guide on how to do this:
Plug into Power:
To begin charging your camera battery, you'll need to connect your universal charger to a power source. Most universal chargers come with a power cord that can be plugged directly into a wall outlet. Simply take the charger and locate the end of the power cord that should be attached to the charger. If it's not already connected, carefully insert the connector into the appropriate slot on the charger until it clicks into place. Now, take the other end of the power cord, which should have a standard wall outlet plug, and plug it into an available outlet in your home. Make sure the outlet is easily accessible and not obstructed by furniture or other objects. Once the charger is plugged in, you can move on to the next step of placing your camera battery in the charger.
It's important to note that some universal chargers may have different power input options. Some might use a USB connection, while others might have interchangeable plugs for different regions. Always refer to the instructions that came with your charger to ensure you're using the correct power input method for your specific charger.
If you're using a power strip or an extension cord, make sure it can handle the power requirements of the charger. Additionally, ensure that the power outlet you're using is functioning properly by testing it with another device or appliance. This will help you determine if the outlet is working or if there might be a problem with it.
Once you've confirmed that the charger is properly plugged into a working outlet, you can proceed to the next steps of charging your camera battery with your universal charger. Remember to follow the specific instructions provided with your charger for the best and safest results.
Simplisafe Outdoor Camera: Charging Frequency Explained
You may want to see also

Monitor charging: Keep an eye on the LED indicator to track the charging progress and prevent overcharging
When charging your camera battery with a universal charger, it's important to monitor the charging process to ensure your battery charges efficiently and safely. LED indicators are a standard feature on most chargers and provide visual cues to help you understand the charging status and any potential issues.
LED indicators are usually designed with colours and patterns to indicate the charging progress. For example, a green light typically signals that your charger is working effectively and your battery is actively charging. Some chargers may also have a flashing green light or a green bar that gradually fills up to indicate that your battery is almost fully charged. A red light, on the other hand, often indicates an issue with the charging process, such as a faulty connection or overheating. It could also mean that your battery is too low on charge to charge properly and may need to be left on the charger for an extended period to recover.
Blue lights or indicators are also common in chargers. A solid blue light often indicates that your battery is fully charged, while a flashing blue light could signal an issue between the charger and the battery, possibly due to dirt or corrosion. Additionally, an orange or yellow flashing light could indicate overheating or that your battery is full and can no longer accept a charge.
By keeping a close eye on the LED indicator, you can prevent overcharging. Overcharging can lead to serious battery health concerns, causing the battery to swell or melt. It can also create volatile hydrogen within the sealed cells, turning them into bad cells. To avoid overcharging, pay attention to the LED indicator and unplug your battery once it reaches the fully charged status.
Charging Your ADT Doorbell Camera: How Long Does It Take?
You may want to see also


