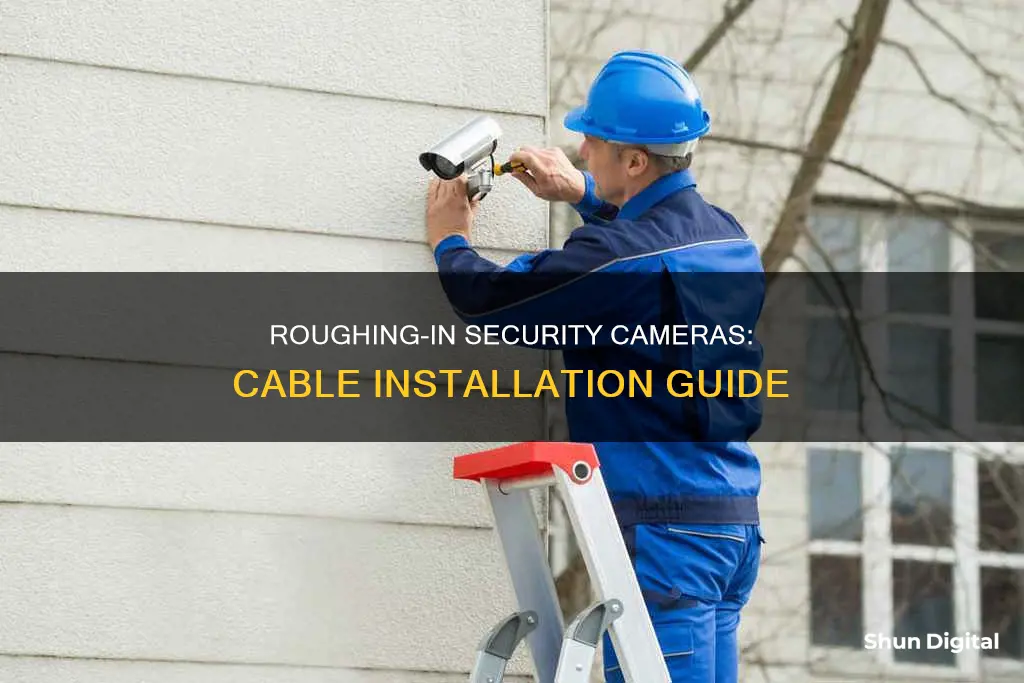
Installing security cameras can be a complicated process, but with careful planning and the right tools, it can be a successful DIY project. The first step is to decide on the number of cameras and their locations, taking into account factors such as the desired angle, height, and potential obstacles. The next step is to gather the necessary tools and materials, including cables, connectors, drills, and fish tape. With these preparations complete, the installation process can begin, starting with drilling holes and running cables to each camera location, followed by connecting the cables to the DVR box and installing the cameras themselves. Proper cable management and protection from the elements are crucial to ensure the system's performance and longevity.
| Characteristics | Values |
|---|---|
| Installation type | POE security camera wiring, wireless security camera wiring |
| Installation location | Indoors, outdoors |
| Installation tools | Drill, spade bits, masking tape, monitor, mouse, keyboard, fish tape |
| Installation steps | Design central surveillance hub, turn off power, drill holes, attach wires, run cables, install cameras, connect cables |
| Cable type | Cat 5/6 security camera wires, RG-59 BNC connectors, coaxial wires, ethernet cable |
| Cable management | Use conduits, avoid heat and high voltage, avoid tight corners, use electrical boxes |
| Cable length | Measure cable run, add 5 feet to total, coil excess cable |
What You'll Learn
![]()
Decide on a central location for your cables to meet
When installing a security camera system, it is essential to decide on a central location for your cables to meet. This location, often referred to as the central surveillance hub, NVR (Network Video Recorder), or DVR (Digital Video Recorder), serves as the central meeting point for all your camera cables. Here's a detailed guide to help you choose the right location:
First, it is important to select a location that is easily accessible. This accessibility will make the wiring process more convenient and comfortable. Attics or areas near your internet router are often ideal choices for the central surveillance hub. By choosing a central location that is easy to reach, you can avoid messy wiring and make future maintenance or adjustments simpler.
Next, consider the distance between the cameras and the central hub. Measure the distances and ensure you have enough cable length to reach each camera location. If needed, you can use cable extenders to bridge longer distances. Planning the wiring route in advance will help you avoid complications during installation.
Additionally, when deciding on a central location, keep in mind that you will need to connect the DVR or NVR to a monitor for viewing the footage. Choose a location that allows for easy connectivity to the monitor, preferably without requiring excessive cable lengths.
Furthermore, it is advisable to choose a location that is relatively discreet and secure. While the central surveillance hub should be accessible, it is also important to minimise the visibility of your security system's core components to potential intruders. If possible, opt for a location that can be concealed or tucked away to enhance the overall security of your setup.
Lastly, ensure that the chosen location has adequate power outlets to support the DVR or NVR and any other necessary equipment. The central surveillance hub will require a reliable power source to function effectively.
By carefully considering these factors, you can decide on a central location for your security camera cables that is accessible, well-organised, and secure, ultimately enhancing the effectiveness of your surveillance system.
Stream Camera Focus: Keep Your Face in Frame
You may want to see also
![]()
Choose the right cable type for your cameras
Choosing the Right Cable Type for Your Cameras
The right cable type for your surveillance cameras depends on several factors, including the type of cameras you have, the distance between cameras and the recording device, the resolution of the cameras, and your budget. Here's a detailed guide to help you choose the best cable type for your setup:
Coaxial Cables
Coaxial cables, often referred to as coax, are a popular choice for connecting security cameras. They consist of a copper core surrounded by insulation, a metal shield, and an outer protective cover. Coaxial cables are known for their durability and ability to transmit signals over long distances. They are suitable for both analog and high-definition digital video transmissions.
The most common type of coaxial cable used in security camera installations is the RG59 Siamese cable, which combines a coaxial cable and a power cable in a single casing. This design allows for easy video and power transmission for BNC cameras. The RG59 cable is thick enough to carry signals over most sites while being thin enough to facilitate easy installation.
Another option is the RG6 cable, which is thicker and offers better signal transmission, making it ideal for longer cable runs or installations requiring higher bandwidth. RG6 cables are recommended for higher-definition camera systems.
Ethernet Cables
Ethernet cables, also known as network cables, are primarily used for network connections. However, they can also be used for transmitting video signals from security cameras, especially IP (Internet Protocol) cameras. Ethernet cables are made of twisted pairs of copper wires encased in an outer jacket.
The most common types of Ethernet cables used with security cameras are Cat5, Cat5e, and Cat6. Cat6 cables offer faster data transmission speeds and improved signal integrity compared to Cat5 and Cat5e cables.
Ethernet cables can be used with Power over Ethernet (PoE) technology, which allows for the transmission of both data and power over a single cable. This eliminates the need for separate power cables and simplifies the installation process. PoE technology is particularly useful when powering IP cameras.
Factors to Consider
When choosing the right cable type for your surveillance cameras, consider the following factors:
- Distance: Determine the maximum distance between your cameras and the recording device or network switch. Different cable types have varying distance limitations, so choose a cable that can reliably transmit signals over the required distance.
- Bandwidth: Consider the resolution and image quality of your cameras. Higher-resolution cameras require cables with greater bandwidth capacity to ensure optimal performance.
- Power Requirements: If your cameras support PoE, using PoE-compatible cables can simplify the installation by combining power and data transmission. Otherwise, ensure that your chosen cable can handle the power requirements of your cameras.
- Environmental Conditions: If your cameras will be installed outdoors or in harsh conditions, choose cables specifically designed for outdoor use, with weather resistance, shielding, and durability.
- Compatibility: Ensure that the connectors on the cable match those on your cameras and recording devices.
- Future Expansion: Consider the possibility of expanding your security camera system or upgrading to higher-resolution cameras in the future. Choose cables that can support these expansions to avoid the need for replacement.
- Budget: Compare the prices of different cables while considering their features and capabilities. Opt for cables that offer the best balance of affordability and performance for your specific requirements.
Extend Tasco Trail Camera Battery Life
You may want to see also
![]()
Plan your cable route carefully, avoiding power lines
When planning your cable route, it is imperative to avoid running cables near power lines. This is not just a best practice but is mandated by nationwide building codes. The AC power running through power lines can completely destroy quality video signals. The power lines create noise which can be induced into the video cable, causing poor performance.
Therefore, when planning your cable route, be sure to avoid running cables near or attaching them to building power lines. Do not run camera video cables or power cables in the same conduit as power lines.
Additionally, avoid running cables near or over lighting fixtures, especially fluorescent lights. The power noise created by the operation of such lights can cause your video or network cables to become an antenna for the noise and will cause problems.
Charging Camera Batteries: A Step-by-Step Guide
You may want to see also
![]()
Measure each cable run, adding 5ft to the total
Measuring cable length accurately is crucial for ensuring you have enough cable to complete the installation of your surveillance system. The first step is to measure each cable run from the camera location to the video recorder, taking into account any vertical distances up or down walls.
It is recommended to add about 5 feet to the total length you think you need. This buffer helps accommodate any unexpected requirements and ensures you don't end up with cables that are too short. Having a bit of extra cable is preferable to having too little, as it can be neatly coiled up in the attic or above a drop-tile ceiling. This practice does not cause issues with Cat5 or Cat6 network cables, but for Coax Siamese cables, avoid coiling more than 10 feet together to prevent potential resistance to power flow.
Additionally, consider using premade cables if possible, as the factory fittings are often of higher quality than field-made ones. If you're working with bulk cable, you can estimate the length by checking the markings on the cable jacket, which indicate the length from the start of the original cable.
For outdoor cable runs, you may need to account for additional length if you plan to use sprinkler pipes or conduit to protect the cables from the elements and potential damage.
Action Camera Car Mode: What's the Deal?
You may want to see also
![]()
Use pre-made cables if possible
When installing surveillance cameras, it is recommended to use pre-made cables if possible. The factory fittings on pre-made cables are likely to be of higher quality than those made in the field. They will also have a little extra cable, which can be coiled up in the attic or above a drop-tile ceiling. This ensures a clean run at the camera and video recorder locations.
Premade cables are also known as plug-and-play cables and are set up with colour-coded connectors that are already attached. They are also thin and flexible, making them easy to install regardless of your level of expertise.
However, plug-and-play cables are usually sold in fixed lengths, making it difficult to tailor to exact site specifications. They are also more expensive and unshielded, making them prone to electromagnetic interference.
Focusing Non-SLR Cameras: Easy Tips for Sharp Shots
You may want to see also
Frequently asked questions
It is recommended to use a conduit to protect the cables. Drill a hole, feed the cables through, and seal with outdoor-rated silicone caulking.
All wires should gather at a common spot. Use a central wiring closet or hub for the cables and ensure easy access for connections.
Regular power drills with basic drill bits are sufficient for drilling through stucco walls.
Some common mistakes include: mounting cameras too high, poor image quality, overestimating motion detection, placing cameras behind windows, and using dome cameras outdoors.