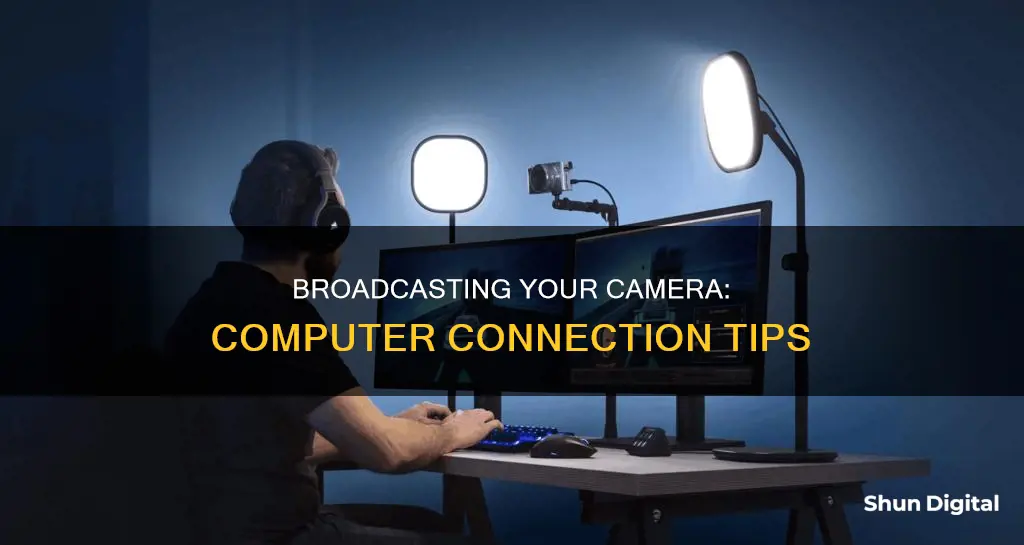
Broadcasting a camera on a computer is a great way to connect with your audience and can be done in a few simple steps. First, you'll need to ensure you have a camera to connect to your computer. This could be a built-in camera, an external USB webcam, or even a DSLR or mirrorless camera. Once you have your camera set up, you can use live streaming software or a platform like YouTube or Facebook Live to start broadcasting. You may also need to adjust your camera settings and test your setup to ensure a smooth broadcast.
| Characteristics | Values |
|---|---|
| Purpose | Live streaming, video calling, recording videos, taking photos |
| Equipment | Computer with a built-in camera or connected webcam/camera, broadcasting software, stable internet connection, tripod, ring light, microphone |
| Software | OBS Studio, YouTube, Facebook Live, SparkoCam, Dacast |
What You'll Learn
![]()
Use OBS Studio to encode a stream
OBS Studio is a free and open-source streaming software that many broadcasters use for mixing and producing live video content. It is a great software encoder option with many use cases. OBS Studio is not just limited to live streaming; it is also a powerful tool for screen capture. OBS Studio is an invaluable resource for anyone looking to maintain exceptional video recording quality in the content they create.
To use OBS Studio, you must first set it up to flow with your streaming setup. The OBS Auto-Configuration Wizard is available to automatically determine the proper settings for your computer and streaming solution. The wizard will take into account your internet upload speed, processor capabilities, and desired video quality to recommend the best OBS settings for recording.
- Download OBS Studio: Head over to the official OBS website and download the latest version of the software for your operating system.
- Run the OBS Auto-Configuration Wizard: Upon launching OBS software for the first time, follow the on-screen instructions to provide details about your internet connection, desired streaming resolution and frame rate, and how you plan to use OBS (streaming or recording). The wizard will then perform a test to determine your optimal settings.
- Manually Adjust Suggested Settings (Optional): While the Auto-Configuration Wizard provides a good starting point, you may want to make some manual adjustments to the settings based on your specific needs and preferences. You can access these settings by clicking on the “Settings” menu in the top right corner of the OBS interface.
- Set Up Your Audio Input Capture Devices: Navigate to “Settings” > “Audio” to configure your microphone and any other audio sources you want to include in your stream. Here, you can choose your default microphone and speaker devices, adjust audio levels, and enable features like noise suppression.
- Add a Source: Click the “+” button under the “Sources” section and choose the source you want to add. Common sources include “Display Capture” for capturing your entire screen, “Game Capture” for capturing a specific game window, and “Window Capture” for capturing a specific application window. You can also add sources like webcams, images, and audio input devices.
- Confirm Output Settings: Navigate to “Settings” > “Output” to confirm that your chosen streaming service and stream key are properly configured. You can also adjust your output settings here, such as the bitrate and encoder, which will impact the video quality and bandwidth usage of your stream.
- Test Your Stream: Before going live, it’s crucial to test your stream to ensure everything is working correctly. Click the “Start Streaming” button to begin a test stream. You can then monitor your stream on the streaming platform to check for any audio or video issues.
With that general process in mind, let’s take a look at how to use the different functions of OBS Studio, such as adding a video source, screen recording, incorporating graphic overlays, and more.
The Megapixel Mystery: Uncovering 90s Bank Surveillance Camera Secrets
You may want to see also
![]()
Stream your webcam to Twitch
Streaming your webcam to Twitch can be done in a few different ways, depending on your budget and desired level of quality.
Using OBS Studio
OBS Studio is a free and open-source software that allows you to stream your webcam to Twitch and other streaming platforms. Here's how to set it up:
- Install OBS Studio: Go to https://obsproject.com/download, select your operating system, and install the software.
- Set up your webcam: If your computer doesn't have a built-in webcam, attach and set up an external USB webcam.
- Open OBS Studio: Launch the OBS Studio application.
- Add your webcam as a source: Click the "+" below the "Sources" box, select "Video Capture Device, and follow the prompts to add your webcam as a source.
- Adjust your webcam settings: You can resize and reposition your webcam feed within OBS Studio to get the perfect framing.
- Set up streaming on Twitch: In Twitch's dashboard, go to the "Stream" section and click "Stream Key." Click "Show Key" and then "I Understand" to reveal your stream key.
- Enter your stream key in OBS Studio: In OBS Studio, go to "File" > "Settings," then click the "Stream" tab. Paste your stream key into the "Stream Key" field.
- Start streaming: Once you've configured your settings, click the "Start Streaming" button in OBS Studio to begin streaming your webcam to Twitch.
Using a Mirrorless Camera and Capture Card
For higher-quality streaming, many Twitch streamers use mirrorless cameras or DSLRs in combination with a capture card. Here's a basic overview of how to set this up:
- Choose a camera: Popular options include the Sony a6400, Canon M50, and Nikon D5300.
- Get a capture card: The Elgato Cam Link and Blackmagic Atem Mini Pro are well-regarded options.
- Connect your camera to the capture card: Use an HDMI cable to connect your camera to the capture card, and then connect the capture card to your computer.
- Set up your camera and lighting: Ensure your camera is focused and framed correctly, and that your lighting is set up to illuminate your face and background.
- Configure streaming software: OBS Studio can be used with your new setup, or you can explore other options like Elgato Stream Deck.
Additional Tips:
- Lighting is crucial: Many commenters on a Reddit thread about webcams for Twitch streamers emphasised that good lighting is often more important than an expensive camera.
- Audio quality matters: Several commenters on the same thread also noted that audio quality is another key factor in the overall quality of your stream.
- Experiment with different setups: Don't be afraid to try out different cameras, lighting setups, and software to find the combination that works best for you and your streaming needs.
Restarting Li-ion Camera Battery: Quick Guide
You may want to see also
![]()
Install your webcam
If your computer doesn't have a built-in webcam, you'll need to attach and set up an external USB webcam. You can buy webcams from most tech stores or large online marketplaces, such as Amazon. They vary in price depending on their quality.
To install your webcam, follow these steps:
- Attach the webcam to your computer. Most webcams have a clip that allows you to attach it to the top of your monitor. Some may have a tripod that you can mount it to. Consult the user's manual that came with your webcam if you need help.
- Connect your webcam to your computer. Most newer webcams are plug-and-play, so you can use the USB cable attached to your webcam to plug it into any free USB port on your computer. Your computer should detect it automatically.
- Install the driver software if needed. If your computer doesn't detect your webcam automatically, you may need to install the driver software for your webcam. If it came with a CD, insert the CD into your disk drive and follow the instructions to complete the installation process. If you don't have a CD, you can download the driver software from your webcam manufacturer's website.
- Set your webcam as the default. On Windows 10, you can do this using the Control Panel. On Windows 11, you can disable your PC's built-in webcam in the Settings menu.
The Ultimate Camera Mode for Photography Enthusiasts
You may want to see also
![]()
Open your service's Live Stream section
Open your service's "Live Stream" section and retrieve your stream key
In order to link your webcam's stream to your preferred service, you'll need to retrieve a link that allows you to do so from your service. This process varies from service to service.
For Twitch:
- Go to https://www.twitch.tv/ and log in if necessary.
- Click your username in the upper-right corner.
- Click "Dashboard".
- Click the "Channel" tab below "Settings" on the left side of the page.
- Click "Stream Key".
- Click "Show Key".
- Click "I understand" and copy your key.
For Facebook:
- Go to https://www.facebook.com/ and log in if necessary.
- Click "Live Video".
- Click the "Connect" tab.
- Copy the contents of the "Stream Key" text box.
For YouTube:
- Go to https://www.youtube.com/live_dashboard_splash and log in if necessary.
- Click "Stream now" on the left side of the page.
- Click "Reveal" next to the "Stream name/key" box.
- Copy the stream key.
Testing Your Camera on Your Computer: A Step-by-Step Guide
You may want to see also
![]()
Adjust your webcam's view
Adjusting your webcam's view is a simple process, but it may vary depending on the make and model of your device and webcam. Here is a step-by-step guide on how to adjust your webcam's view on a Windows device:
Step 1: Access Your Webcam Settings
To access your webcam settings, you can either use the built-in Camera app or a third-party webcam application.
Using the Camera App:
- Go to the Start menu, type "Camera" in the search bar, and select the Camera app from the results.
- Once the Camera app is open, click on the Settings icon, usually located at the top of the screen.
Using a Third-Party Webcam App:
- If you prefer, you can download a third-party webcam application from the Microsoft Store or another source.
- After installing the app, open it and follow the prompts to select and set up your webcam.
Step 2: Adjust Webcam Settings
Once you have accessed your webcam settings, you will be able to adjust various options to change your webcam's view.
Adjusting Basic Settings:
- In the settings menu, look for options such as photo aspect ratio, video quality, grid lines, video stabilization, and microphone.
- You can adjust these settings according to your preferences. For example, you can turn grid lines on or off, adjust the video quality, or change the microphone volume.
Adjusting Brightness and Exposure:
- To adjust the brightness or exposure of your webcam, locate the "Brightness" or "Exposure" tab in the settings menu.
- Move the slider to the left or right to adjust the amount of light your webcam is processing.
- Remember that webcams generally require a lot of light, so ensure your room is well-lit.
Switching Cameras:
- If your device has multiple cameras (e.g., front-facing and rear-facing), you can switch between them.
- Open the Camera app, swipe in from the bottom edge, or right-click within the app to access the app commands.
- Select "Change Camera" to switch between the available options.
Step 3: Save Your Changes
After you have adjusted your webcam's view to your liking, remember to save your changes.
Look for a "Save" or "Apply" button within the settings menu to preserve your adjustments.
By following these steps, you should be able to successfully adjust your webcam's view and have a more controlled and customised broadcasting experience.
The Power of Camera Focus in UE4: Why Isn't it Default?
You may want to see also
Frequently asked questions
First, ensure your camera is connected to your computer. You can do this by plugging the small end of the camera's cable into the camera and the USB end into your computer. Next, open your computer's camera app and adjust the settings to your preference.
Using a camera as a webcam can instantly boost the quality of your video. With a camera, you can capture a blurred background, perform better in low light, and have more control with manual settings and auto-focus.
To set up a live camera feed, you will need a stable place to set up your equipment, a reliable internet connection, and good lighting. You can invest in a three-point kit or use a simple ring light combined with natural light.
To connect your camera to live streaming, you will need to connect it to your laptop with an HDMI cable. This will allow for the fast transfer of audio and video from the camera.