Adjusting the brightness on your computer camera can be done in a few different ways, depending on your operating system and the applications you use. For Windows 10 users, the latest preview build offers a new Camera Settings page, where you can easily manage and adjust the brightness and contrast of your cameras. For Windows 11 users, enabling the Pro Mode in the Camera app settings will allow you to adjust the brightness. Additionally, you can adjust brightness through video meeting apps like Skype or Microsoft Teams, or by using third-party webcam software.
How to adjust brightness on a computer camera
| Characteristics | Values |
|---|---|
| Operating System | Windows 10/11 |
| Software | Windows Camera App, Skype, Microsoft Teams, Third-party webcam software |
| Camera Type | External, Built-in |
| Steps | Enable Pro Mode, Adjust Brightness Slider, Change Default Image Settings, Adjust Brightness in Video Meeting Apps, Adjust Brightness in Third-party Software |
What You'll Learn
![]()
Adjusting brightness on Windows 10
Adjusting the brightness on your computer camera on Windows 10 can be done in a few different ways, depending on your preferences and the capabilities of your device. Here is a step-by-step guide on how to adjust the brightness on Windows 10:
Method 1: Using the Settings App
- Open the Windows 10 Settings app by pressing the Win + I keys together on your keyboard.
- In the Settings window, click on "Devices".
- In the left pane, click on "Cameras".
- On the right side, find and click on the camera you want to adjust.
- On the next page, scroll down to find the available sliders for brightness, contrast, and other settings.
- Adjust the brightness slider to your desired level.
Method 2: Enabling Pro Mode in the Camera App
- Open the Windows search bar and type "Camera".
- Click on the result under the "Best match" section to open the camera app.
- In the Camera app, click on the gear icon (Settings) in the top left corner.
- In the Settings pane, under the "Camera" section, enable the "Pro mode" by moving the slider to the right.
- Return to the Camera app, and on the left side, under the Photo timer icon, you will see a stop-like icon (Brightness).
- Click on this icon, and a Brightness slider will appear on the right.
- Move the slider up or down to adjust the brightness according to your preference.
Method 3: Using Third-Party Webcam Software
If the built-in methods are not suitable for your needs or if your camera does not support brightness adjustments, you can use third-party webcam software. These applications often provide more extensive settings and may offer an easier way to adjust brightness and other colour settings.
It is important to note that the availability of certain methods and settings may vary depending on your Windows version and the capabilities of your camera. Always ensure that you are using the latest version of Windows 10 to access the newest features and improvements.
Finding Dehaze in Camera Raw: A Quick Guide
You may want to see also
![]()
Using the Camera app
If your PC has a built-in camera or a connected webcam, you can use the Camera app to take photos and videos.
To find the Camera app, select Start > Camera.
Changing camera settings in the Camera app
To change camera settings in the Camera app, follow these steps:
- Open the Camera app.
- Swipe in from the right edge of the screen, and then select Settings.
- Adjust the settings for each option. These might include:
- Changing the photo aspect ratio or video quality.
- Turning location info on or off.
- Showing or hiding grid lines.
- Turning video stabilization on or off.
- Turning the microphone on or off.
- Turning the video lamp on or off.
- Changing what happens when you tap the screen.
Enabling Pro Mode to adjust brightness
You can also adjust the brightness in the Camera app by enabling Pro Mode. Here's how:
- Go to Windows search and type Camera in the search field.
- Click on the result below the Best match section to open the camera.
- In the Camera app, click on the gear icon (Settings) at the top left of the app screen.
- In the Settings pane, under the Camera section, go to Pro mode and move the slider to the right to turn it on.
- Now, return to the Camera and on the left side, under the Photo timer icon, you will see a stop-like icon (Brightness).
- Click on this and you will now see a Brightness slider on the right.
- Move the slider up or down to adjust the brightness according to your requirement.
Focusing Swann Cameras: Tips for Crisp, Clear Surveillance Footage
You may want to see also
![]()
Changing settings on Microsoft Teams
Microsoft Teams does not currently have a built-in option to adjust camera brightness. However, there are several workarounds you can use to adjust the brightness of your camera in Microsoft Teams.
Adjust Skype Video Settings
If you adjust the brightness level on Skype, the changes should transfer to Microsoft Teams. To do this, launch Skype and go to Settings, then select Audio & Video. From there, go to Webcam settings and bring the brightness slider to the right to increase the brightness. Save these changes, then launch Microsoft Teams and check the results.
Change Camera App Brightness Settings
You can also adjust the brightness settings on the Camera app. Exit Microsoft Teams and launch the Windows 10 built-in camera app. Click on the Settings icon and enable Pro Mode to access the advanced options. Use the slider to increase the brightness, then close the Camera app and launch Microsoft Teams to check the results.
Upgrade or Downgrade Your Camera Driver
Some users have reported that updating or rolling back the camera driver has solved the issue of low brightness in Microsoft Teams. For example, Microsoft LifeCam users have reported that rolling back to driver version 4.25 fixed the issue. You can download older camera drivers directly from the Microsoft Update Catalog Website. If you are using a third-party webcam, go to the camera manufacturer's website and download a newer or older driver version.
Additional Tips
- Set up a white background screen on Teams to cast more light on your face.
- Use the Default Teams app theme. The Dark or High Contrast theme will result in less light being cast on your face.
- Ensure the source of light is in front of you. Place your computer in front of a window with natural light, if possible.
To access the device settings in Microsoft Teams, enable the video for the meeting. Under the video, click on the Cog icon to open the Device settings. From there, you can scroll down to the Video settings area and adjust the filters as needed.
Alternatively, you can access the filters from the Microsoft Teams settings window. Click on the three dots next to your profile picture in the application's top bar, then click on Settings. In the settings popup, click on Devices, then scroll down to the Camera section and adjust the filters as needed.
Adjusting Brightness and Contrast in Windows 10
If you are running Windows 10 Build 21354 or higher, you can change the brightness and contrast of your video/web camera by following these steps:
- Open the Windows 10 Settings app (shortcut: Win + I).
- Go to the Camera settings page, which will list all the cameras added to your system.
- Click on the camera you want to adjust.
- On the next screen, scroll down to find the sliders to increase and decrease the brightness and contrast.
Restoring Default Camera Settings in Windows 10
If you are not satisfied with the changes you have made, you can restore the default camera settings in Windows 10 by following these steps:
- Open Windows 10 Settings.
- Go to Devices > Cameras.
- Find your camera in the Cameras list on the right and click on it.
- Click on Restore defaults.
Additionally, if you are having issues with your webcam, you can click on the Troubleshoot button to run a built-in troubleshooter.
Latest Camera Raw: What's New in the Update?
You may want to see also
![]()
Adjusting brightness on Windows 11
Adjusting the brightness on your computer camera in Windows 11 can be done in a few different ways, depending on your preferences and the hardware you are using. Here is a step-by-step guide on how to adjust the brightness on Windows 11:
Using the Camera App:
- Open the Camera app by searching for "camera" in the Taskbar search box and clicking on the individual search result.
- Once the app is open, click on the settings gear icon, usually located in the top-left corner.
- In the settings panel, look for an option called "Pro mode" and toggle it on.
- Return to the home screen of the Camera app.
- Find the brightness icon, typically on the left side under the timer option.
- Click on the brightness icon and use the lever or slider to adjust the brightness to your desired level.
Through Windows Settings:
- Press the "Win + I" keys together on your keyboard to open the Windows Settings app.
- In the Settings window, navigate to "Bluetooth & devices" on the left sidebar.
- Click on "Cameras" on the right side.
- Under the "Connected cameras" heading, click on the camera you want to adjust.
- Find the "Default image settings" section and expand it.
- Use the plus or minus signs, or the slider, to adjust the brightness level as per your requirement.
Using Quick Actions:
If you have an Arm-based SoC from Qualcomm, you can access additional webcam settings through Quick Actions:
- Open Quick Actions by pressing the "Windows Key + A" on your keyboard.
- Choose the pencil icon to edit the available quick actions.
- Click "Add" and select "Windows Studio Effects".
- Once added, click on the "Studio Effects" icon.
- Here, you can adjust the brightness, along with background effects, eye contact, and framing.
It is important to note that the available settings may vary depending on the webcam you are using. Additionally, Windows 11 PCs can automatically adjust screen brightness and contrast based on the displayed content, and you can also adjust the screen brightness from the Windows Settings panel.
Traffic Camera Tickets: Do You Have to Pay?
You may want to see also
![]()
Using third-party webcam software
If you are using a Windows 10 or 11 PC, you can adjust your camera's brightness settings by enabling the Pro mode in the Camera app. Here is how you can do it:
- Go to the Windows search bar and type "Camera" in the search field.
- Click on the result under the "Best match" section to open the camera.
- In the Camera app, click on the gear icon (Settings) at the top left of the app screen.
- In the Settings pane, under the Camera section, go to Pro mode and move the slider to the right to turn it on.
- Now, return to the Camera and on the left side, under the Photo timer icon, you will see a stop-like icon (Brightness).
- Click on this and you will now see a Brightness slider on the right.
- Move the slider up or down to adjust the brightness according to your requirement.
Alternatively, you can also adjust the brightness of your camera through the Settings app. Here are the steps:
- Press the Win + I keys together on your keyboard to open the Settings app.
- In the Settings window, click on Bluetooth & devices on the left side.
- Now, navigate to the right side and click on Cameras.
- On the right side, scroll down a bit and under the Connected cameras section, click on Integrated Webcam.
- Now, navigate to the right side, scroll down and under the Default image settings section, adjust the Brightness levels by moving the slider to the left or right.
If you are using a Mac, there are no built-in camera settings for the webcam. Thus, you will first need to install a third-party app to adjust the brightness settings. The Webcam Settings and iGlasses apps are two popular options. Once you’ve chosen an app and installed it on your Mac, you can adjust brightness, contrast, aperture and more.
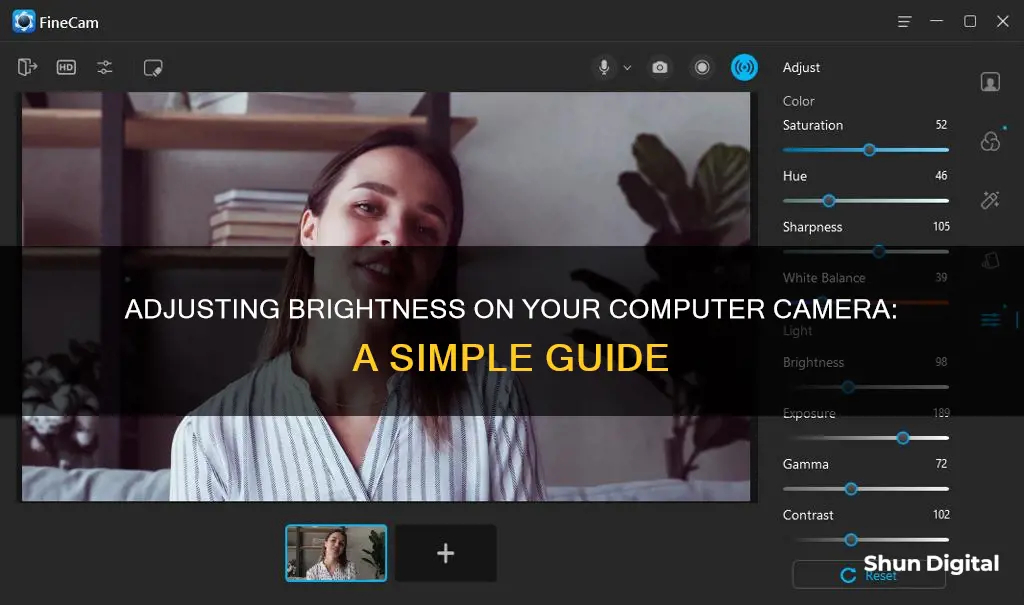
You can also adjust the brightness and colour settings of your webcam using some third-party webcam software. These software applications provide even more extensive settings and may be easier to use. For example, you can use FineCam’s advanced colour adjustment feature to change the colour and brightness settings of your webcam.
Charging Your GE X600 Camera: A Quick Guide
You may want to see also
Frequently asked questions
If you're using Windows 10, go to Settings > Devices > Cameras. Find your camera in the list, click on it, then click 'Configure'. You should see a brightness slider that you can adjust.
Press Win + I to open Settings, then click on 'Bluetooth & devices' in the left sidebar. Next, click on 'Cameras' and then 'Integrated Webcam'. You should now see a 'Default image settings' section where you can adjust the brightness levels.
Microsoft Teams does not have a built-in option to adjust camera brightness. However, you can adjust the brightness in Skype, which is owned by Microsoft, and the changes should transfer to Teams. Open Skype, go to Settings > Audio & Video > Webcam settings, and adjust the brightness slider.
Yes, you can adjust the brightness directly from the Camera app settings by enabling Pro mode. Open the Camera app, click on the gear icon (Settings), then turn on Pro mode. Now, you should see a Brightness slider on the left side of the app.
Most external webcams come with bundled software that allows you to modify settings like brightness and contrast. If your webcam did not come with such software, you can adjust the settings through the Windows Camera app (see previous answer).