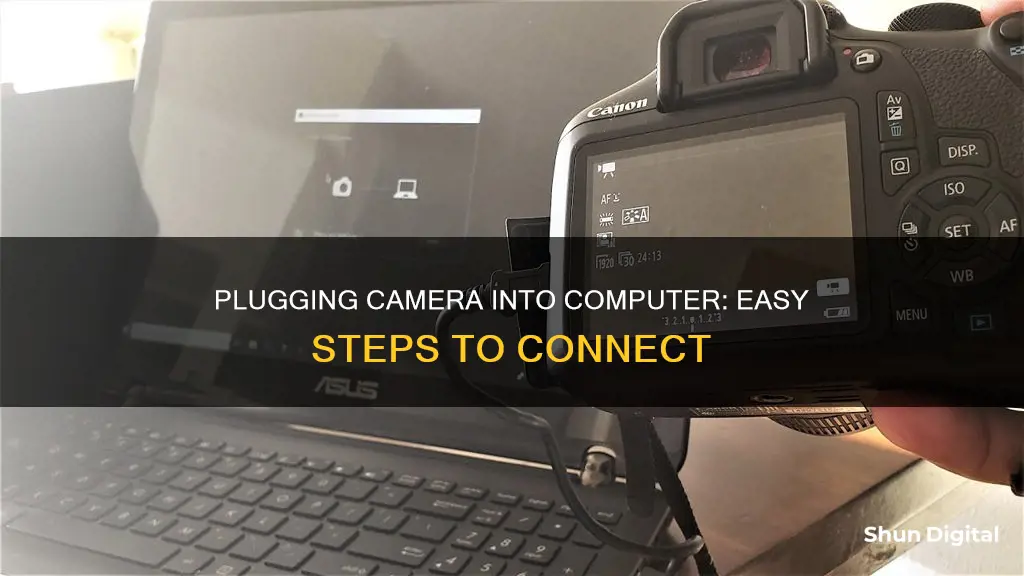
There are several ways to connect a camera to a computer, and the method you choose will depend on the type of camera and computer you have. The most common way is to use a USB cable – connect one end of the cable to the camera and the other end to the computer. Make sure your computer is powered up and turn on the camera. If your computer doesn't detect your camera, you may need to install the driver software. You can usually do this using a CD that comes with your camera, or by downloading the software from the manufacturer's website.
| Characteristics | Values |
|---|---|
| Connection type | USB cable |
| Cable shape | Rectangular USB end, smaller opposite end |
| Cable use | Connect to camera and computer |
| Camera power | On |
| Computer power | On |
| Camera mode | Set to "Play" mode or similar |
| Software | Install if necessary |
What You'll Learn
![]()
Connect camera to computer using a USB cable
To connect your camera to your computer using a USB cable, you will need to ensure you have the correct USB cable. Most point-and-shoot cameras use mini-USB connectors, so make sure you have the correct connector for your camera. Your camera manufacturer should have included the correct USB cable in the box.
Next, turn on your camera and computer. You may need to set your camera to a specific mode, such as 'Play' mode, for it to be recognised by your computer. Consult your camera's user manual if you are unsure.
Now, plug the small end of the USB cable into your camera. This port may be hidden behind a plastic flap or panel, so check your camera's manual if you cannot locate it. Then, plug the other end of the USB cable into a USB port on your computer.
Once the cable is connected to both devices, your camera's drivers should begin to install. You may then see a pop-up window asking what you want to do with the device. From here, you can choose to import photos, open a folder, or launch a software.
The Deco 79 Wood Metal Camera: A Vintage Treasure
You may want to see also
![]()
Ensure the correct software is installed
To ensure that the correct software is installed, you should first check what kind of ports your camera and computer have. Most digital cameras have a USB port, while some may also have an HDMI or mini-HDMI port. Depending on your computer, you may need a USB-A or USB-C port to connect to your camera. If your camera and computer ports don't match, you may need to use an adapter or a cable that can convert the signals.
Once you have the correct ports and cables, connect your camera to your computer. Make sure your camera is turned off and your computer is on. Plug one end of the cable into your camera and the other end into your computer. Then, turn on your camera and switch it to the appropriate mode, such as playback, PC, or webcam mode. Your computer should automatically detect your camera and install the necessary drivers.
If your computer does not automatically detect your camera, you may need to install the drivers manually. Check if your camera came with a disk containing the drivers or with instructions to find the drivers online. If your camera came with a disk, insert it into your computer before plugging in your camera. Windows will recognise that you are attempting to install software and will guide you through the installation process. If there is no disk, you can search for the drivers online by visiting the webcam manufacturer's website.
If you are using a Windows operating system, you can also use Windows Update to manually look for drivers:
- Go to the Search box and search for Device Manager.
- In the Device Manager, go to Cameras or Imaging Devices, right-click on the webcam, and select Update Driver. Follow the instructions to see if Windows can find the drivers.
If you are still having issues, check your camera's settings to ensure it is set to the correct mode to be recognised by your computer. Additionally, make sure your camera has enough battery power, memory space, and resolution.
Osiris Camera Straps: Real Gold or Gilded Glamour?
You may want to see also
![]()
Check camera is recognised by the computer
Once you've plugged your camera into your computer, there are several ways to check if it's recognised by your device.
First, check that your camera is plugged in securely to your computer. If it is, and your camera still isn't recognised, try plugging it into a different USB port.
If you're using a Windows device, you can run the automated camera troubleshooter in the Get Help app. To do this, select Start, then choose Settings > Update & Security > Windows Update > Check for updates. If there are no updates for your camera, try selecting Advanced options > Optional updates, and look for any driver updates for your camera. Allow any available updates to install, then restart your device.
If your camera still isn't recognised, try restarting your computer. If you haven't restarted your device since you plugged in your camera, you should do so.
Next, test your camera with the Camera app. Select Start, then choose Camera from your apps. If you're asked to allow access to the Camera, select Yes. If the camera works in the Camera app, the problem might be with the app you're trying to use.
If your camera still isn't recognised, try the following:
- Check for a camera switch or button on your device. Some laptops and portable devices have a physical switch or button that turns the camera on or off. Make sure it's in the "on" position before using your camera.
- Give your apps permission to use the camera. In newer versions of Windows, some apps don't have default access to the camera. To let your device access the camera, select Start, then choose Settings > Privacy > Camera.
- Check your antivirus software. In your antivirus software settings, look for settings that block access to your camera or permission to use your camera.
- Check your hardware drivers. Try using your camera with a different USB port. If that doesn't work, or your camera is built into your device, try scanning for hardware changes in the Device Manager.
How to Fight Camera-Based Speeding Tickets in Tennessee
You may want to see also
![]()
Open the correct folder on the camera
Once you have connected your camera to your computer, you will need to open the correct folder on the camera.
First, make sure that your camera is on. On most cameras, you can do this by using a dial near the top of the device.
Next, you will need to locate the USB slot on your camera. This can sometimes be tricky, as camera manufacturers sometimes hide the slot behind a panel or door, which is designed to blend into the overall design of the camera. Many cameras have a USB logo on them, which may also appear next to the panel. Some camera makers place the USB slot in the same compartment as the battery and memory card. Try looking on the sides and bottom of the camera for the USB slot. If you cannot find it, consult the camera's user guide.
Once you have located the USB slot, connect the USB cable to the camera. Be careful not to use too much force when inserting the connector. Ensure that the connector is aligned with the slot, as inserting it the wrong way can damage the cable and the camera. Make sure that any panel or door that may be hiding the slot is completely out of the way.
Now, connect the other end of the USB cable to your computer. The USB slot on your computer can usually be found on the sides of a laptop or at the back/front of a desktop unit.
With the cable connected to both devices, turn on your camera if you haven't already. Depending on the model, you may also need to press the photo playback button, which is usually marked with a play icon.
If everything is connected correctly, your camera may display a "connecting" message on the LCD screen. On your computer, a pop-up window should appear, giving you a few options for downloading the photos. Select an option and follow the on-screen instructions.
Now, open the correct folder on your camera. On your computer, double-click "My Computer", then double-click your camera's name under the "Devices and Drives" section. Finally, double-click your camera's storage folder. This is usually called DCIM, but it may be named something else. There may be another folder inside this one, named after the camera brand—for example, "100CANON".
From here, you can review your photos, delete them from your camera's memory card, copy them to a file on your computer, or view them directly from the camera.
Charging VHS Camera Batteries: A Step-by-Step Guide
You may want to see also
![]()
Transfer photos to the computer
Transferring photos from your camera to your computer is a straightforward process. The first step is to turn on your computer. If you are using a Windows computer, this method will work on Windows 11, 10, 8, or earlier. For Mac users, it will work on macOS Ventura, Monterey, or earlier.
Next, you will need to connect your camera to your computer. This can be done using a USB cable that came with your camera. If you don't have the cable, you will need to purchase a replacement that fits your camera model. If you are having trouble finding the port on your camera, check for any panels that can be flipped open. If your computer or laptop doesn't have a USB-A port, you may need an adapter.
Once your camera is connected, turn it on. Your computer should recognize it immediately. However, you may need to switch your camera into Review mode for it to fully connect. This process varies depending on your specific camera model.
Now, you are ready to transfer your photos. If you are using a Windows computer, look for the AutoPlay window that pops up in the bottom-right corner. Click the "AutoPlay" box, then select "Open folder to view files." This will open the File Explorer, where you can locate your photos. They are typically found in a folder labeled DCIM (Digital Camera Images). Select the photos you want to transfer, then drag and drop them into a new location on your computer, such as the Pictures folder or a new folder.
If you are using a Mac, open the Photos app, which looks like a multi-colored flower. Select the photos you want to transfer by clicking on each one. You can then click "Import Selected" or "Import All New Photos" in the top-right corner. The imported photos will be saved to "All Photos," but you can change the save location if desired.
After you have transferred your photos, don't forget to eject your camera or SD card before unplugging it from your computer. This process may vary slightly depending on your operating system, but it generally involves locating the camera or SD card in the left sidebar of the File Explorer or Finder and clicking the eject icon.
Alternatively, you can transfer photos to your computer by removing the SD card from your camera and inserting it directly into your computer's card reader, if it has one. If your computer doesn't have a built-in card reader, you can purchase an external SD card reader that connects via USB. Once you've connected the SD card, open the File Explorer (for Windows) or Finder (for Mac) and locate your SD card in the left panel. From there, you can select and drag the photos to the desired location on your computer, just as you would if your camera were connected directly.
Sport Mode Photography: Capturing Fast-Paced Action
You may want to see also
Frequently asked questions
You will need a USB cable to connect your camera to your computer. Most point-and-shoot cameras use mini-USB connectors, so ensure you have the correct USB cable for your camera.
First, ensure you have the correct USB port on your camera. Camera manufacturers sometimes hide the port behind a panel or door, so check your camera's user guide if you cannot locate it. Once located, connect the USB cable to the camera, ensuring the connector is aligned correctly.
Connect the other end of the USB cable to an open USB slot on your computer. The USB slot is usually located at the back or front of the system unit for desktop computers.
Once the camera is connected, turn it on and ensure it is set to the correct mode to be recognised by your computer. This may be called "Play mode" and can vary depending on your camera model. Your computer should then recognise the camera and display a pop-up with photo-downloading instructions.