A rear-view camera, also known as a backup camera, is a device that allows you to see what's behind your vehicle without having to turn around. While some car models have built-in rear-view cameras, others can be fitted with aftermarket cameras. The process of installing a rear-view camera involves removing the rear license plate, drilling a hole for the camera cable, connecting the camera to a power source, and mounting the camera to the license plate. The camera's video cable is then routed to the front of the car and connected to a monitor or infotainment system. Finally, the camera is tested to ensure it is functioning properly.
| Characteristics | Values |
|---|---|
| Camera type | Bracket-mounted, flush-mounted, license plate frame, license plate bar, OEM-specific, integrated OEM, in-dash aftermarket, on-dash aftermarket, rearview mirror |
| Installation time | One hour |
| Skill level | Beginner |
| Video quality | 1080p, 1440p, 2K, 2.5K, 4K, Full HD |
| Viewing angle | 140 degrees, 160 degrees, 180 degrees |
| Memory | microSD, cloud |
| Power source | 12V socket, OBD-II connector, rearview 12V power, battery |
| Installation steps | Remove license plate and interior panel, drill hole, run camera wiring, fuse camera wires, route camera cable, connect monitor, mount camera |
What You'll Learn
![]()
Choosing the right camera for your car
Budget
The cost of car cameras can range from a few hundred to a couple of thousand dollars. It's important to set a budget that you're comfortable with and stick to it. Consider not only the cost of the camera but also any additional expenses, such as memory cards, bags, and other accessories.
Camera Type
There are three main types of cameras to choose from: mirrorless cameras, DSLR (Digital Single Lens Reflex) cameras, and point-and-shoot cameras. Mirrorless cameras are becoming increasingly popular due to their compact size and excellent performance. They offer interchangeable lenses and fast autofocus systems. DSLR cameras, while declining in sales, are still a good choice and are widely used by beginners and professionals. Point-and-shoot cameras are ideal for street photography or situations where you need a compact camera.
Sensor Size
Larger sensors generally produce higher-quality images with better dynamic range and low-light performance, but they also come at a higher price. APS-C sensors offer a balance between image quality and affordability, while micro 4/3 sensors are smaller and more affordable, yet still capable of excellent image quality.
Lens Options
Consider the lens options available for the camera type you choose. DSLR cameras typically have a wider range of lens selections, while mirrorless cameras may have more limited options since they are a newer technology. Different lenses have varying focal lengths and apertures, so choose the ones that suit your photography needs.
Features
Modern cameras offer a plethora of features, including image stabilization, autofocus, and video capabilities. Image stabilization reduces camera shake for sharper images, while fast autofocus helps capture clear, in-focus shots. Video capabilities are essential if you want to capture high-quality video footage in addition to still images.
Research and Reviews
Before purchasing a car camera, be sure to do your research and read reviews from other photographers. Try to find reviews from those who shoot similar types of photos as you and look for sample images taken with the camera to get an idea of its performance and image quality.
Installation
Aftermarket camera systems may require professional installation, especially if they involve complicated wiring. Consider the mounting options for the camera and whether they will require drilling or other modifications to your vehicle.
Safety
One of the primary purposes of a car camera is to improve safety, particularly when backing up or parking. Choose a camera with a wide field of view and consider additional features like collision detection and parking mode to enhance safety.
In summary, choosing the right camera for your car involves considering your budget, the type of camera, sensor size, lens options, desired features, and safety capabilities. Be sure to read reviews and do your research to make an informed decision that suits your specific needs and budget.
Surveillance at Work: Know Your Rights and Fight Back
You may want to see also
![]()
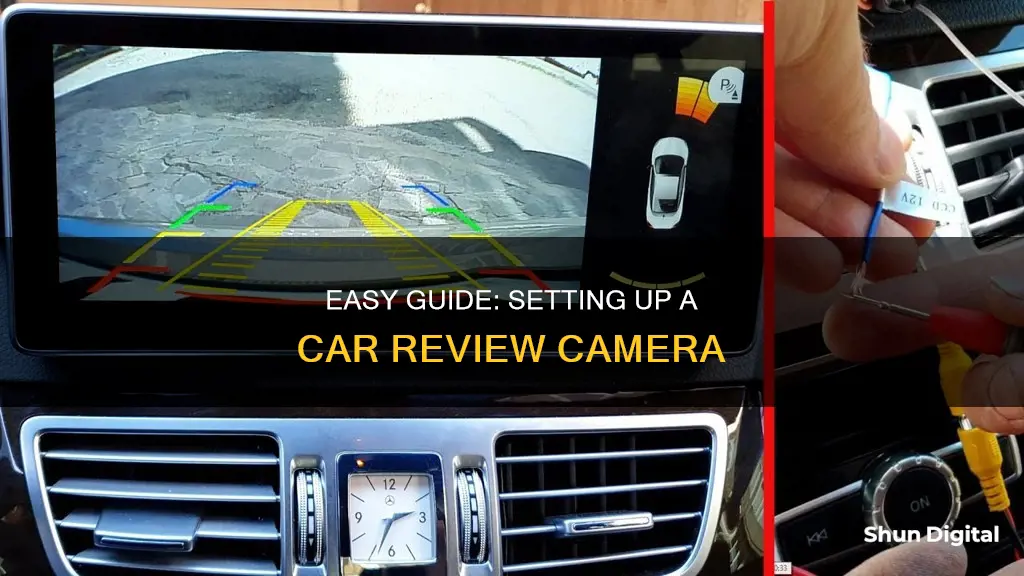
Installing the camera
The first step in installing a rear-view camera is to purchase the necessary equipment. This includes a mountable backup camera designed for your specific vehicle, an external or internal monitor, and power and video cords if they didn't come with your camera and monitor.
Once you have all the necessary equipment, you can begin the installation process. Start by removing your rear license plate and your trunk's interior panel to expose the car's rear wiring chambers. Drill a small hole in the license plate mounting area, making sure there are no obstructions between the plate and the wiring chamber. Place a rubber grommet around your camera cable to keep it in place and prevent leaks, then run the cable through the drilled hole into the trunk.
Locate your car's reverse light wires, which connect the tail lights to the dashboard. Strip and separate these wires, then fuse your camera wires with the reverse light wires. Attach a bare wire cable to the camera's power connector and poke it through the centre of the exposed reverse light wires, twisting them together and wrapping them with electrical tape.
If your camera has a separate video cable, route this to the front of the car, connecting it to the camera's video connector if necessary. You may need to peel back the automobile's headliner or side panels to access the chamber.
Now it's time to mount the camera to your license plate. Follow the manufacturer's instructions to attach the camera to the front or back of your license plate, using the screws you removed earlier. Reattach your license plate and interior panels, then test the camera to make sure everything works.
Tips for Installation
- When drilling the hole for the camera cable, choose a drill bit that is just large enough to accommodate the cable and grommet.
- To avoid a messy installation, try to route the camera cable through the hoses connecting to the liftgate or trunk.
- If you need to thread the cable through a tight hose, use a thin wire, coat hanger, fishing wire, or long zip tie to guide it through.
- Make sure to clean the rear window before mounting the camera to ensure a strong adhesive bond.
- Mount the camera in a location where it won't move and provide enough slack for the camera to travel up and down.
- Test the camera after installation by turning on the car engine and checking if the camera turns on automatically.
Focusing Your Instax Mini 8: Tips and Tricks
You may want to see also
![]()
Setting up the camera's wiring
- Remove the rear license plate and interior trunk panel: Take off the screws holding the rear license plate using a Phillips-head screwdriver. Then, carefully pry off the interior trunk panel to expose the car's rear wiring chambers.
- Drill a small hole: Make sure there are no obstructions between the license plate mount and the rear wiring chamber. Use a power drill with a high-speed twist drill bit to create a small hole for the camera's power and video cable. Ensure the hole is large enough to accommodate the cable.
- Install a rubber grommet: Slip a rubber grommet onto the camera cable near the non-splitting end. This will keep the wire in place and prevent leaks. Choose a grommet that fits snugly inside the drilled hole.
- Run the camera cable: Pull the camera's video and power cable through the drilled hole into the trunk. Ensure the cable is tight, so the rubber grommet stays in place.
- Locate the reverse light wires: Find the cords that connect the tail lights to the dashboard, usually located in the hatch or trunk. These wires will provide power to the camera.
- Strip and separate the reverse light wires: Use a wire stripper or pliers to remove the rubber covering the wires. Then, use a screwdriver to poke a hole through the exposed wires, separating the individual wire strands. Ensure the car is turned off for safety.
- Fuse the camera wires with the reverse light wires: Attach the bare wire cable to the camera's power connector. Poke the bare wires through the exposed reverse light wires and twist them together. Wrap the connection with electrical tape for insulation and protection. Ensure you connect the correct polarity (positive to positive, negative to negative).
- Route the camera's video cable to the front: Connect the RCA cable to the camera's video connector if needed. Run this cable through the vehicle, usually by peeling back the headliner or side panels, towards the area by the fuse box. The exact routing will depend on your vehicle's model.
- Connect the camera's power and video cable: Once you've installed the rear-view monitor, connect the backup camera to its power and video cable. Ensure the cable is securely plugged into the camera.
- Test the camera: Before using your new camera on public roads, test it in a safe area. Check if the camera turns on when the car is running. If it doesn't, double-check the power connections and mounting.
Charging Your SeaLife Camera: A Step-by-Step Guide
You may want to see also
![]()
Connecting the display
Firstly, determine the type of display you want. You can choose between an external monitor, which mounts onto your windshield, or an internal monitor that either clips onto your existing rear-view mirror or replaces it entirely. External monitors are easier to install and provide a clearer view, while internal monitors are less obtrusive and preserve the car's original look.
Secondly, gather the necessary materials and tools. Ensure you have the correct cables, including power and video cords, and any required adapters or converters. You may also need tools like a Phillips-head screwdriver, wire strippers, and electrical tape.
Now, it's time to connect the display. If you're using an external monitor, follow the manufacturer's instructions to attach the mount to the windshield, and then hook the monitor onto the mount. For internal monitors, you may need to clip the device onto your existing mirror or replace the mirror entirely, following the specific instructions for your model.
Next, route the camera's video cable to the front of the car. This may involve removing panels and running the cable through the exposed chamber. The exact process will depend on your vehicle's make and model. Ensure you connect the video cable to the camera's cord if they are separate.
After that, connect the monitor's power cable. This typically involves attaching it to a fuse tap or a cigarette lighter adaptor, which you can then plug into your car's fuse box or cigarette lighter receptacle.
Finally, test the setup. Before driving on public roads, test the camera in a safe area to ensure it works correctly. Check the image quality, and make any necessary adjustments to the camera's position or settings.
Remember, each car model is unique, so you may need to adapt these steps accordingly. Always refer to your vehicle's manual for specific instructions and consult a professional if you're unsure about any part of the process.
Understanding Camera Raw's Auto-Cropping Feature
You may want to see also
![]()
Testing the camera
In many cases, rear-view camera malfunctions are caused by loose or improperly connected wires. If your camera is not working properly, you may need to check that all cables and connections are secured tightly and that all connections are correct. If this doesn't solve the problem, check that the camera is not physically damaged. Ensure that the camera is installed the right way up and that its position is correctly aligned.
Home Camera Service Charges: What's the Deal?
You may want to see also
Frequently asked questions
There are a few types of cameras to choose from, including bracket-mounted, flush-mounted, license plate frame, license plate bar, OEM-specific, integrated OEM, in-dash aftermarket, on-dash aftermarket, and rearview mirror. Your choice depends on your budget and preference.
First, ensure you have the necessary equipment, such as a mountable backup camera, an external or internal monitor, and power and video cords. Then, remove your rear license plate and trunk's interior panel. Drill a small hole in the license plate mounting area and place a rubber grommet around your camera cable. Run the camera cable into your trunk and locate your car's reverse light wires. Strip and separate these wires and fuse them with your camera wires.
Route your camera's video cable to the front of the car and fix the monitor to the front windshield, rearview mirror, or mirror mount. Run the monitor's splitter cable to the fuse box and connect it to the RCA cable. Attach the monitor's power cable to a fuse tap and plug it into the fuse box.