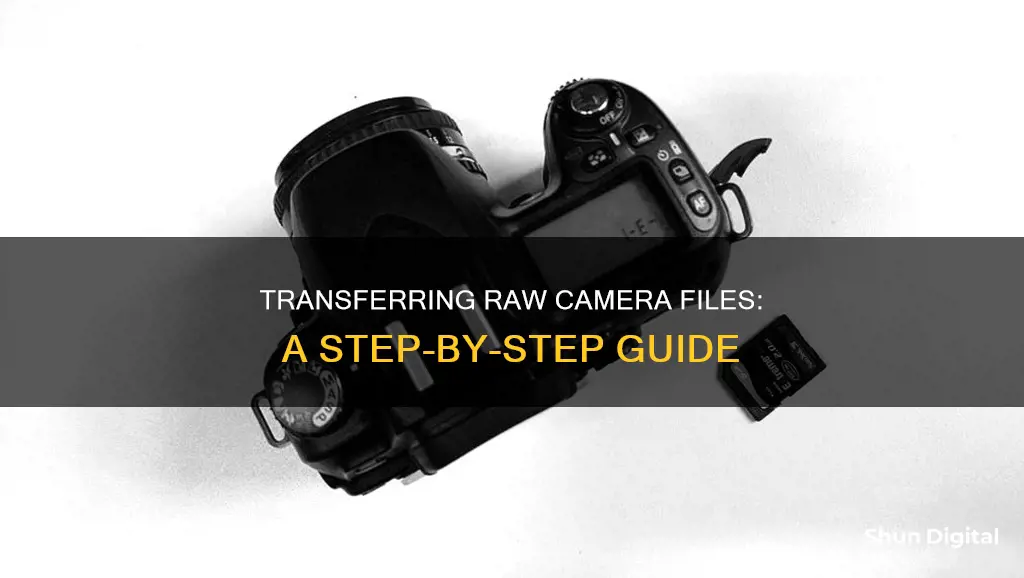
There are several ways to transfer raw files from your camera to your phone or computer. Wired connections are generally considered the most reliable method, as they are cheap, fast, and stable. However, wireless connections such as Wi-Fi and Bluetooth are also available, although they may be slower and more prone to connection issues. For example, Wi-Fi SD cards like Toshiba FlashAir and Wi-Fi hotspot card readers like Kingston Mobilelite Wireless allow you to transfer raw files wirelessly. Additionally, specific apps like Camera Connect & Control can be used to transfer raw files to Android devices, while the Canon Camera Connect app for iOS supports raw file transfers as well.
| Characteristics | Values |
|---|---|
| Wireless Connections | Bluetooth, Wi-Fi, 4G |
| Wireless Problems | Connections drop, low speed, battery draining, incompatible versions |
| Wired Connections | Cable, USB-C, Lightning, USB-OTG |
| Wired Benefits | Cheap, reliable, fast |
| Wireless SD Cards | Toshiba FlashAir, Kingston Mobilelite Wireless |
| Wireless SD Card Problems | Power drain, limited support for faster card speeds, high cost |
| Wireless SD Card Benefits | Full access to card contents |
| Apps | Snapseed, PhotoMate, Lightroom, Camera Connect & Control, PlayMemories, raw2dng, Send-Anywhere, Google Drive, OneDrive |
| App Problems | Only transfer JPEGs, not RAW |
| File Types | JPEG, DNG, TIFF, NEF, MOV, HEIF, AVCHD, MP4, RAW |
What You'll Learn

Using a cable
Using a USB Cable to Transfer Files from a Camera to a Windows Computer
First, turn on your computer. Then, use the USB cable that came with your camera to connect it to an open USB port on your computer. If you don't have this cable, you must purchase a replacement that fits your camera model. If you can't find the port on your camera, check for any panels that can be flipped open.
Next, turn on your camera. Your computer should recognize it immediately. You may have to switch the camera into Review mode in order for it to fully connect to your computer. This process will be different depending on your specific camera.
You should then see the AutoPlay window pop up. Click the "AutoPlay" box in the bottom-right corner, and select "Open folder to view files". This will open the File Explorer. You may need to scroll down to find this option. Alternatively, you can open this folder manually. To do this, right-click the Start menu and click File Explorer. Then, click your camera device listed on the left panel, and then click "SD card".
Now, click "DCIM". You may see the photos immediately after clicking your device. In most cases, photos will be in a folder labelled "DCIM" (Digital Camera Images).
Select the photos you want to transfer. You can transfer individual photos, or press CTRL + A to select all the photos in the folder. To select multiple photos, hold CTRL and click each photo.
Finally, drag the pictures to a new location on your computer. You can drag the photos into the Pictures folder, or you can create a new folder. The amount of time it takes to transfer will depend on the amount of files and your computer.
If you want to delete the photos from your camera's SD card, wait for the files to finish transferring to your computer. Return to the SD card's folder and press CTRL + A to select all the photos. Right-click the photos, then click Delete.
To eject the camera, click the arrow in the bottom-right corner of the taskbar. Click the device icon, and then click Eject. You can now safely unplug the camera from the computer.
Using a USB Cable to Transfer Files from a Camera to a Mac
First, turn on your computer. Then, use the USB cable that came with your camera to connect it to an open USB port on your computer. If you don't have this cable, you must purchase a replacement that fits your camera model. If you can't find the port on your camera, check for any panels that can be flipped open. If your computer or laptop doesn't have a USB-A port, you'll need to purchase an adapter. You can find this on the Apple website or at an electronics store.
Next, turn on your camera. Your computer should recognize it immediately. You may have to switch the camera into Review mode in order for it to fully connect to your computer. This process will be different depending on your specific camera.
Now, open the Photos app on your Mac. This looks like the multi-coloured flower.
Select the photos you want to transfer. Click each photo to select it. You can also drag your cursor to select multiple photos at a time.
Click "Import Selected". You can also click "Import All New Photos" in the top-right corner. Imported photos will be saved to "All Photos". If you want to change the save location, click the drop-down menu next to "Import to" and select a new destination.
Finally, eject your camera. Open the Finder. Locate the camera in the left sidebar, then click the up-arrow icon to eject it. You can now safely disconnect the camera from your computer.
One option for transferring raw files from your camera to your smartphone is to use an On-the-Go (OTG) cable. On devices with a microUSB connection, Android may support the use of an OTG cable which will mount the drive via a card reader. Support is much better for USBC type connections where a similar connector is available. On iOS, a Lightning to SD Card Camera Reader cable can be used.
Another option is to use a USB-C connector or Lightning cable, depending on your smartphone model. This will leave you with a standard female USB connector to plug your favourite card reader into. You can use any File Manager to copy the files, although Solid Explorer is a good option for Android.
Edits in Camera Raw: Permanent or Not?
You may want to see also

Using a Wi-Fi SD card
- Check your camera's compatibility: Before investing in a Wi-Fi SD card, ensure your camera supports SDHC cards. Most modern cameras should have no problem handling this format. Additionally, research your specific camera model to see if it has built-in Wi-Fi capabilities or menu functions designed to work with Wi-Fi SD cards.
- Choose a Wi-Fi SD card: Select a card that suits your needs and budget. The Eye-Fi SD card is a popular choice due to its additional features and online storage options. The Eye-Fi Mobi Pro, for example, offers selective transfer, RAW format support, and 12 months of free online storage.
- Set up your Wi-Fi SD card: Download the necessary software or application for your chosen Wi-Fi SD card. For the Eye-Fi card, you would download the Keenai software (previously branded as Eye-Fi) on your computer or mobile device. Follow the installation instructions and create an account if required.
- Configure the settings: During the setup process, you will be able to choose where you want your photos and videos to be transferred. You can usually select specific folders or create new ones. Additionally, you may need to connect your Wi-Fi SD card to your local Wi-Fi network, especially if you are using a computer with a wired Ethernet connection.
- Test the transfer: Once the setup is complete, insert the Wi-Fi SD card into your camera and take a test photo. The image should automatically transfer to the designated folder on your computer or mobile device.
- Manage power usage: Using a Wi-Fi SD card will consume more power from your camera's battery, so be prepared to recharge your camera's battery more frequently. Newer Wi-Fi SD cards are generally more power-efficient, but it is still something to keep in mind.
- Explore additional features: Depending on the Wi-Fi SD card you choose, you may have access to various additional features. For example, the Eye-Fi Mobi Pro offers selective transfer, allowing you to choose specific photos for transfer by using your camera's save/lock function.
By following these steps, you can efficiently transfer raw files from your camera using a Wi-Fi SD card, giving you greater flexibility in managing and editing your photos.
Charging Your Coolpix S51: A Step-by-Step Guide
You may want to see also

Using a Wi-Fi hotspot card reader
First, purchase a Wi-Fi hotspot card reader that is compatible with your camera and device. The Kingston MobileLite Wireless range, such as the G3, is a popular option. These card readers often double up as emergency power banks, making them a handy tool to have in your photography kit.
Once you have your card reader, follow these steps:
- Take the card reader with you and plug it into the hotspot. You can create a local Wi-Fi hotspot using your camera. Consult your camera's manual to find out how to do this, as the process may vary depending on your camera model.
- Connect your smartphone or tablet to the local Wi-Fi network created by your camera. You may need to enter a password, which should be provided by your camera.
- Access the card reader via its associated app. Make sure you have downloaded and installed the app beforehand.
- Transfer your raw files from the camera to your device. Depending on the card reader and your device, you may be able to select multiple files for transfer at once.
- Once the transfer is complete, you can disconnect your device from the local Wi-Fi network and begin editing your raw files using your preferred photo editing apps.
It is recommended to use the fastest card reader available to maximize transfer speeds. Additionally, ensure that your card reader is not a multiple card reader, as some mobile devices may struggle to work correctly when presented with multiple drives in a single reader.
While transferring raw files over Wi-Fi is convenient, it's important to keep in mind that this method may drain your camera's battery more quickly. It is always a good idea to have fully charged batteries before beginning the transfer process.
Doorbell Camera Battery Options: External Power Source?
You may want to see also

Connecting your memory card to your phone
Transferring raw files from your camera to your smartphone can be a straightforward process. One option is to use a WiFi SD card, such as the Toshiba FlashAir, which provides full access to the card contents, allowing you to transfer the full raw files back to your smartphone. However, this option has some drawbacks, including increased power drain on your camera battery and higher costs.
Another option is to use a WiFi hotspot card reader such as the Kingston Mobilelite Wireless range. This option involves plugging the card reader into the hotspot and then accessing it via an associated app. It often doubles up as an emergency power bank, which can be useful. When choosing a card reader, it is recommended to select the fastest one available to maximize transfer speeds. Additionally, it is suggested to avoid using a multiple card reader as some mobile devices may struggle to work correctly with multiple drives in a single reader.
If WiFi is not an option, you can try directly connecting your memory card to your phone. For devices with a microUSB connection, Android may support the use of an On-the-Go (OTG) cable, which will mount the drive via a card reader. Better support is available for USBC type connections, where a similar connector can be used. For iOS devices, a Lightning to SD Card Camera Reader cable can be used, although this option tends to be pricier.
When using any method that requires plugging your memory card into another device, it is important to exercise caution as there is a higher potential for file loss. It is recommended to test the workflow with some test shots before you need to use it, and to ensure that all devices are fully charged to avoid potential problems.
Unraveling Camera Battery Composition: What Powers Photography?
You may want to see also

Using a card reader
Step 1: Choose a Suitable Card Reader
Select a card reader that is compatible with your camera's memory card format, such as SD or microSD. Consider factors like price, speed, and compatibility with your computer or smartphone. Some card readers have a built-in cable, while others may require a separate USB or USB-C cable.
Step 2: Connect the Card Reader
Take the memory card out of your camera and insert it into the card reader. Then, connect the card reader to your computer or smartphone. If you're using a smartphone, you may need an adapter, such as a USB-C connector or Lightning cable, depending on your phone model. Ensure the connection is secure to avoid any data transfer issues.
Step 3: Access the Memory Card Content
Once connected, your computer or smartphone should recognize the memory card as an external storage device. On a computer, use Windows Explorer (PC) or Finder (Mac) to navigate to the memory card drive and open the folder containing your raw files. On a smartphone, you may need to use a file management app to access the card's contents.
Step 4: Transfer the Raw Files
Select the raw files you want to transfer and copy them to your desired location on your computer or smartphone. You can drag and drop the files or use the copy and paste function. If transferring to a computer, consider creating a specific folder for your raw files to keep them organized and easily accessible.
Step 5: Safely Remove the Memory Card
After the transfer is complete, safely remove the memory card from the card reader. This step is crucial to ensure data integrity and prevent any file corruption. Follow the standard procedure for your operating system, such as "Eject" on a Mac or "Safely Remove Hardware" on a PC.
Best Camera Battery Chargers: De-A45 Edition
You may want to see also
Frequently asked questions
You can use a third-party app such as Camera Connect & Control or plug your memory card into your phone.
You can use a Lightning to SD Card Camera Reader cable to connect your memory card to your phone.
You can either plug your camera into your computer using a cable or take out your camera's memory card and insert it into your computer.
Raw files are the digital equivalent of negatives and give you more flexibility when editing your photos.


