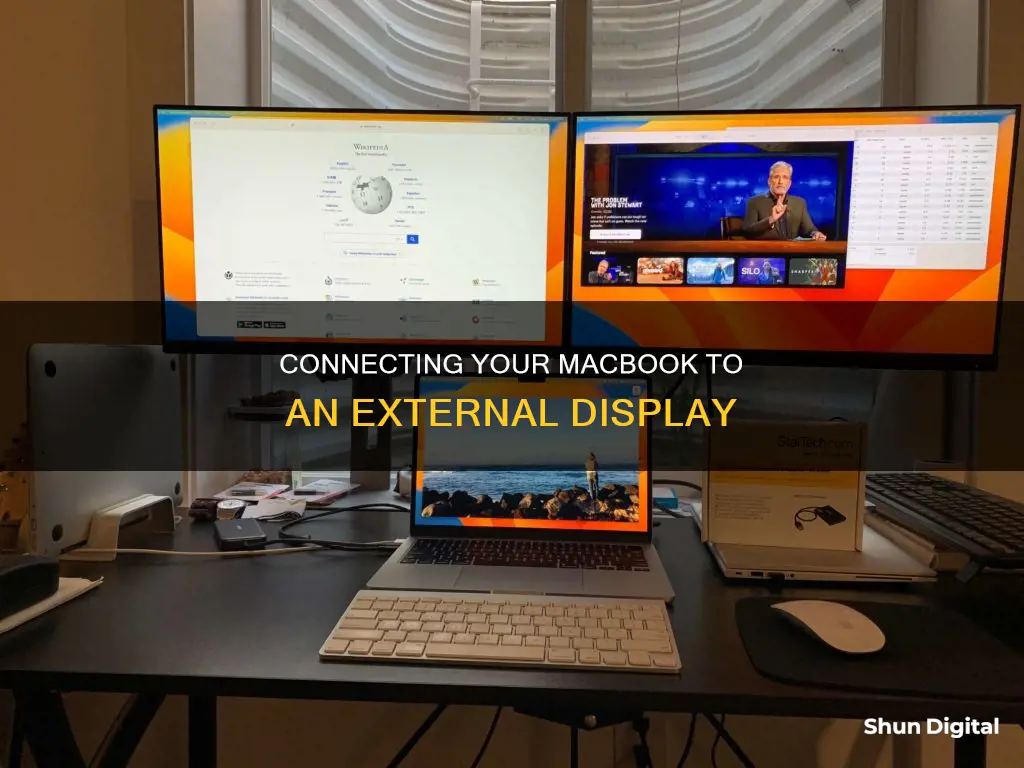
If you want to hook up your MacBook to another monitor, you'll need to determine what kind of video ports your MacBook has, how many displays it can support, and whether you have the right cables. Depending on your MacBook model, you may be able to connect multiple displays. Once you have the right cables, the steps to connect your MacBook to another monitor are relatively simple.
| Characteristics | Values |
|---|---|
| Number of displays supported | Depends on the Mac model. Some can support up to five additional displays, while the M1 Macs can support only one additional display. |
| Ports | HDMI, USB-C, Thunderbolt 3, 4, 2, or Mini Display |
| Cable | VGA, DVI, HDMI, USB-C/Thunderbolt 3, USB-C/Thunderbolt to HDMI, USB-C to VGA, USB-C to DVI, USB-C to Mini DisplayPort, Mini DisplayPort to HDMI, Thunderbolt 3 (USB-C) to Thunderbolt 2 |
| Adapter | Apple USB-C Digital AV Multiport, Apple Thunderbolt 3 (USB-C) to Thunderbolt 2, Apple USB-C VGA Multiport, Apple Thunderbolt, Belkin UltraHD High Speed 4K HDMI, Apple USB-C/Thunderbolt 3, Apple Thunderbolt 3/USB-C, Apple USB-C Digital AV Multiport, Uni. Six-foot USB-C/Thunderbolt 3 to HDMI, Apple USB-C VGA Multiport, Belkin USB-C to VGA, Benfei USB-C to DVI, Apple Thunderbolt 2 |
| Display settings | Extended display, Mirror display, Duplicate display, Show only on 1, Show only on 2 |
What You'll Learn

Identify your MacBook model
To identify your MacBook model, you can use the following methods:
About This Mac:
The simplest way is to go to the Apple menu in the upper-left corner of your screen and select "About This Mac". This will provide you with information about your MacBook model, including the model identifier and part numbers.
System Information App:
You can also use the System Information app to identify your MacBook model. Go to the Apple menu and select System Information to access details about your MacBook.
Serial Number:
If you don't have your MacBook or it's not turning on, you can find the serial number printed on the underside of your device, usually near the regulatory markings. You can also find the serial number on the original packaging, next to a barcode label. Once you have the serial number, you can enter it on the Check Coverage page or Tech Specs page to find your specific MacBook model.
Apple Part Number:
The original packaging of your MacBook may also display an Apple part number, such as MNYF2xx/A or MLH12xx/A. The "xx" in the part number varies depending on the country or region. You can match this Apple part number to the list of MacBook models provided by Apple to identify your specific model.
Model Number:
Model Numbers, also called Family Numbers on some older G3 and G4-based Macs, can usually be found on the bottom of notebook Macs or on the back or bottom of desktop Macs. These Model Numbers typically look like A1278 or M8493. However, keep in mind that Model Numbers are not always unique and may be shared by different models, so additional information may be needed for accurate identification.
Monitoring Bandwidth Usage: Tracking Program Bandwidth Consumption
You may want to see also

Identify your monitor model
To identify your monitor model, you can follow these steps:
Firstly, find your "Mac version" by going to the Apple menu, clicking on "About this Mac", and then clicking on "Overview". Knowing your Mac version will help you determine the type of video ports it has and how many external displays it can support.
Next, locate the model ID of your monitor. This can usually be found on a label at the lower side of the rear panel of the monitor. Once you have the model ID, you can check the product page on the manufacturer's website to get an overview of the available connectivity ports for that specific model. This will help you determine if the monitor is compatible with your Mac and if you have the correct cables and adapters for the connection.
Additionally, you can refer to the user manual or documentation that came with your monitor to get more detailed information about its model, specifications, and supported connection types. This will ensure that you have the necessary cables and adapters for a successful connection.
By identifying your monitor model and its specifications, you can ensure compatibility with your Mac and gather the necessary equipment for a proper setup.
Opening LG Flatron LCD Monitors: A Step-by-Step Guide
You may want to see also

Ensure you have the right cables
To connect your MacBook to another monitor, you will need to ensure you have the right cables. The cable you require depends on the model of your Mac and the type of monitor. Apple has implemented several different port types over the years, and your Mac desktop or MacBook might feature any of the following: HDMI, USB-C, Thunderbolt 3, 4, 2, or Mini Display.
If your Mac has an HDMI port, you can use an HDMI cable to connect an HDMI display. If your Mac doesn't have an HDMI port, you'll need an adapter or converter. Some newer Macs have a Thunderbolt/USB-C port, which supports USB-C-equipped monitors or Thunderbolt 3 monitors. In this case, you can use any USB-C cable to connect your Mac to your monitor.
If you have a Thunderbolt 3 (USB-C) or Thunderbolt 4 (USB-C) port on your Mac, you can also connect to a DisplayPort (DP) display. You will need a USB-C to Display Port 1.4 cable for this. Alternatively, if you have a Thunderbolt port, you can connect to a DisplayPort device, but it must be the last device in a chain of connected Thunderbolt devices.
For Macs with Thunderbolt or Thunderbolt 2, you can connect up to two displays. If the displays have Thunderbolt ports, you can daisy-chain them, connecting one display to the Mac and the other display to the first. If your Mac has two Thunderbolt ports, you can connect each display to a separate Thunderbolt port.
If your Mac has a Mini DisplayPort, you can use an adapter to connect to displays with VGA, DVI, or HDMI interfaces.
If you want to connect your Mac to a VGA display, you will need a USB-C VGA Multiport Adapter or a similar adapter. VGA connectors transmit analogue signals and will only carry HD video and analogue audio.
For a DVI display, you will need a USB-C to DVI adapter. DVI offers a higher-quality, digital signal than VGA, which will provide a marked difference when viewing HD video.
Monitoring iPhone Memory Usage: A Step-by-Step Guide
You may want to see also

Connect the monitor to power
To connect your MacBook to another monitor, you'll first need to connect the monitor to a power source. This is done using the display's power cable.
Different monitors have different types of power cables, so it's important to identify which cable your monitor uses. Common types of power cables include VGA, USB-C, Thunderbolt, and HDMI. Once you've identified the type of cable your monitor uses, simply plug it into the corresponding port on the monitor, and connect the other end to a power source, such as a power outlet or power strip.
If your monitor doesn't turn on after plugging it in, try adjusting the power cable connection to ensure it's securely attached. You may also want to check that the monitor is set to the correct power source using its physical controls, usually a series of buttons or a joystick.
Additionally, if your monitor has multiple input sources, you may need to select the correct one. This can also be done using the monitor's physical controls.
Once your monitor is connected to power and turned on, you can proceed to connect it to your MacBook.
Monitoring Bandwidth Usage: Airport Extreme Edition
You may want to see also

Connect the monitor to your MacBook
To connect your MacBook to another monitor, you'll need to determine what kind of video ports your MacBook has, how many displays it can support, and whether you have the right cables.
Identify the video ports on your MacBook
First, you need to identify what type of video ports your MacBook has. This will determine what kind and how many external displays you can connect and how you connect them. Common video ports on MacBooks include HDMI, USB-C, Thunderbolt 3, 4, 2, or Mini Display.
Check how many displays your MacBook can support
Next, check how many displays your MacBook can support. Different models of Macs have different capabilities. For example, Mac computers with the Apple M1 Chip can only connect to a single external display, while Mac computers with Thunderbolt 4 (USB-C) and HDMI ports can connect to up to eight external displays, depending on the model.
Ensure you have the right cables and adapters
If your display comes with cables that match the ports on your MacBook, you can use those to connect the two. If not, you'll need to obtain cables that fit the available ports on both your MacBook and the display. If your display cables don't have connectors that match the ports on your MacBook, you may need to use an adapter.
Connect your display to your MacBook
Once you have the correct cables and adapters, connect your display to your MacBook using the identified video ports. Make sure that both your MacBook and the display are powered on. Your MacBook should automatically detect the display. If it doesn't, check that the cable is properly connected and that your software is up to date.
Best Monitor Size for Editing: How Big is Too Big?
You may want to see also
Frequently asked questions
First, identify the video ports on your MacBook. Next, determine how many displays your MacBook can support. Then, make sure you have the right cables and adapters. Finally, connect your displays to your MacBook.
The most common types of video ports are HDMI, USB-C, Thunderbolt 3, 4, 2, or Mini Display.
Some MacBook models can support up to five additional displays. However, M1 MacBook models, including the MacBook Air and 13-inch MacBook Pro, can only support one additional display.
The cable you need depends on the model of your MacBook and the type of monitor. If your MacBook has an HDMI port, you can use an HDMI cable to connect it to an external monitor. If your MacBook has a Thunderbolt 3 (USB-C) port, you can use a USB-C cable. For Thunderbolt 4 (USB-C) or HDMI ports, you can connect up to eight external displays depending on your MacBook model.
Connect your second monitor to your MacBook using an HDMI cable. If your MacBook doesn't have an HDMI port, connect the HDMI cable to a USB cable or hub, and then connect that to your MacBook. Go to System Preferences and select Displays. In the Display window, click on Display Settings and set the second display as an Extended display or Mirror for [name of the main display].


