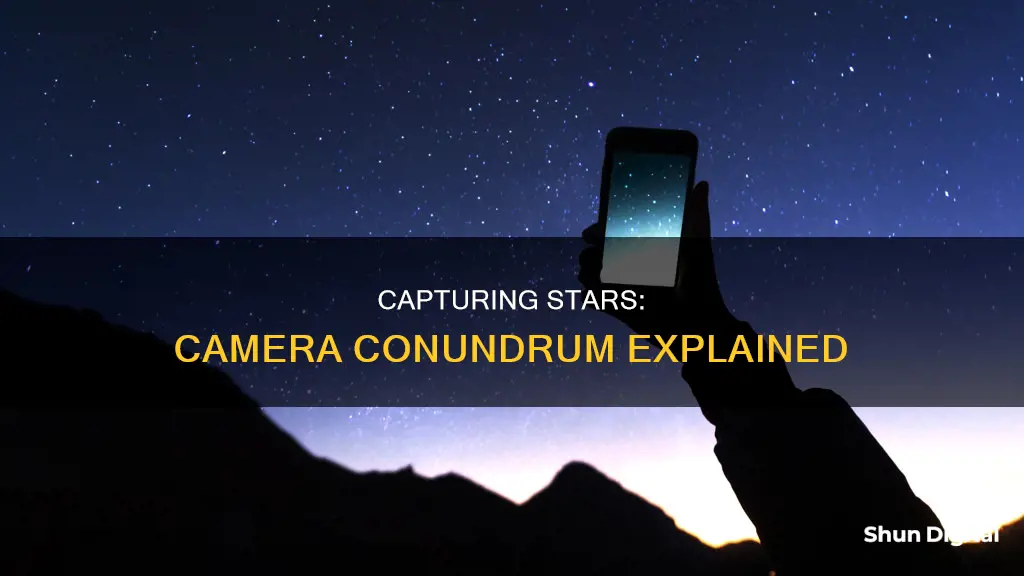
Many factors can contribute to a camera's inability to capture stars. These include the camera's settings, such as ISO, aperture, shutter speed, and focus, as well as ambient light pollution and the dynamic range of the camera sensor compared to the human eye. Post-processing techniques can enhance star visibility in photographs, but it's challenging to match the human eye's ability to perceive stars.
| Characteristics | Values |
|---|---|
| Camera settings | Increase ISO, adjust aperture, shutter speed, and exposure |
| Light pollution | Avoid streetlights, house lights, vehicle lights, etc. |
| Camera focus | Achieve daytime focus, use manual focus, adjust focus via camera not eyes |
| Camera equipment | Use extension tubes, spacers, diagonal, Bahtinov mask, remote shutter release |
| Post-processing | Tweak photos using photo editing tools and software |
What You'll Learn
- The dynamic range of camera sensors is not a match for the human eye
- Camera settings: ISO, aperture, shutter speed, and focus
- Ambient light: too much light pollution can affect visibility
- Post-processing: editing tools can enhance star visibility
- Camera equipment: lens type, focal length, and mounts can impact star visibility

The dynamic range of camera sensors is not a match for the human eye
The human eye and a camera sensor are very different. The human eye has a much wider dynamic range than a camera sensor. The human eye acts as a contrast detector, whereas a digital camera sensor uses absolute level detection. The human eye can detect a single photon in dark-adapted conditions, and when exposed to sunlight, the dynamic range of the human eye is well over 1,000,000:1.
The human eye can see about 20-24 stops of dynamic range, whereas cameras have 10 to 12 stops of dynamic range. The human eye registers brightness on a logarithmic scale, whereas digital sensors are linear. This means that the human eye can see a much wider range of brightness levels than a camera sensor.
The human eye also has a very high "frame rate" and can change sensitivity, direction, and focus very quickly. The brain takes all these images from the eye and creates a composite image, filling in details that are completely made up based on expectations.
The human eye and brain work together to create an image. The brain is what is seeing things via the eyes. The eye has a very small area of 'good' vision, and what we see when we look at a scene is more like a panorama made up of lots of small images adjusted for focus, exposure, and colour balance. The brain is constantly flickering (saccading) across the scene, putting the small area of sharp vision over each part of the scene in turn.
The human eye can see a theoretical dynamic range of 30 stops, and in reality, the practical dynamic range is usually closer to 20. A modern DSLR can capture more dynamic range in an instantaneous case than the human eye.
The human eye system can discern a 3-magnitude star sitting in a lawn chair with a beer, while looking at the full moon, which has a magnitude of -13. This is some pretty large dynamic range that the human eye faithfully sees.
The human eye and brain system is extremely sophisticated, and until the scene hits a very high dynamic range, the brain constantly recognises how wide that dynamic range is and alters the manipulation to suit.
Element TV's Camera Conundrum: Fact or Fiction?
You may want to see also

Camera settings: ISO, aperture, shutter speed, and focus
To capture the stars in all their glory, you need to adjust your camera settings to allow more light to enter the camera sensor. Here are the key camera settings to consider:
ISO
The ISO setting determines the camera sensor's light sensitivity. For star photography, a high ISO is required to compensate for the low-light conditions. Typically, values between ISO 1600 and ISO 3200 are recommended, but this can go up to ISO 6400 or more during a new moon or in areas with light pollution. It's important to note that higher ISO values introduce more noise to the image, so finding the right balance is crucial.
Aperture
The aperture setting controls the size of the opening in the lens through which light enters the camera. For star photography, a wide aperture (low f-stop value) is preferred to allow more light to reach the sensor. Most photographers use apertures in the range of f/1.4 to f/2.8, with f/4 being the minimum recommended setting. Using a wide aperture results in a shallow depth of field, so the foreground may be soft or out of focus.
Shutter Speed
Shutter speed refers to the length of time the camera's shutter remains open, allowing light to reach the sensor. For star photography, a slow shutter speed (long exposure) is necessary due to the low-light conditions. However, if the shutter speed is too slow (longer than about 30 seconds), the stars will begin to blur, creating star trails. The ideal shutter speed range is typically between 15 and 30 seconds, depending on the lens and camera setup.
Focus
Focusing at night can be challenging, as autofocus systems may struggle in low-light conditions. To achieve sharp focus for star photography, it is recommended to switch to manual focus and adjust the focus ring to infinity. Fine-tuning may be required to find the optimal focus point. Additionally, using distant light sources, such as bright stars or street lights, can help achieve accurate focus.
Pursuing a Career as a TV Cameraman: Degree Options
You may want to see also

Ambient light: too much light pollution can affect visibility
The biggest enemy of night sky photography is ambient light. Too much light pollution can affect visibility. Make sure you are in the countryside or have very little ambient light around (no or very little streetlights, house lights, vehicle lights, etc).
You will need to adjust your camera settings to capture the night sky. A higher ISO is recommended, as this will boost the electronic signal generated by the incoming light. Try ISO 3200 or even 6400. You will also need to boost the exposure in post-processing to bring out the details.
You can also try taking multiple photos and stacking them using some kind of median averaging to reduce the noise you see at high ISO. You can use photo editing tools on a computer to tweak the photos and bring out more stars.
Woman Man Camera TV: Sarah Cooper's Guide to Chaos
You may want to see also

Post-processing: editing tools can enhance star visibility
Post-processing is an essential step in astrophotography to enhance star visibility and create breathtaking photos of the night sky. Here are some editing tools and techniques to achieve that:
Image Stacking:
- Image stacking is a crucial step in astrophotography post-processing. It involves merging multiple light and calibration frames into a single image.
- By stacking images, you can boost the signal-to-noise ratio, resulting in a clearer and more detailed shot.
- Stacking also helps to even out the values across the picture, reducing noise without lowering the signal.
- You can stack images using software like Photoshop or Lightroom, which offer "Auto-Blend Layers" options.
Reduce Stars Quantity:
- To achieve a cleaner composition, you can reduce the number of "peripheral" stars in your photo, emphasizing the sky and making the remaining stars more distinguishable.
- In Photoshop, use the Eyedropper Tool to select the color palette of the stars you want to reduce, and then adjust the Fuzziness level and Feather option to fine-tune your selection.
Bring Out the Stars:
- To add visual appeal, you can make the stars more prominent by selecting them with the Sample tool, copying the selection to a new layer, and setting the Layer Blending Mode to Screen.
- Group the layers using Photoshop keyboard shortcuts (Ctrl+G for Windows, Cmd+G for Mac), and add a mask to the group if you need to lower the effect's intensity in certain areas.
Fine-Tune White Balance:
- The color of the night sky can be influenced by various factors like twilight, light pollution, airglow, moonlight, etc.
- In Lightroom, use the WB: Temp slider in the Basic panel to adjust the white balance. Move the slider left for colder temperatures and right for warmer ones.
Adjust Contrast and Exposure:
- Play with the Blacks, Whites, and Contrast sliders in Lightroom to enhance the contrast between dark and light regions, making the stars brighter and the sky darker.
- Be careful not to overdo the contrast, as it may make the image too obscure.
Apply Lens Corrections:
- Check the "Enable Profile Correction" option in Lightroom to correct lens distortions like vignetting, stretched foreground, or inaccurate curves of the Milky Way.
- Also, check the "Remove Chromatic Aberration" box to eliminate any unwanted haloes around bright stars.
Dehaze the Photo:
Use the Dehaze Tool in the Effects menu of the Develop Module in Lightroom to reduce the impact of light pollution and enhance the contrast and vibrancy of the Milky Way.
Adjust Hue, Saturation, and Luminance:
- Experiment with the sliders in the HSL panel of Lightroom to tweak individual colors in your photo.
- Be cautious when adjusting colors to maintain a natural look, especially with blue and green hues, as digital cameras tend to oversaturate them.
Fix Highlights and Shadows:
Raising the exposure and contrast can make certain parts of your image too bright. Use the Highlights and Shadows sliders in Lightroom to fine-tune these areas.
Apply Local Adjustments:
- Use the Gradient tool in Lightroom to brighten the foreground or bring specific areas of the sky into focus.
- The Adjustment Brush tool allows you to apply adjustments to specific regions, giving you greater control over your edits.
Reduce Noise and Sharpen the Photo:
- High ISO values used in night photography can introduce noise to your images, which needs to be addressed in post-processing.
- Use the tools in the Detail panel of Lightroom to reduce noise, keeping the values minimal for better results.
- The Masking slider is essential to hide sharpening in noisy regions, and values around 90 are recommended.
These editing techniques will help you enhance the visibility of stars in your astrophotography images, allowing you to create stunning visuals of the night sky.
Where is the Camera on My Smart TV?
You may want to see also

Camera equipment: lens type, focal length, and mounts can impact star visibility
The lens type, focal length, and mounts can all impact the visibility of stars in a photograph.
Lens Type
Prime (or fixed) lenses have a fixed focal length and are known for delivering high-quality images. Zoom lenses, on the other hand, provide a range of focal lengths, making them more versatile but potentially compromising on image quality. The type of lens you choose will depend on the specific requirements of your shoot.
Focal Length
The focal length of a lens determines the angle of view and magnification. Lenses with shorter focal lengths provide a wider angle of view and less magnification, making them better suited for landscapes. Longer focal lengths offer a narrower angle of view and more magnification, which is ideal for sports or wildlife photography. Additionally, longer focal lengths are more susceptible to camera shake, resulting in blurred photos.
When it comes to star photography, a wider angle lens (smaller focal length) is generally recommended. This is because it allows for a larger field of view, capturing more of the night sky. However, it's important to note that the working distance also plays a crucial role. If you're using a wide-angle lens close to the working area, there will be a noticeable difference in the apparent sizes of identical objects at different distances from the imaging system.
Mounts
The type of mount used in star photography is crucial to achieving clear, sharp images. Star trackers are commonly used to compensate for the Earth's rotation and prevent "star trailing" in long-exposure shots. The tracking accuracy of these mounts depends on the diameter and precision of the gear and worm drive. Larger diameters and higher precision gears will result in better tracking performance.
Additionally, the alignment of the mount is essential. Inaccurate alignment can result in issues such as "colour mottling," where the sensitivity of pixels under different colour filters creates blotches of colour in the image. To avoid this, slight offsets in the alignment or a technique called "dithering" can be used, resulting in a grey background instead of coloured blotches.
In summary, the choice of lens type, focal length, and mount all play a significant role in star visibility in photography. Experimentation with different equipment and settings is often necessary to achieve the desired results in star photography.
Utilizing Internet Explorer to View Unv Cameras
You may want to see also
Frequently asked questions
Your camera might not have the right settings to see the stars. Try increasing the ISO to 2000 or higher, and make sure your camera is focused on infinity.
Using a tripod or another stabilisation method can help your phone capture more light from the night sky. You can also try downloading a third-party camera app that gives you more manual control over your phone's camera settings.
You can try attaching your phone to a telescope or binoculars. This will help you capture more light from the night sky and improve your ability to see the stars.
Start by finding a dark location away from city lights. Use a tripod to stabilise your phone and make sure your phone is focused on infinity. Try to include a distant horizon in your composition, as this will help your phone's autofocus.
There are several apps available that can help you capture the night sky with your phone. Some popular options include NightCap Camera (iOS), DeepSkyCamera (Android), Camera FV-5 (Android), and StarTrail Photos Generator (Android).


