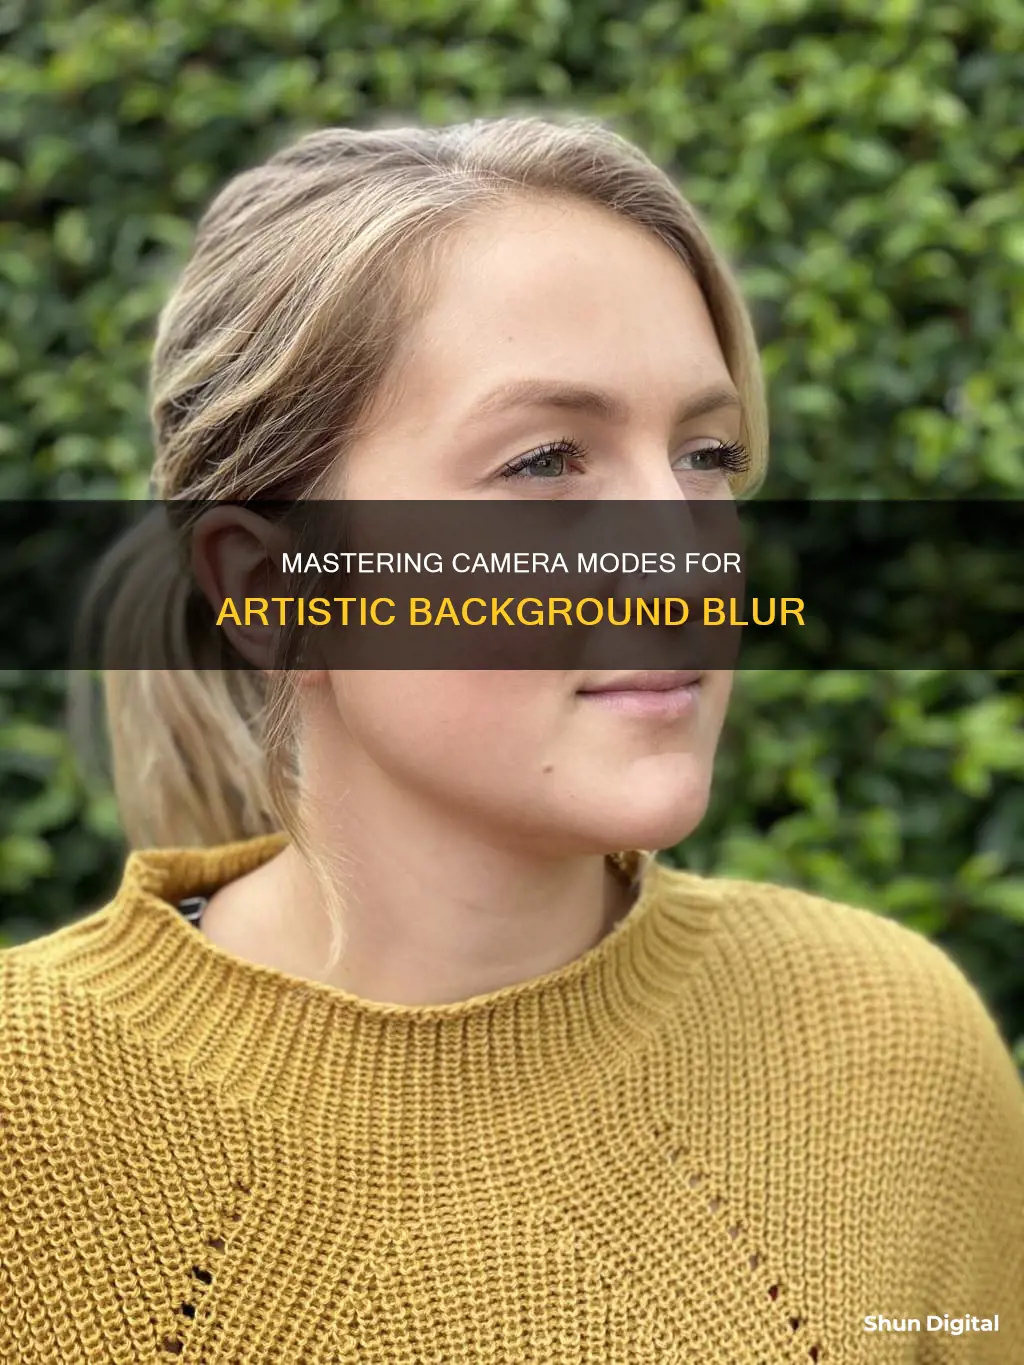
Capturing a photo with a blurred background is a great way to highlight the subject of your photo and create a professional-looking image. This effect can be achieved through a combination of gear, settings, and subject placement. In terms of gear, a camera with a larger sensor, such as a mirrorless or DSLR camera, will make it easier to blur the background. Additionally, using a lens with a wide aperture setting, such as f/2.8 or lower, will help create a shallow depth of field, keeping the subject in focus while blurring the background. Telephoto lenses can also be used to make the background appear closer and more dramatic. When it comes to settings, setting your camera to aperture priority mode (A or AV) and opening your aperture as wide as possible will help achieve the desired blur. Subject placement is also important; moving your subject away from the background and getting closer to them will enhance the blur effect. Playing with lighting and adding elements like Christmas lights or sparklers can create interesting bokeh effects, adding mood and emotion to your photos.
| Characteristics | Values |
|---|---|
| Camera mode | Aperture priority mode (A or AV) |
| Aperture | As wide as possible (lowest f-stop number) |
| Subject placement | Away from the background |
| Zoom | Closer to the subject |
| ISO | 200 for a bright sunny day, 400 for a cloudy darker day, 800 for low light |
| Shutter speed | Higher than the lens number |
What You'll Learn

Use a camera with a larger sensor
Using a camera with a larger sensor is a great way to achieve those dreamy, creamy bokeh backgrounds that make your photos pop. Here's why:
Larger Sensors Provide Pretty Blur
A larger sensor in your camera will help you capture beautiful background blur, also known as bokeh. Bokeh is a Japanese term for the aesthetic quality of blurred areas in a photograph, and it can add depth, dimension, and mood to your images. By blurring the background, you can isolate your subject and make them stand out effectively.
How Sensor Size Affects Background Blur
The sensor size plays a critical role in determining the amount of background blur in your photos. The market offers a wide range of cameras with different sensor sizes, apertures, and zoom ranges, making it challenging to estimate the exact amount of background blur you can achieve. However, understanding the relationship between sensor size and background blur will help you make an informed choice when selecting a camera for achieving those perfect blurry backgrounds.
Understanding the Technical Aspects
The amount of background blur is influenced by factors such as focal length, aperture, and subject size. By using certain formulas, you can estimate the maximum strength of background blur your camera can produce based on its specifications. This involves considering factors such as focal length, aperture, and the size of your subject.
Practical Tips for Using a Larger Sensor Camera
When using a camera with a larger sensor, here are some practical tips to achieve stunning blurred backgrounds:
- Use a wide aperture lens: Look for lenses with at least an f/2.8 aperture. The lower the f-stop number, the more blur you will achieve.
- Play with aperture settings: Experiment with different aperture settings to find the right balance between a sharp subject and a blurred background. Remember that lower f-stop numbers result in a wider aperture and more blur.
- Move your subject away from the background: Keep your background at a distance from your subject. This will make it easier to achieve that soft and creamy bokeh look.
- Get close to your subject: Move closer to your subject to increase the blur effect. This technique works well with any camera, including smartphones.
- Use a telephoto lens: A telephoto lens can make your background seem closer, resulting in a more dramatic blur.
By following these tips and understanding the relationship between larger sensors and background blur, you'll be well on your way to capturing stunning photographs with beautiful bokeh effects.
Trail Camera Battery Life: How Long Do They Last?
You may want to see also

Set your camera to aperture priority mode (A or AV)
Setting your camera to aperture priority mode (A or AV) is a great way to blur the background of your photos. This mode gives you control over the aperture, which is the most important setting in photography. Aperture priority mode is also faster to use than manual mode, making it a good option when you need to work quickly.
To set your camera to aperture priority mode, simply turn the PASM dial on your camera to the "A" or "Av" setting. On some Fuji and Leica cameras without a PASM dial, you can get the same effect by turning the shutter speed dial to Auto. With aperture priority mode selected, you can now manually set the aperture to your desired f-stop. Remember that a wider aperture will create a shallower depth of field and more background blur, while a narrower aperture will result in a greater depth of field and less background blur.
Once you have set your desired aperture, the camera will automatically select a shutter speed to match it, ensuring proper exposure based on the lighting conditions measured by the camera's light meter. This takes the guesswork out of selecting the correct shutter speed and allows you to focus on composing your shot.
Aperture priority mode is particularly useful in situations where you want to control the depth of field. For example, in portrait photography, you may want to use a wide aperture to blur the background and make your subject stand out. In landscape photography, on the other hand, you might want to use a narrow aperture to ensure that objects in the foreground, middle distance, and background are all in focus.
Keep in mind that in low-light conditions, aperture priority mode may result in slower shutter speeds, which can lead to blurry images if you're not using a tripod. In such cases, you can increase the ISO to allow for a faster shutter speed, or consider switching to manual mode if you need more control over the shutter speed.
Extending SpyPoint Camera Battery Life: How Long Should It Last?
You may want to see also

Use a wide aperture lens
Using a wide aperture lens is a great way to achieve a blurred background in your photos. The aperture of a lens refers to the adjustable opening that controls how much light enters the lens and is specified by the f-number. A wider aperture will create a shallow depth of field, resulting in a soft, blurred background.
When choosing a lens, look for one with a large aperture of at least f/2.8. Lower f-numbers will offer even more blur. For example, a 50mm lens with an aperture of f/1.8 will give you a nice bokeh effect, and lenses with apertures of f/1.4 or f/1.2 will provide even more blur. However, these lenses with larger apertures tend to be more expensive.
It's important to note that while a wide aperture is essential for achieving a blurred background, it's not the only factor. The distance between your subject and the background also plays a crucial role. The further away the background is from your subject, the smoother the bokeh will be. So, make sure to create some distance between your subject and the background to enhance the blur effect.
Additionally, the focal length of your lens can also impact the blur. Longer focal lengths can help compress the background, making the blur appear more exaggerated. However, even with a wide-angle lens, it is still possible to achieve a nice background blur.
By combining a wide aperture lens with the right subject placement and focal length, you can create stunning portraits or other types of photographs with beautiful blurred backgrounds that draw attention to your main subject.
Gaffer's Kit: Should You Include Camera Batteries?
You may want to see also

Use a telephoto lens
A telephoto lens is a great way to blur the background of your photos and make your subject stand out. Here's how to use it:
A telephoto lens has a long focal length, which means it can magnify your subject and make it appear closer. This is especially useful when you can't get physically closer to your subject. The longer the focal length, the more zoomed-in your image will be. For example, switching from a 50mm lens to a 400mm lens will make a significant difference to the background blur, even if the aperture remains the same.
How to Use a Telephoto Lens to Blur the Background
To blur the background with a telephoto lens, you need to understand the relationship between focal length, aperture, and depth of field. The depth of field refers to the distance between the closest and most distant areas in focus. A telephoto lens, with its longer focal length, helps to compress the background, making it appear softer and more blurred. This effect is enhanced when combined with a wide aperture (a smaller f-number), as this further reduces the depth of field.
Tips for Using a Telephoto Lens:
- Focal Length and Aperture Combination: The combination of a long focal length and a wide aperture is key to achieving a blurred background. A lens with a focal length of 100-200mm and an aperture of f/5.6, for example, will provide a significant amount of blur.
- Distance from the Background: Pulling your subject away from the background will enhance the blur effect. The further your subject is from the background, the smoother and more creamy the blur will appear.
- Distance from the Subject: In addition to distance from the background, the distance between you and your subject also matters. Getting closer to your subject will amplify the blur effect. This is because a shorter distance between the camera and the subject results in a shallower depth of field, making the background appear more out of focus.
- Sensor Size: The size of your camera's sensor also plays a role. DSLR or mirrorless cameras with large sensors tend to have longer focal lengths, which contribute to a better background blur.
- Lighting: Remember that the quality of the blur, or bokeh, depends on how soft and rounded the light sections in the background are. Look for bright spots of light, such as sunlight filtering through leaves, to create beautiful geometric bokeh.
Choosing the Right Camera Profile for Your RAW Photos
You may want to see also

Use a portrait mode on your iPhone
Portrait mode is a feature on the iPhone Camera app that allows you to take professional-looking photos with a sharp focus on the subject and a blurred background. This mode is perfect for shooting portraits of people and pets, but it can also be used for other subjects. Portrait mode is especially useful when you want to blur an ugly or distracting background, helping your subject stand out and creating a more pleasing image overall.
To use Portrait mode on your iPhone, open the Camera app and swipe to select Portrait mode at the bottom of the screen. Your subject should be between two and eight feet from the camera, and there should be plenty of light, as Portrait mode doesn't always work in low-light conditions. When you see the name of the lighting effect (e.g., Natural Light) turn yellow, it means the depth-effect is working, and you're ready to take your shot. You can then press the shutter button to capture your photo.
After taking a photo in Portrait mode, you can edit it to adjust the strength of the background blur. To do this, open the photo in the Photos app, tap "Edit," and then tap the "f/number" icon in the top left corner. A Depth slider will appear beneath the photo, allowing you to increase or decrease the blur strength by dragging the slider left or right.
It's important to note that Portrait mode is not available on all iPhone models. It is available on the iPhone SE (2nd generation) and later, iPhone X and later, as well as iPhone 7 Plus and iPhone 8 Plus. On the iPhone XR and iPhone SE (2nd generation), the rear-facing camera must detect a person's face to take a Portrait mode photo.
In addition to adjusting the blur strength, you can also enhance your Portrait mode photos using various lighting effects. On iPhone X and later, and iPhone 8 Plus, you have five Portrait Lighting options: Studio Light, Contour Light, Stage Light, Stage Light Mono, and High-Key Light Mono. These effects can be applied before or after taking the photo and can add a creative touch to your images.
Explore Lorex Camera Corridor Mode: Maximizing Your Camera's View
You may want to see also
Frequently asked questions
Bokeh.
Aperture.
The lower the aperture, the more blur you will achieve. A low aperture setting of around f/2.8 or lower will help you achieve a blurred background.
A wide aperture lens.
Ensure there is a large distance between the subject and the background.


