Adobe Camera Raw (ACR) is a powerful tool for photographers and graphic designers who work with Adobe Photoshop and Adobe Lightroom. It is a plugin that allows users to process and edit raw image files from digital cameras directly within these Adobe applications. ACR offers a wide range of tools and features to enhance, adjust, and fine-tune raw images, ensuring they reach their full potential in terms of colour, exposure, and detail.
ACR supports a vast range of raw file formats, allowing users to manipulate the original image data for maximum control and quality. It also offers non-destructive editing, meaning that all changes made are reversible, and the original raw file can always be restored.
What You'll Learn
![]()
Importing and enhancing raw images
Adobe Camera Raw is a tool that lets you import and enhance raw images. It has been a must-have for professional photographers since its release in 2003. Applications that support Adobe Camera Raw include Photoshop, Photoshop Elements, After Effects, and Bridge.
Importing Raw Images
To import camera raw images in Photoshop, select one or more camera raw files in Adobe Bridge, and then choose File > Open With > Adobe Photoshop CS5. Alternatively, you can choose the File > Open command in Photoshop and browse to select camera raw files. When you finish making adjustments in the Camera Raw dialog box, click Open Image to accept changes and open the adjusted image in Photoshop. Press Alt (Windows) or Option (Mac OS) to open a copy of the adjusted image and not save the adjustments to the original image’s metadata. Press Shift while clicking Open Image to open the image as a Smart Object in Photoshop.
To import camera raw images in After Effects using Adobe Bridge, select one or more camera raw files in Adobe Bridge, and then choose File > Open With > Adobe After Effects CS5.
Enhancing Raw Images
Adobe Camera Raw provides several features to enhance your raw images, including:
- Denoise: Removes noise from photos captured with high-ISO settings or in low light. It uses artificial intelligence to process Bayer or X-Trans RAW DNG files, reducing noise while preserving fine details.
- Raw Details: Produces crisp details, improves color rendering, and reduces artifacts. It is useful for large prints or displays where fine details are visible.
- Super Resolution: Creates an enhanced image with 2x the linear resolution, resulting in an image with 4x the total pixel count. This feature is especially useful for increasing the resolution of cropped images.
These features can be accessed by right-clicking on a photo and selecting Enhance from the context menu. You can also use keyboard shortcuts to enhance images quickly.
Troubleshooting Camera Raw Command Issues
You may want to see also
![]()
Non-destructive editing
Adobe Camera Raw is a tool that allows you to import and enhance raw image files, giving you greater control over the final image than you would have with JPEG images. When you shoot in RAW, you are essentially capturing all the data recorded by the sensor of your digital camera. This results in an image that hasn't been processed or compressed by the camera, giving you more data to work with when editing.
With non-destructive editing, you can fix colour problems, correct image perspective and lens distortion, enhance hidden details in shadows and highlights, and make precise edits to specific areas of your image. You can also use Adobe Camera Raw as a filter, applying non-destructive edits to all your images and layers. This simplifies your editing workflow and maximises flexibility.
The non-destructive nature of Adobe Camera Raw means that you can always return to the original image, even after numerous edits. This gives photographers and editors greater freedom to experiment and explore different creative directions without the risk of losing their original work.
Charging GoPro Hero 4: In-Camera Battery Charging Guide
You may want to see also
![]()
White balance adjustment
Adobe Camera Raw is a powerful tool for photographers, allowing users to import and enhance raw images. It is available as a plug-in with Adobe After Effects and Adobe Photoshop, and can also be used with Adobe Bridge.
To adjust the white balance, the user must first identify which objects in the image they want to be neutral-coloured (white or grey). The user can then adjust the colours to make those objects neutral. A white or grey object in a scene will take on the colour cast by the ambient light or flash used to take the picture.
The White Balance tool can be found under the Basic panel in the Edit tab. The user can then specify an object they want to be white or grey, and Camera Raw will determine the colour of the light in the scene and adjust the lighting automatically.
The White Balance drop-down menu in the Basic panel has three main controls for correcting a colour cast: As Shot, Auto, and Custom. As Shot uses the white balance metadata from the camera to determine the initial setting, which usually yields the correct colour temperature, or something close to it. Auto calculates the white balance based on the image data. Custom allows the user to choose a custom white balance by dragging the Temperature slider along the Kelvin scale until the desired effect is achieved, or by using the colour dropper tool on the top toolbar to select the colour they want the software to recognise as white or neutral.
The range and units for the Temperature and Tint controls differ depending on the file format. For raw files, Camera Raw provides a true-temperature adjustment slider, from 2,000 Kelvin to 50,000 Kelvin. For JPEG or TIFF files, Camera Raw attempts to approximate a different colour temperature or white balance, using a scale of -100 to 100 in place of the temperature scale.
The user can also adjust the white balance by selecting the White Balance tool and clicking an area in the image that they want to be a neutral grey. The Temperature and Tint properties will adjust to make the selected colour exactly neutral, if possible.
Adobe Camera Raw also offers a range of white balance presets, including Cloudy, Daylight, Flash, Fluorescent, Shade, and Tungsten. These presets either warm or cool the image to varying degrees.
Camera Batteries: Airplane Safety and Legalities Explored
You may want to see also
![]()
Exposure and tone control
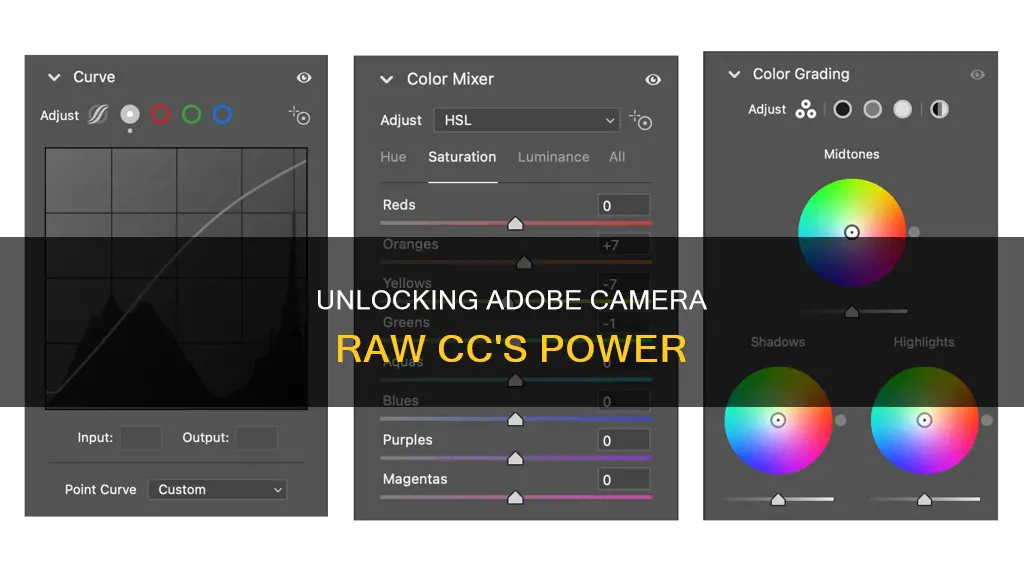
Adobe Camera Raw's exposure and tone control features allow you to make precise adjustments to the brightness and tonal range of your images. The Exposure slider in the Basic panel of the Camera Raw dialog box adjusts the overall image brightness. An adjustment of +1.00 is similar to opening the aperture one stop, while an adjustment of -1.00 is like closing the aperture by one stop. The Contrast slider increases or decreases image contrast, primarily affecting midtones. The Highlights slider adjusts bright image areas, allowing you to darken or brighten highlights while minimising clipping. The Shadows slider works similarly, but for dark image areas. The Whites slider adjusts white clipping, while the Blacks slider adjusts black clipping.
The Tone Curve feature in Camera Raw provides further control over image exposure and tonal range. The Curve options can be used to adjust contrast and exposure, as well as specific colour channels. The Parametric Curve option in the Curve drop-down menu allows for fine-tuning of image exposure by splitting tones into highlights, lights, darks, and shadows. The Point Curve option provides more freedom to create extra control points and make more targeted adjustments. Additionally, the Red Channel, Green Channel, and Blue Channel options allow for adjustments to specific colour values.
Mastering Edits: Clear Adjustments in Adobe Bridge and Camera Raw
You may want to see also
![]()
Lens correction
Adobe Camera Raw is a tool that lets users import and enhance raw image files. It is available as a plug-in with Adobe Photoshop and After Effects and can also be used with Adobe Bridge. Camera Raw supports images up to 512 megapixels and can interpret many camera raw formats.
The Lens Corrections tab in the Camera Raw dialog box provides tools to rectify these issues. It includes a Profile tab, which offers predefined lens profiles to compensate for common lens flaws. By checking the "Enable Lens Profile Corrections" box, Camera Raw will attempt to select the appropriate lens make, model, and profile based on the image's EXIF metadata. Users can also manually fine-tune the corrections using the Manual tab, which provides sliders to adjust distortion, defringing, and vignetting.
Additionally, the Lens Corrections tab can correct for chromatic aberration and colour fringes. By checking the "Remove Chromatic Aberration" box, Camera Raw will automatically remove lateral chromatic aberration and correct colour fringing. The Purple Amount and Green Amount sliders allow for further refinement, adjusting the intensity of the correction to prevent desaturation of purple or green objects in the image.
Editing Midtones in Camera Raw: A Step-by-Step Guide
You may want to see also
Frequently asked questions
Adobe Camera Raw CC is a plugin for Adobe Photoshop and Lightroom, allowing users to process and edit raw image files from digital cameras. It offers a range of tools to enhance, adjust and fine-tune raw images, improving colour, exposure and detail.
Adobe Camera Raw CC supports a wide range of raw file formats, allowing manipulation of original image data. It also offers non-destructive editing, white balance adjustment, exposure and tone control, colour grading, lens correction, noise reduction, batch processing and presets.
Yes, it is designed as a plugin for these applications and requires either Photoshop or Lightroom to be installed and running to function.
While it is primarily designed for raw image processing, it can also be used to adjust JPEG and TIFF images, although with more limited flexibility and benefits.
Presets are saved sets of adjustments. You can create your own or use pre-built presets to quickly and consistently apply a look to your images.