White balance is the process of removing unrealistic colour casts, so that objects which appear white in person are rendered white in your photo. It is used to adjust colours so that the image looks more natural.
White balance changes the colour of the white tones in your photograph so that they appear white. This can often change the 'temperature' of your whole photograph, shifting it towards cooler blues or warmer yellow tones. This temperature scale is known as the Kelvin scale.
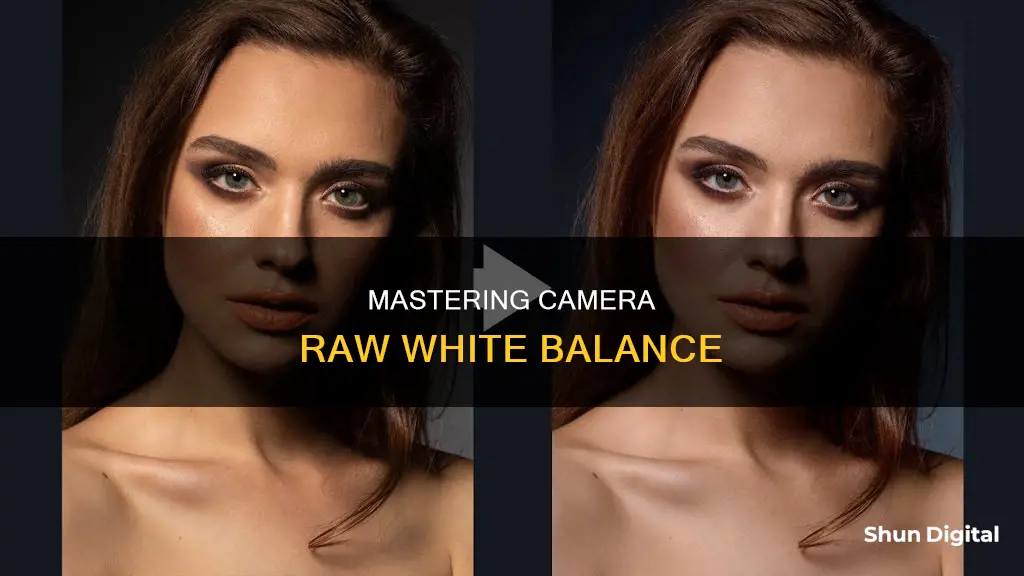
When shooting in RAW, white balance does not get applied to the RAW file. However, it is important to set the white balance in-camera as it affects the in-camera histogram and blinkies.
You can adjust the white balance in Adobe Camera Raw (ACR) by using the White Balance Tool, selecting a preset white balance level, or manually adjusting the white balance using the Temperature and Tint sliders.
| Characteristics | Values |
|---|---|
| Purpose | Remove unrealistic color casts so that objects which appear white in person are rendered white in your photo |
| Process | Adjusting colors to get rid of color casts, in order to match the picture with what was seen when it was taken |
| Tools | Adobe Camera Raw, Photoshop, Camera Raw plug-in |
| White Balance Tool | Click the "White Balance Tool" button in the top menu to change your mouse pointer into the "White Balance Tool" |
| White Balance Presets | Auto, Custom, Cloudy, Daylight, Flash, Fluorescent, Shade, Tungsten |
| Custom White Balance | Drag the Temperature slider along the (Kelvin) scale until you get the desired effect, or use the colour dropper tool on the top toolbar to select the colour you want the software to recognise as white or neutral |
| Histogram | A graphical representation of tonal values in your photo |
| RGB Values | Displayed in the upper-right corner of the dialog box when you move the Zoom tool, Hand tool, or White Balance tool over the preview image |
| White Balance Controls | Sets the color balance of the image to reflect the lighting conditions under which the photo was taken |
| Temperature | Fine-tunes the white balance to a custom color temperature |
| Tint | Fine-tunes the white balance to compensate for a green or magenta tint |
What You'll Learn
![]()
Using the histogram and RGB values in camera raw
When using Adobe Camera Raw, the histogram and RGB values can be used to understand the white balance and tonal values of your image. The histogram is a graphical representation of the tonal values in your photo, with shadows on the left, midtones in the middle, and highlights on the right. A histogram with data spread across the whole graph indicates an image that takes advantage of the full tonal scale. Conversely, a histogram with most data grouped at one end indicates a flat, low-contrast image.
In the Camera Raw dialog box, the histogram shows all three channels (red, green, and blue) of the image simultaneously. As you adjust the settings, the histogram changes automatically. The RGB values of the pixel under the pointer appear below the histogram.
To view the RGB values, move the Zoom, Hand, or White Balance tool over the preview image. The values will appear in the upper-right corner of the dialog box. The histogram can also be used to identify clipping, which occurs when the colour values of a pixel are higher or lower than can be represented in the image. To identify clipping, turn on Clipping Warning in ACR, which will draw attention to overexposure with red shading and underexposure with blue shading.
The histogram is a useful tool to understand the exposure and colour distribution of your image, helping you make adjustments to achieve your desired result.
Achieving Flawless Skin Tone in Camera Raw
You may want to see also
![]()
White balance controls for camera raw
The white balance of a camera raw image is recorded by the camera as metadata when the image is taken. This setting usually yields the correct colour temperature. You can adjust it if the white balance is not quite right.
The Adjust tab in the Photoshop Camera Raw dialog box includes the following three controls for correcting a colour cast in your image:
- White Balance: Sets the colour balance of the image to reflect the lighting conditions under which the photo was taken. In some cases, choosing a white balance from the White Balance menu provides satisfactory results. In many cases, you may want to customise the white balance using the Temperature and Tint adjustments.
- Temperature: Fine-tunes the white balance to a custom colour temperature. Set the colour temperature using the Kelvin colour temperature scale. Move the slider to the left to correct a photo taken at a lower colour temperature of light: the plugin makes the image colours cooler (bluish) to compensate for the lower colour temperature (yellowish) of the ambient light. Conversely, move the slider to the right to correct a photo taken at a higher colour temperature of light: the plugin makes the image colours warmer (yellowish) to compensate for the higher colour temperature (bluish) of the ambient light.
- Tint: Fine-tunes the white balance to compensate for a green or magenta tint. Move the slider to the left (negative values) to add green to the photo; move it to the right (positive values) to add magenta.
To adjust the white balance quickly, select the White Balance tool, and then click an area in the preview image that should be a neutral grey or white. The Temperature and Tint sliders automatically adjust to make the selected colour exactly neutral (if possible). If you're clicking whites, choose a highlight area that contains significant white detail rather than a specular highlight.
Cleaning Corroded Camera Battery Contacts: DIY Guide
You may want to see also
![]()
Tonal and image adjustments in camera raw files
Camera raw files contain unprocessed and uncompressed grayscale picture data from a digital camera's image sensor, along with metadata about how the image was captured. Adjusting the tonal values in a camera raw file can help you achieve the desired image brightness and contrast.
Histogram and RGB Levels
A histogram is a graphical representation of the tonal values in your photo, with the number of pixels at each luminance value displayed. A histogram with non-zero values across the tonal range indicates an image with good contrast, while a histogram bunched up at one end or the other indicates a lack of contrast. A spike on the left side of the histogram indicates shadow clipping, while a spike on the right indicates highlight clipping.
In Adobe Camera Raw, the histogram is displayed as a ribbon with three colours – red, green, and blue – representing the red, green, and blue colour channels. White areas indicate where all three channels overlap, while yellow, magenta, and cyan appear when two of the channels overlap.
Tonal Adjustments
The Basic panel in Adobe Camera Raw offers several sliders for adjusting the tonal values of your image:
- Exposure: Adjusts overall image brightness.
- Contrast: Adjusts image contrast, mainly affecting midtones.
- Highlights: Adjusts bright image areas to darken or recover highlights.
- Shadows: Adjusts dark image areas to brighten or recover shadow details.
- Whites: Adjusts white clipping to reduce or increase highlight clipping.
- Blacks: Adjusts black clipping to increase or reduce shadow clipping.
Additionally, the Curve panel offers more fine-tuned controls for adjusting the tonal scale of your image. You can use the Parametric Curve or Point Curve to make adjustments to the tonal response curve.
Image Adjustments
The Basic panel in Adobe Camera Raw also includes controls for adjusting image saturation and clarity:
- Clarity: Adds depth to an image by increasing local contrast.
- Vibrance: Adjusts image saturation while minimising clipping and preventing skin tones from becoming oversaturated.
- Saturation: Adjusts the saturation of all image colours.
The Color Mixer panel allows you to adjust individual colour ranges. You can change the hue, saturation, and luminance of specific colours to refine your image.
Are Camera Batteries Charged? Understanding Camera Battery Basics
You may want to see also
![]()
Using the White Balance Tool in Camera Raw in Photoshop
White balance is the process of removing unrealistic colour casts, so that objects that appear white in person are rendered white in your photo. In digital photography, this means adjusting colours so that the image looks more natural.
Open Your Image in Camera Raw
To begin, open your image in the Camera Raw editor. You can do this by dragging your image into a linked editing program like Photoshop or by right-clicking on the image and selecting 'open with'.
Access the White Balance Tool
Once your image is open, click the "White Balance Tool" button in the top menu to change your mouse pointer into the "White Balance Tool".
Find a Neutral Grey Area
Now, find a neutral grey area within the image. If a neutral grey area is not available, you can also select a white area, but make sure it is not a specular white. In other words, try to select a white object rather than a source of white that is from light or a reflection of light.
Click on the Grey or White Area
After finding the desired area, click on it with your mouse pointer to automatically correct the white balance within the image.
Make Further Adjustments (Optional)
At this point, your image's white balance should be corrected. However, if you want to make further adjustments, you can use the "Temperature" and "Tint" sliders on the "Basic" tab to fine-tune the temperature and tint of the image.
The "Temperature" slider uses the Kelvin colour temperature scale. Moving the slider to the left will add more blue to the image, while moving it to the right will add more yellow.
The "Tint" slider adjusts the white balance to correct magenta or green colour casts. Moving the slider to the left will add more green, while moving it to the right will add more magenta.
Additionally, you can enter specific temperature and tint values into the adjacent value fields for each slider if you prefer a more precise adjustment.
Compare Results
Finally, compare the before and after results to evaluate the effectiveness of your adjustments.
By following these steps, you can easily adjust the white balance of your images in Camera Raw using Photoshop, ensuring that the colours in your photos accurately represent the scene you captured.
Charging Your Fujifilm Camera Battery: How Long Does It Take?
You may want to see also
![]()
Manually adjusting the white balance in Camera Raw in Photoshop
White balance is the process of removing unrealistic colour casts, ensuring that objects that appear white in person are rendered white in your photo. It is one of the most basic yet trickiest aspects of photography.
Step 1:
Open your image in the Camera Raw editor. You can do this by dragging the image into your linked editing program, such as Photoshop, or by right-clicking on the image and selecting 'Open with'.
Step 2:
Click the "White Balance Tool" button in the top menu to change your mouse pointer into the "White Balance Tool".
Step 3:
Find a neutral grey area within the image. If a neutral grey area is unavailable, you can also select a white area, ensuring it is not a pure white. Click on the grey or white area to automatically correct the white balance within the image.
Step 4:
To make further adjustments, click on the “Basic” tab within the settings panel on the right side of the “Camera Raw” dialog box. Use the “White Balance” drop-down menu to select a preset white balance level. The default setting, "As Shot", will display the white levels using the metadata contained in the camera raw image.
Alternative Method:
Another way to adjust the white balance in Photoshop is by using the Curves tool.
Step 1:
Add a Curves Adjustment Layer.
Step 2:
Click on the right edge of the Properties tab and select "Auto Options" from the menu.
Step 3:
Select the "Find Light & Dark Colours" option from the "Auto Color Correction Options" window.
Step 4:
For greater control, you can manually adjust the white balance by selecting one of the specific colours (e.g., red, green, or blue) from the drop-down list. Adjust the colour by dragging the line from the right upper edge down until the desired result is achieved. Repeat this process for the other colours as needed.
Additional Tips:
- It is easier to adjust the white balance of RAW photos, TIFFs, PSDs, and other minimally compressed files. Adjusting a JPEG too far may result in colour problems or compression artefacts.
- Real estate photographers should consider shooting in RAW format to ensure maximum flexibility in post-processing.
- Consistency in lighting is crucial for achieving optimal results in real estate photography. Strive for uniformity in light sources to simplify the editing process.
- Using a grey card can help achieve accurate colours. Take a photo with the card filling the entire frame, then set a custom white balance using the photo of the grey card.
Updating Adobe Camera Raw CS3: A Step-by-Step Guide
You may want to see also
Frequently asked questions
White balance is the process of removing unrealistic color casts so that objects that appear white in person are rendered white in your photo. It adjusts the colors so that the image looks more natural.
There are three ways to adjust white balance in Camera Raw: using the White Balance Tool, using a preset, or manually adjusting the Temperature and Tint sliders.
The Temperature slider adjusts the color temperature of the light used when the photo was taken, from cool (blue) to warm (yellow). The Tint slider adjusts the white balance to correct for a green or magenta tint.