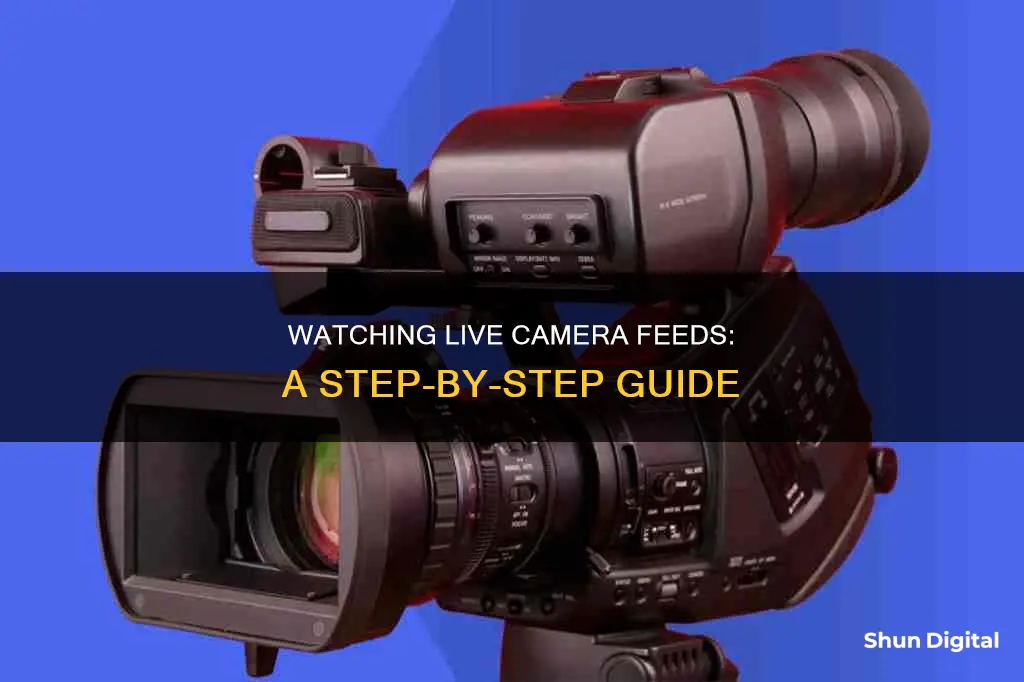
Live camera streaming is a popular method of content creation that allows broadcasters to connect with their audience in an authentic way. It can be used for various purposes, such as live events, personal broadcasts, marketing, or even surveillance. With the right equipment and tools, setting up a live camera stream is straightforward. This includes a camera capable of shooting high-definition videos, a stable internet connection, proper lighting, and a suitable online video platform. Additionally, webcams can be easily integrated with social media platforms and offer the advantage of not requiring an encoder due to their digital nature. Overall, live camera streaming provides an opportunity to engage with viewers in real-time and offers a unique viewing experience that pre-recorded videos cannot replicate.
| Characteristics | Values |
|---|---|
| Live streaming platform | YouTube, Dacast, IPCamLive |
| Video type | On-demand, live, time-lapse |
| Equipment | Webcam, camera, tripod, microphone |
| Connection | 5G wireless internet, Tethered Ethernet, Wi-fi |
| Speed | 720p at 24fps |
| Privacy settings | Public, private, unlisted |
What You'll Learn

How to set up a live camera feed
Setting up a live camera feed can be a straightforward process, but it does require some equipment and technical knowledge. Here is a step-by-step guide on how to set up a live camera feed:
Choose a Camera:
Firstly, you need to select an appropriate camera for your live stream. This could be a webcam, an IP camera, or even a smartphone with a good camera. If you plan to stream outdoors, consider using a security/surveillance camera, which offers flexibility and stealth.
Select an Online Video Platform:
Choose a reliable online video platform (OVP) that supports live streaming and is compatible with your camera. Popular platforms include YouTube Live, Twitch, and Vimeo. Some platforms may require an account and a waiting period before you can start streaming.
Set Up Your Camera and Internet Connection:
Connect your camera to your computer or streaming device. Ensure your internet connection is stable and fast enough for live streaming. Use an Ethernet or WiFi connection if possible, and pay attention to your upload speed.
Configure Camera Settings:
Log in to your camera using a web browser and access the camera's settings. Configure the network settings, including the IP address, DNS server, and RTMP stream settings. Test your camera's video and audio encoding settings to ensure they are compatible with the streaming platform.
Connect to the Streaming Platform:
Obtain the stream key and URL from your chosen streaming platform. In the camera settings, enable RTMP streaming and enter the stream URL and key. This will allow your camera to connect to the streaming platform.
Test and Promote Your Stream:
Before going live, test your entire streaming setup to identify any issues. Make sure your camera is positioned correctly and that the video and audio quality are acceptable. Promote your live stream on social media or other platforms to build an audience.
Go Live:
Once you are satisfied with your setup and have tested everything, it's time to start streaming! Click the "Go Live" button on your streaming platform, and your live camera feed will be broadcast to your audience.
Remember to consider your lighting and audio setup as well. Ensure your lighting is adequate and consistent, especially if you are streaming for extended periods. For audio, consider using an external microphone to improve sound quality and reduce background noise.
Ulta's Camera Surveillance: What You Need to Know
You may want to see also

How to connect your camera to live streaming
To connect your camera to live streaming, you'll need a camera with a clean HDMI output, a laptop or computer, and a video capture card or device. You'll also need a microphone, an audio interface, and headphones.
Using a Video Camera or DSLR
One of the easiest ways to improve the quality of your live streams is to use a video camera or DSLR instead of your computer's built-in webcam. Video cameras and DSLRs offer improved image and audio quality, and give you more control over manual settings like focus, contrast, and frames per second. They also offer the ability to capture a blurred background and perform better in low-light settings.
Using an HDMI Interface Unit
To set up your camera with an HDMI Interface Unit, you'll need:
- An HDMI cable
- An HDMI to USB video capture device
- A computer with streaming software installed
Steps:
- Connect one end of the HDMI cable to the camera's HDMI output and the other end to the HDMI input of the video capture device.
- Connect the video capture device to your computer using a USB cable.
- Turn on the camera.
- Open the video/audio settings of the capture/streaming software on your computer.
- The software should now recognize your camera as a webcam.
Using a Camera's USB Port
Some cameras have a USB port that can be connected directly to the USB port on your computer. Simply connect the two with a USB cable and you're ready to start streaming. However, this method may not work with all cameras, and some cameras may not import audio through USB. In this case, you'll need to use a USB microphone.
Using Broadcasting Software
If you plan to live stream with your camera, you'll need broadcasting software such as OBS or Restream. You'll need to connect your camera to your computer using either HDMI or a capture card, then download and install the broadcasting software. You can then add your camera as a source in the software.
Pet Cameras: Do Dogs Watch and Care?
You may want to see also

How to promote your live stream
Promoting your live stream is an essential part of ensuring that your content reaches your target audience. Here are some detailed and direct strategies to promote your live stream on the topic of "how to watch live camera":
Choose the Right Platform:
Select a live streaming platform that aligns with your target audience. Popular options include Facebook Live, YouTube Live, Twitch, Instagram Live, TikTok LIVE, and LinkedIn Live. Consider where your ideal viewers are most likely to be engaged and choose a platform that suits your content niche.
Schedule Your Live Stream:
Planning your live stream in advance gives you more time to promote it effectively. Share the date and time across your social media channels and consider creating a dedicated event page or post to generate buzz and attract potential viewers.
Create Engaging Content:
Craft an informative and captivating video description that highlights the key topics, benefits, and target audience for your live stream. Understand your audience's pain points and tailor your content to address their interests and needs.
Cross-Platform Promotion:
Promote your live stream across multiple social media platforms, including Facebook, Twitter, Instagram, TikTok, and LinkedIn. Utilize stories, reels, and shorts to your advantage, as these formats tend to receive higher engagement. Create eye-catching thumbnails, use relevant hashtags, and pin your upcoming live stream to the top of your profile pages.
Leverage Email Marketing:
If you have an email list, send out a targeted email blast with a captivating subject line and an image to increase open rates. Provide details about the live stream, including the date, time, and key topics. You can also include a link to the live stream in your email signature for added visibility.
Social Media Teasers:
Create short teaser clips or trailers to build excitement and intrigue for your live stream. Share these teasers on social media platforms and include a link to your event. You can also go live to stream a teaser and build anticipation for the main event.
Collaborate and Engage:
Consider inviting guests or collaborating with influencers to add credibility and attract their audiences. Engage with your viewers during the live stream by asking for their input, creating polls, and responding to their comments. You can also encourage viewers to share your live stream with their network by incorporating verbal and visual calls-to-action.
Simulcasting:
Simulcasting involves broadcasting your live stream across multiple platforms simultaneously. This strategy ensures that you reach a wider audience and maximize viewership. Facebook and YouTube, for example, offer features that notify users when a page they follow goes live.
Repurpose Content:
After your live stream, repurpose the content into different formats such as blog posts, podcasts, or shorter clips for social media. This allows you to reach new viewers and provide additional value to your existing audience.
Analyze and Adapt:
Review the analytics provided by streaming platforms to understand your live stream's performance. Identify the most engaging parts of your stream and use that insight to optimize future broadcasts. Adapt your promotional strategies based on what worked well and what could be improved.
Remember, promoting your live stream is an ongoing process that requires a combination of strategic planning, cross-platform outreach, and audience engagement. By utilizing these tactics, you can effectively expand your reach and create a successful live streaming experience.
Hidden Cameras: Watching Youngsters, Safely and Securely
You may want to see also

How to improve audio quality
Improving the audio quality of a live camera feed can be done in a few simple steps. Here are some tips to achieve better audio quality:
Choose the Right Microphone
The built-in microphone on your device may not always be sufficient, especially if you are far away from it or there is background noise. A dedicated microphone will help you sound clearer, louder, and more professional. There are several types of microphones to choose from, such as lapel, shotgun, or condenser mics, each with its advantages and use cases. For example, a lavalier microphone is small and discreet, making it ideal for interviews or presentations, while a shotgun microphone is highly directional and can be used for film sets or outdoor recordings.
Microphone Placement
Ensure the microphone is placed correctly and at an optimal distance from the speaker's mouth. The ideal distance for most microphones is around 3-5 inches from the speaker's mouth. If you are using a built-in camera microphone, try to stay within an arm's length (about 3 feet or less) to capture better audio and reduce background noise.
Reduce Background Noise
Choose a quiet location for your live video. Avoid places with high levels of background noise, such as streets, cafes, or public spaces. Opt for a room with soft surfaces, minimal echo, and good insulation. If you cannot find a quiet location, consider using noise-canceling microphones, such as the Logitech Blue Yeti, or use noise-canceling software or plugins to reduce unwanted sounds.
Monitor Audio Levels
Keep an eye on your audio levels during the live stream to ensure the sound is not too loud or too soft. Use software or hardware tools to check the levels, and make adjustments if necessary. Headphones can also help you listen to your audio and make sure it sounds good.
Avoid Feedback and Echo
Feedback and echo can ruin your audio quality and are annoying to your viewers. Use a directional microphone that only picks up your voice and not surrounding sounds, or lower the volume of your speakers or headphones to minimise these issues. Additionally, consider using headphones to prevent echo.
Use a Pop Filter
A pop filter is a screen placed in front of or around the microphone to reduce plosives, which are popping sounds made when pronouncing certain consonants like 'p' and 't'. Pop filters improve sound quality and reduce audio distortion.
Test and Practice
Before going live, test and practice your live video to identify and fix any audio issues, such as noise, distortion, or sync problems. Get feedback from others to ensure your audio is clear and easy to understand.
Post-Production Techniques
If you are editing your live stream after recording, there are several techniques to improve audio quality. Use audio editing software to remove background noise, normalise audio levels, and reduce reverb or echo. You can also boost the bass of the audio to make it sound more natural.
By following these steps, you can significantly improve the audio quality of your live camera feed, ensuring a better experience for your viewers.
Are School Cameras Watched?
You may want to see also

How to choose an online video platform
When choosing an online video platform, there are several factors to consider to ensure a high-quality and engaging live stream. Here are some key points to help you make an informed decision:
- Video and Audio Quality: Look for platforms that offer high-quality video and audio streaming. This is essential for providing your viewers with a good viewing and listening experience.
- Reliable Streaming: Choose a platform that ensures seamless streaming with minimal buffering. Buffering can be frustrating for viewers and degrade their overall experience.
- Adaptive Bitrate Streaming: Opt for platforms that offer adaptive bitrate streaming. This feature adjusts the video quality based on the user's internet connection, ensuring smooth streaming without interruptions.
- Device Compatibility: Consider the range of devices your audience may use to access your live stream. Select a platform that is compatible with various devices, browsers, and operating systems.
- Engagement Tools: To interact with your audience, look for platforms that offer tools such as live chats, Q&A sessions, polls, and reactions. These features enhance viewer engagement and create a more dynamic experience.
- User-Friendly Interface: A user-friendly interface is crucial for both the broadcaster and the viewer. It should be intuitive and easy to navigate, optimising the overall experience for everyone involved.
- Recording and Playback Options: The ability to record your live streams and make them available for on-demand viewing is important. This allows users to watch the content at their convenience and provides an opportunity for those who missed the live session.
- Analytics and Reporting: Access to detailed analytics and reporting tools can help you understand your audience's behaviour, demographics, and engagement with your content. This information is invaluable for refining your content strategy and marketing efforts.
- Monetization Options: If you plan to monetise your live streams, look for platforms that offer features like pay-per-view, subscriptions, or advertising models. This will enable you to generate revenue from your content.
- Security and Privacy: Ensure that the platform provides robust security and privacy features, such as password protection, encryption, and access controls. This is crucial for protecting your content and maintaining viewer privacy.
- Customer Support: Opt for platforms that offer reliable customer support to promptly resolve any technical issues. Good customer support can save you time and provide guidance when troubleshooting.
- Customisation and Branding: If customisation is important to you, look for platforms that allow you to brand your live streaming player and personalise the viewing experience.
- Free vs. Premium: Consider your budget and specific needs when deciding between free and premium platforms. Free platforms like YouTube Live, Facebook Live, and Twitch have large existing audiences and are user-friendly, making them ideal for individuals or small businesses. On the other hand, premium platforms like Vimeo Livestream, Brightcove, and WebEx offer advanced features, enhanced security, and reliable streaming but come with a subscription fee.
Chinese Cameras: Watching People, Invading Privacy
You may want to see also
Frequently asked questions
Yes, there are several websites such as Insecam, Webcamtaxi, EarthCam, and iPet Companion that offer live camera streaming from around the world.
You can watch live cameras from various categories such as street, traffic, nature, wildlife, monuments, beaches, hotels & resorts, and even interactive cameras where you can play with cats or turn on lamps in someone's house.
No, most of the live camera streaming websites offer free access to their cameras.
For the best experience, it is recommended to use the Mozilla Firefox browser when watching live cameras. However, other modern browsers such as Chrome and Firefox should also work for most live camera streams.
Yes, you can live stream your own camera using platforms such as YouTube. Simply enable your channel for live streaming, click "Create Go Live," select "Webcam," add a title and description, and choose your privacy settings.


