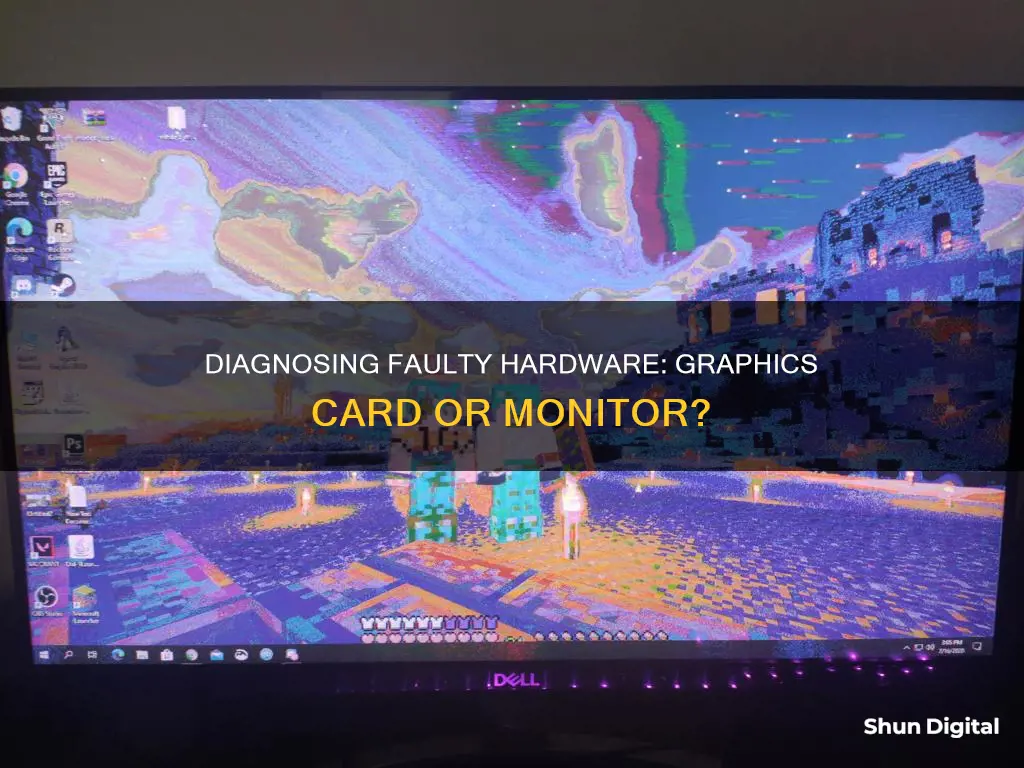
If you're experiencing issues with your monitor's display, it could be the result of a faulty graphics card. Graphics cards are integral to the operation of a system by displaying your computer's data on a monitor. When graphics cardssection sign fail, they can cause visual distortions or stop displaying data completely. To determine whether your graphics card is faulty, you can try hooking up another monitor to your computer and/or using your current monitor with a different computer. If the visual distortions persist with the new monitor, the issue is likely with your graphics card. If the distortions stop, it's possible that your original monitor is faulty.
| Characteristics | Values |
|---|---|
| Screen freezes or goes black | Could be a sign that your graphics card is dying |
| Lagging or stuttering | Could be a sign of issues with the graphics card |
| Screen glitches | Could be a sign of problems with the graphics card |
| Strange artifacts (dots, lines, patterns) | Could be a sign of a faulty graphics card |
| Games crashing frequently | Could be a sign that the GPU can't handle the load |
| Excessive fan noise | Could be a sign of problems with the graphics card |
| Blue screen errors during graphics-intensive activities | Could be caused by a faulty graphics card |
| PC not booting up | Could be caused by a faulty graphics card or other hardware issues |
| Motherboard error codes | Could indicate a faulty graphics card |
| Video cable issues | Could be the cause of visual problems |
| Outdated graphics drivers | Could be the cause of issues with the GPU |
| Overheating | Could be a sign of GPU failure |
| Hardware conflicts | Could be the cause of GPU issues |
What You'll Learn

Check for visual distortions
If you are experiencing visual distortions, such as screen tearing, horizontal lines, or strange colours, there are several things you can check to determine whether the issue is with your graphics card or your monitor.
Firstly, check your monitor and power cables for any signs of damage and ensure they are properly connected. If you have a loose or defective cable, this could be causing the distortion. Disconnect and then reconnect the cable, checking for any bent, burnt, or broken pins.
If you have an older CRT monitor, the refresh rate may not be set properly, causing the display to appear wavy or flickering. Adjust the refresh rate to reduce or eliminate the flicker.
Another potential cause of visual distortions is EMI (ElectroMagnetic Interference). Verify that no speakers, fans, or other magnetic devices are close to the monitor, as these can generate magnetic fields that distort images.
If you have checked the above and the issue persists, connect your monitor to another computer. If the monitor displays the same distortion, then your monitor is likely defective. If the monitor works fine on another computer, there may be a problem with the video card in your original computer.
If you determine that the issue is likely with your graphics card, you can try reseating the card by removing it from its slot and then placing it back in firmly. This will help to ensure that it hasn't come loose. You should also check for any signs of wear or damage and remove any dust buildup, as graphics cards need to be kept cool.
Fertility Monitors: Can They Detect Infertility Issues?
You may want to see also

Inspect for signs of wear or damage
To inspect for signs of wear or damage, you will need to open your computer case. First, remove the side panel from your computer's desktop tower, or laptop casing if possible. If your graphics card is damaged, you may see signs of burning or melted components.
Graphics cards need to be kept cool, so it is important to check for any dust buildup and remove it. Dust can cause overheating, which can lead to premature failure of the card. Use compressed air to blow away any dust from the card and the surrounding area.
You should also check that the graphics card is seated properly in its slot. Remove the card from its slot and then place it firmly back in. This will help you confirm that it hasn't come loose.
If there is any visible damage to the graphics card, this is a strong indicator that it is faulty and will need to be replaced.
Hooking Up Your Xbox 360: Audio-Visual Setup Guide
You may want to see also

Check for overheating
Overheating can be detrimental to both your graphics card and your monitor, and it is important to identify the source of the problem to prevent any further damage. Here are some steps to help you check for overheating issues:
Firstly, identify any symptoms of overheating. This could include graphical glitches, flashing, blackouts, or a complete failure of the display. These issues may occur after the monitor has been on for a certain period, indicating a potential overheating problem.
Next, determine if the heat sink is the cause of the issue. The heat sink is responsible for dissipating heat, and if it is not functioning properly, it can lead to overheating. Inspect the heat sink to ensure it is properly attached and secured. Check for any signs of damage or misalignment, as this could hinder its ability to cool effectively.
Another potential cause of overheating is the thermal paste. Thermal paste is used to improve heat transfer between components, such as between the transistors and the heat sinks. Over time, the thermal paste can dry out, crack, or lose its effectiveness, leading to increased temperatures. Inspect the thermal paste to ensure it is intact and adequately applied. If it appears dry or cracked, it may need to be replaced.
Additionally, the capacitors near the heat sinks may also contribute to overheating issues. Capacitors can age prematurely due to their proximity to the heat, causing them to bulge or fail. Inspect the capacitors for any signs of bulging or leakage, as this could indicate they need to be replaced.
Finally, consider using a tool such as a thermal camera to identify hot spots or areas of high temperature. This can help pinpoint specific components that may be causing the overheating issue. By identifying and addressing the source of the problem, you can prevent further damage and ensure the stable operation of your graphics card and monitor.
Unboxing Your ASUS Monitor: A Step-by-Step Guide
You may want to see also

Check for hardware conflicts
To check for hardware conflicts, you can try the following:
Check the Video Cable
Ensure that the video cable is not the cause of any visual problems you may be experiencing. Try using a different HDMI or DisplayPort cable, and check that the connectors on the cable are clean and in good condition. Also, inspect the video ports on your PC and monitor to ensure they are clean and functioning correctly. Make sure there is no debris in the cable or any of the ports or cable connectors. If possible, try using a different monitor or television to see if the problem persists.
Update Graphics Drivers
If you are experiencing issues with your GPU, try updating your video drivers to see if this resolves the problem. You can usually find and download the latest drivers for your graphics card on the manufacturer's website. Once downloaded, install the latest drivers and check if this has improved performance.
Roll Back Graphics Drivers
If the problems started occurring after a graphics driver update, try uninstalling and reinstalling a previous version of the drivers. You should be able to find older drivers on the manufacturer's website.
Check the Clock Speed on Your Graphics Card
If you are overclocking your graphics card, return the clock speed to the manufacturer's default settings to see if the problem continues.
Check the Seating of Your Graphics Card
Open your PC case and check that your graphics card is properly seated in its PCI slot and firmly latched. If it is loose, remove the graphics card and check for dust or debris on the connectors. Clean the connectors and the PCI slot with an eraser or rubber cleaner, then reseat the card properly.
Check for Dust and Debris on Your Graphics Card
Open your PC case and remove the graphics card. Check for an excessive amount of dust or debris around or behind the fans. If it is dusty, clean it with compressed air.
Perform a Stress Test on Your Graphics Card
If you are still able to boot up your computer, download and install apps that test your graphics card, such as Novabench or Unigine's Heaven Benchmark. These programs will test your graphics card by rendering a graphically intense scene and will provide you with your highest, lowest, and average frame rate, as well as the average temperature of your graphics card. If your frame rate average is below 30 frames per second, your graphics card may not be equipped to handle most 3D graphics. If your average frame rate is below 60 frames per second, your graphics card may not be able to handle high-end intensive graphics. If your graphics card is reaching temperatures above 80 degrees Celsius, it is overheating and could be causing damage.
Hooking Up Four Monitors: Maximizing Ports with Adaptors
You may want to see also

Check fan speed settings
To check your GPU fan speed settings, you can use GPU monitoring software or check the BIOS.
Using GPU Monitoring Software
Many GPUs come with built-in software to check fan speed, temperature, and clock speeds. If you have an NVIDIA card, you can utilize the NVIDIA Control Panel. For AMD cards, use the Radeon Software. These will show you your current fan speed and max speed.
There are also third-party software options available, such as MSI Afterburner, EVGA Precision X1, NZXT CAM, and ASUS GPU Tweak. These tools allow you to view details about your graphics card, including clock speed, temperature, fan speed, and more.
Checking in the BIOS
You can also check your GPU fan speed in your motherboard's BIOS menu. To do this, restart your PC and press the BIOS key (usually Delete, F2, or F12) to enter the BIOS. Navigate to the section for PC Health or Hardware Monitoring, where you should find the current fan speeds for all fans connected to your motherboard, including the GPU fans.
The fan speed will typically be displayed as an RPM reading. Note that not all motherboards provide GPU fan speed information in the BIOS, so you may need to use one of the software options listed above.
LCD Monitors: China Tariff List Concerns for Buyers
You may want to see also
Frequently asked questions
If your graphics card is faulty, you may experience visual distortions or your data may stop displaying completely. To check if it's your graphics card that's causing the problem, hook up another monitor to your computer and/or use your current monitor with a different computer. If the visual distortions persist, the monitor is not the issue. If they're gone, the monitor itself may be faulty.
There are several signs that your graphics card may be dying. These include frequent crashes, a black screen, lags or frame rate drops, screen glitches, strange artifacts (dots, lines, patterns), blue screen errors during graphics-intensive activities, and excessive fan noise.
If your graphics card is faulty or dying, you can try updating your graphics drivers, reducing the load on your GPU, checking for overheating, evaluating hardware health, checking installation, and removing overclock. If none of these solutions work, you may need to replace your graphics card.


