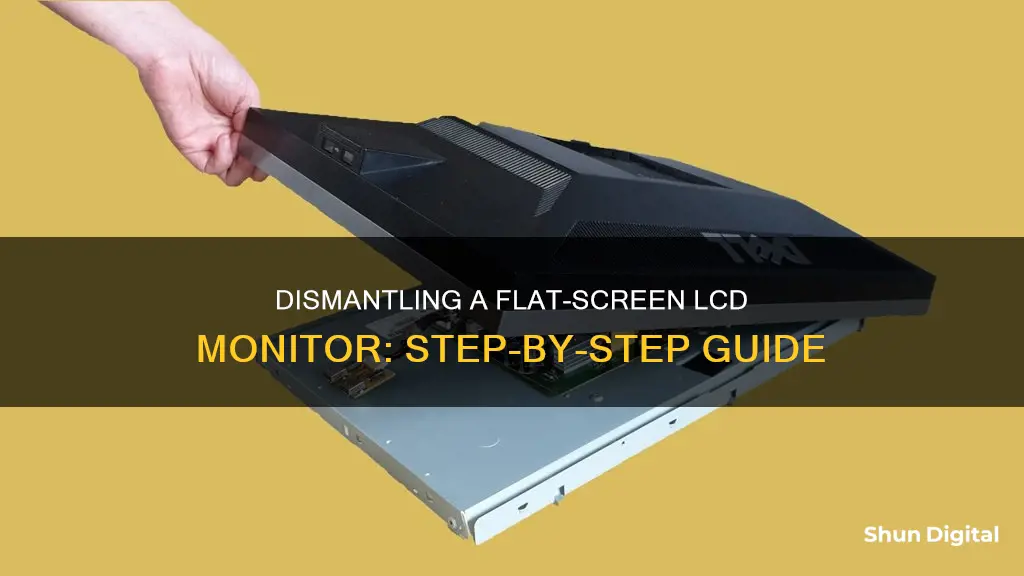
Taking apart an LCD monitor is a relatively straightforward task that requires few tools and little time. However, it is important to take precautions to discharge any stored power and ground your equipment to remove static electricity. This guide will walk you through the steps of safely disassembling a flat-screen LCD monitor, including how to remove the back cover, discharge the capacitor, and unplug internal cables.
| Characteristics | Values |
|---|---|
| Difficulty | Relatively straightforward, requiring few tools and time |
| Preparation | Discharge power stored in capacitors to the ground |
| Location | Place the monitor display side down |
| Steps | 1. Remove screws from the back of the monitor and near the stand |
| 2. Insert a flat-head screwdriver between the front and back halves, disengaging plastic clips | |
| 3. Unplug cables from circuit boards and inner back panel | |
| 4. Remove additional screws from the inner back panel and pull it off the front display | |
| Safety | Ground metal equipment to remove static electricity if reusing |
What You'll Learn
- Place the monitor display-side down and remove all visible screws
- Slide a flat-head screwdriver between the two halves, disengaging plastic clips
- Unplug cables from circuit boards and the inner back panel
- Remove any remaining screws from the inner back panel
- Pull the inner back panel off the front display screen

Place the monitor display-side down and remove all visible screws
To begin taking apart a flat-screen LCD monitor, place the monitor display-side down on a soft cloth on a stable surface. This will protect the screen from scratches and cracks. It is important to ensure that the monitor is securely positioned before proceeding.
Next, remove all visible screws from the back of the monitor and near the monitor stand. These screws fasten the back panel to the front panel, so be sure to remove all of them. The screws are typically located around the perimeter of the back panel and in the middle. Some models may also have screws on the sides of the monitor and the front. Place the screws in a safe location, as you may need them later during reassembly.
After removing the visible screws, you can begin to separate the back panel from the front panel. Use a flat-head screwdriver to carefully slide between the two halves of the monitor, feeling for any plastic clips or tabs holding them together. Depress or disengage these clips until the back panel comes away from the front.
At this point, the internal components of the monitor will be exposed, and you can proceed with further disassembly if needed. Remember to handle the components with care and to discharge any stored electricity safely if you plan to reuse the monitor after disassembly.
Adjusting Your ASUS Designo MZ27AQ Monitor Like a Pro
You may want to see also

Slide a flat-head screwdriver between the two halves, disengaging plastic clips
To take apart a flat-screen LCD monitor, you will need a flat-head screwdriver. This tool is designed to help you prise things apart, and the flat end of the screwdriver will be particularly useful for this task. You can purchase anti-slip flat-head screwdrivers with plastic handles to help you get a good grip.
Once you have your screwdriver, place your LCD monitor display-side down. Remove any screws you see on the back of the monitor and near the stand. Then, insert the head of the flat-head screwdriver between the two halves of the monitor, the front and the back. Carefully slide the head through the gap, feeling for any plastic clips holding the two halves together. You will need to depress these clips to disengage the two halves of the monitor.
Slide the screwdriver along the gap between the two halves, carefully depressing any plastic clips you find. You may need to wiggle the screwdriver slightly to help disengage the clips. Keep sliding the screwdriver through the gap until you have disengaged all the clips and can separate the back of the monitor from the front.
Once the two halves are apart, you will need to unplug the cables from the sockets on the circuit boards and inner back panel. You can then remove any remaining screws from the side of the inner back panel and pull it off the front display screen. Be sure to ground your metal equipment to remove any static electricity if you wish to use your monitor again after dismantling it.
Monitoring App Usage: Is There an App for That?
You may want to see also

Unplug cables from circuit boards and the inner back panel
Now that you have removed the back panel of the monitor, it's time to move on to the next step: unplugging the cables from the circuit boards and inner back panel. This process requires careful attention to detail and a steady hand. Here's a step-by-step guide to help you through the process:
Locate the Cables: Begin by identifying the cables that need to be unplugged. They should be connected to sockets on the circuit boards and the inner back panel that was revealed when you removed the back panel of the monitor.
Grip the Cables Firmly: Using your fingers or a pair of pliers, grip the cables firmly but gently. Make sure you are holding the cables themselves and not the connections or sockets, as applying force directly to the connections can cause damage.
Unplug the Cables: Gently pull the cables to detach them from the sockets. It is important to do this slowly and carefully to avoid any sudden movements that could damage the connections or surrounding components.
Inspect the Connections: Once a cable is unplugged, take a moment to inspect the connection. Look for any signs of damage or wear and ensure that the socket is intact and secure. This is also an opportunity to clean any dust or debris from the connection point.
Repeat for All Cables: Continue this process for all the cables that are connected to the circuit boards and inner back panel. Work systematically to ensure that you don't miss any cables, and remember to take your time with each one.
By following these steps, you will be able to safely and effectively unplug the cables from the circuit boards and inner back panel of your flat-screen LCD monitor. Remember to stay focused and take your time, as working with electronics requires precision and care.
Adjusting Monitor Settings: A Guide to Resizing Your Display
You may want to see also

Remove any remaining screws from the inner back panel
To remove the remaining screws from the inner back panel of your LCD monitor, follow these steps:
Begin by placing your LCD monitor face down on a flat surface. This will give you access to the back of the monitor, where you can locate and remove any visible screws. These screws are typically found near the monitor's stand, securing the two halves of the monitor together.
Using a flat-head screwdriver, carefully slide the head between the back and front halves of the monitor. Gently slide the screwdriver through the gap, feeling for any plastic clips or fasteners holding the halves together. Depress or disengage these clips to gradually separate the back panel from the front display.
As you work your way around the edges of the monitor, continue to depress the plastic clips and simultaneously check for any remaining screws. Some LCD monitors may have additional screws along the sides or hidden underneath the previously fastened areas. Remember to keep your screwdriver close by as you work, as you may encounter different types of screws requiring adjustment.
Once you have successfully disengaged all the clips and removed any remaining screws, you should be able to gently lift or pull the back panel away from the front display screen. This will expose the inner back panel, revealing the circuit boards and various cables.
At this point, you can now focus on the inner back panel itself. Locate any visible screws along the edges or surface of this inner panel and proceed to remove them. These screws may vary in size and placement, depending on the model of your LCD monitor. Ensure you have a secure grip on the panel and continue to unscrew any fasteners you come across.
By following these steps, you will have successfully removed the remaining screws from the inner back panel of your flat-screen LCD monitor. Remember to keep your workspace organised and to set aside any removed screws safely, as they may be needed for reassembly.
Battery-Sapping Security Apps: Monitor Your Usage
You may want to see also

Pull the inner back panel off the front display screen
To pull the inner back panel off the front display screen of an LCD monitor, you will need to first place the monitor display-side down. Remove any screws you see on the back of the monitor and near the monitor's stand.
Next, insert the head of a flat-head screwdriver between the two halves of the monitor (the front and back). Carefully slide the head through the gap, feeling for any plastic clips holding the two halves together. Depress these clips when you reach one. Do this until all the clips have been disengaged and the back of the monitor comes away from the front.
Now, unplug the cables from the sockets on the circuit boards and inner back panel that are revealed when you take off the back of the monitor. Remove any remaining screws you see on the side of the inner back panel.
Finally, you can pull the inner back panel off the front display screen.
Note: It is very important that you take care to discharge any stored power in the capacitors before beginning this process, as they can store thousands of volts of electricity even after the monitor has been turned off for days.
Asus Monitor Power Cord Length Options Explored
You may want to see also
Frequently asked questions
Yes, it is safe in most cases. There are no hazardous chemicals that I know of. However, if it's a CCFL backlit LCD display, there is mercury in the CCFL (Cold Cathode Fluorescent Lamp).
Place your LCD monitor display side down. Remove any screws you see on the back of the monitor and near the monitor's stand. Insert the head of a flat-head screwdriver between the two halves of the monitor, the front and back. Carefully slide the head through the gap, feeling for any plastic clips holding the two halves together. Depress these clips when you reach one and do this until all the clips have been disengaged and the back of the monitor comes away from the front.
You will need a flat-head screwdriver and a lamp cord to discharge the stored voltage to the ground.
It is very important to take care to discharge the power stored in the capacitors, which can store thousands of volts of electricity even after the monitor has been turned off for days. Always ground your metal equipment to remove any static electricity if you wish to use your monitor again after dismantling it.


