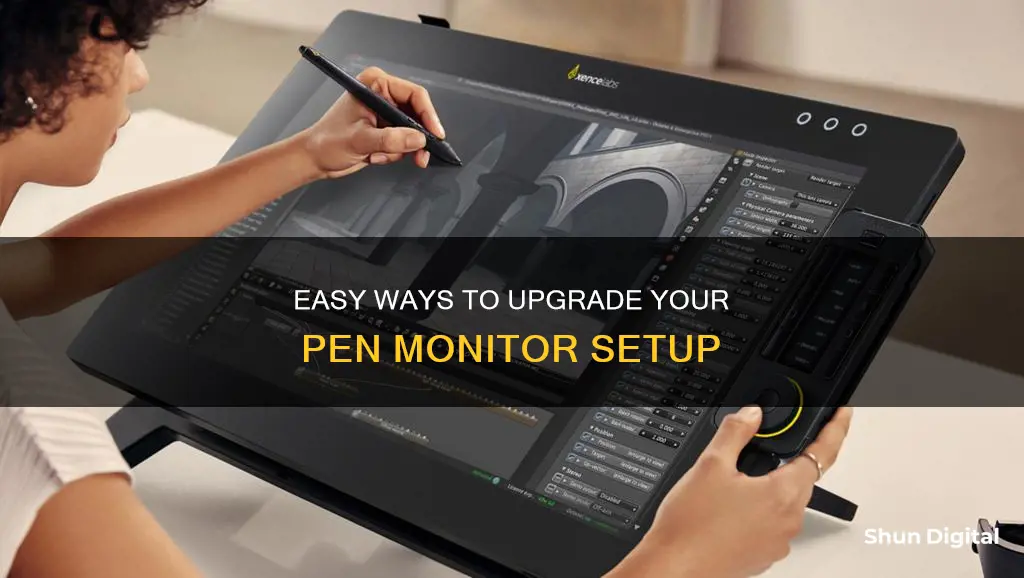
If you're using a stylus with a second display and want to switch seamlessly between the two without dropping your pen, there are a few ways to do so. If you're using a Windows PC, you can go into the Control Panel and click on Tablet PC Settings. From there, you can map your pen clicks to the second display by clicking on the message that says, Tap this screen with your tablet pen... and then clicking on your pen display. For those with a Huion Pen Display, you can set your display to Duplicate or Extend mode by going into the Control Panel and selecting either Duplicate these displays or Extend these displays. Alternatively, you can use third-party software such as AutoHotkey to assign a keyboard shortcut to switch between displays.
What You'll Learn

Using a keyboard shortcut to switch displays
Using keyboard shortcuts to switch displays can be a quick and efficient way to manage your monitors. Here are the steps to do so:
Windows Key + P:
One of the most common keyboard shortcuts for switching between multiple monitors is Win+P. This shortcut opens a menu with several display options:
- PC Screen Only: This option allows you to display content only on your primary monitor, turning off the display on any secondary monitors.
- Duplicate: This option duplicates the content of your primary screen onto your secondary screen. This is useful if you want the same content displayed across all screens.
- Extend: This option allows you to extend your desktop across multiple monitors, providing you with a larger workspace. You can move items and applications across the extended screens.
- Second Screen Only: This option turns off the display on your primary screen, showing content only on your secondary screen.
You can navigate through these options using the arrow keys and select one by pressing Enter.
Windows Key + Arrow Keys:
Another useful shortcut for managing multiple displays is the combination of the Windows key with the arrow keys. These shortcuts allow you to move windows between screens or adjust their size:
- Win + Shift + Left Arrow: Move the active window to the left monitor.
- Win + Shift + Right Arrow: Move the active window to the right monitor.
- Win + Left Arrow: Snap the active window to the left half of the current monitor.
- Win + Right Arrow: Snap the active window to the right half of the current monitor.
- Win + Up Arrow: Maximize the active window.
- Win + Down Arrow: Minimize the active window.
These shortcuts provide a quick way to arrange your windows across multiple displays without having to reach for your mouse or navigate through menus.
Customizing Keyboard Shortcuts:
If you want more customization options for your keyboard shortcuts, you can use the built-in Windows settings. Here are the steps to customize keyboard shortcuts for switching displays:
- Open the Settings app and click on "System".
- Click on "Display" and scroll down to the "Multiple displays" section.
- Click on "Advanced display settings" and then click on "Display adapter properties" for the monitor you want to customize.
- Click on the "Monitor" tab and then on the "Properties" button.
- Click on the "Driver" tab and then on the "Update Driver" button.
- Select "Generic PnP Monitor" and click "Next", followed by "Close", and then "OK" to apply the changes.
- Repeat these steps for each monitor you want to customize, and then restart your computer to activate the new drivers.
- After restarting, open the Settings app, click on "Devices", and then "Keyboard".
- Scroll down to the "Keyboard shortcuts" section and click on "Advanced keyboard settings".
- Click on "Language bar options" and then on "Advanced Key Settings".
- Click on "Change Key Sequence" and select the keyboard shortcut you want to change.
- Click "OK" and then "Apply" to save the changes.
By following these steps, you can customize the keyboard shortcuts for switching between displays to suit your preferences.
Troubleshooting:
If you encounter any issues with your keyboard shortcuts, here are some troubleshooting tips:
- Ensure your monitors are connected and detected by your computer. You can use the Win+P shortcut to check if your computer recognizes all your displays.
- Make sure your keyboard is working properly, and check your layout and language settings.
- Keep your drivers up to date, ensuring they are compatible with your monitors and keyboard.
- Use the correct keyboard shortcut for your desired action and monitor setup.
- Close any unnecessary or suspicious applications running in the background to avoid interference with your keyboard shortcuts.
By following these steps and tips, you can efficiently use keyboard shortcuts to switch displays and customize them to match your workflow.
Amazon Refurbished Monitors: Buy or Avoid?
You may want to see also

Using the Control Panel in Windows
To switch your pen monitor using the Control Panel in Windows, follow these steps:
- Open the Control Panel by typing 'Control Panel' in the search bar.
- Navigate to the 'Appearance and Personalization' section and select 'Display'.
- Here, you will see all the connected monitors. Select the monitor that you want to use as the primary monitor.
- Click on the 'Set as Main Display' option. This will make the selected monitor the primary one.
- If you want to switch back or choose a different monitor as the primary display, simply repeat the process and select a different monitor.
Alternatively, if you are using an XP-Pen, you can try the following method:
- Go to Control Panel -> Tablet PC Settings -> Configure (Setup).
- Press Enter until the message that says 'Tap this screen with your tablet pen...' appears on the display you want to use.
- Click on your pen display.
Note that this method may not work for everyone, and you may need to try other suggested solutions if you encounter issues.
Positioning Studio Monitors: Optimal Height for Accurate Audio
You may want to see also

Setting Duplicate or Extend mode on Windows
To set up a duplicate or extend mode on Windows, you will need to connect your pen display to your computer. Once connected, you can launch the Control Panel by clicking Settings > System > Display.
Duplicate Mode
In this mode, your computer screen is duplicated on the pen display. This is called Mirror Display on MacOS. To set this up on Windows, follow these steps:
- Click the Start menu on the bottom-left corner of your desktop.
- Launch the Control Panel by clicking Settings > System > Display.
- Find Multiple displays down the page, select Duplicate these displays, and then apply.
Extend Mode
In this mode, your desktop will be extended across two separate monitors, allowing you to have different windows open on each display. To set this up on Windows, follow these steps:
- Launch the Control Panel by clicking Settings > System > Display.
- You may select the checkbox to Make this my main display if you want to set your pen display as the main monitor.
- Find Multiple displays down the page, select Extend these displays, and then apply.
- You can rearrange the displays to your desired configuration.
- If your mouse cursor only works on your computer screen after extending, you may need to change your tablet driver's work area settings.
Switching Between Displays with a Stylus
If you are using a stylus or touch input and want to switch it between displays, you can do so via the Control Panel in Windows. Here's how:
- Click on Tablet PC Settings.
- Hit Enter until the message "Tap this screen with your tablet pen..." appears on the display you want to use the stylus with.
- Click on your pen display. Now, your stylus input should be mapped to the second display.
To switch the stylus back to the main display, you will need to repeat the above steps in reverse.
Connecting a Second Monitor to Your iMac: A Step-by-Step Guide
You may want to see also

Using third-party methods to switch displays
If you are looking to switch displays using third-party methods, there are a few options available.
Using ControlMyMonitor Utility
ControlMyMonitor Utility is a third-party app that can be used to switch between input sources without having to touch the hardware button on your monitor. It supports CLI commands, and you can download the executable without installing anything on your system.
Using the Windows Registry
If you are using a desktop PC with two monitors connected, you can edit the Windows registry to swap the monitor numbers. Here's how:
- Disconnect all monitors except the primary one, which is the one currently set as "Monitor 1".
- Open the Registry Editor by typing "regedit" into the Windows search bar and selecting it from the results.
- Navigate to the following key: HKEY_LOCAL_MACHINE\System\CurrentControlSet\Control\GraphicsDrivers.
- Rename the "Configuration" and "Connectivity" keys to "Configuration.old" and "Connectivity.old" respectively.
- Shut down your PC completely.
- Connect only the monitor you want to set as the new "Monitor 1" to your PC's primary video port.
- Power on your PC and open the Display Settings by right-clicking on the desktop and selecting it from the menu.
- Plug in the second monitor, and Windows will automatically detect and install the necessary drivers.
- Windows will recreate the registry entries you renamed earlier, so there's no need to return to the registry.
Using the Control Panel
If you are using a Windows PC with a stylus or touch capabilities, you can switch displays via the Control Panel. Here's how:
- Click on "Tablet PC Settings".
- Hit enter until the message "Tap this screen with your tablet pen..." appears on the display you want to use.
- Click on your pen display, and your pen clicks will be mapped to that display.
These methods provide alternative ways to switch displays using third-party tools or built-in Windows features.
Blind Spot Monitoring: Is it Available in Dodge Grand Caravan?
You may want to see also

Using the XP Pen display
The XP-Pen display is a graphic drawing tablet with a screen that is compatible with Windows, Mac, and Linux operating systems. It comes in various sizes, ranging from 10.1 inches to 23.8 inches, and offers a wide viewing angle of 178 degrees, a brightness of 220 cd/m2, and a contrast ratio of 1000:1. The display also supports Android and features an anti-glare matte film to enhance your viewing experience.
The XP-Pen display boasts a battery-free stylus with up to 16K pressure levels and 60-degree tilt recognition, providing a natural and precise drawing experience. The stylus has a unique hexagonal design, a non-slip and tack-free flexible glue grip, and a partial transparent pen tip with an eraser at the end. Additionally, the tablet includes a pen holder with eight replacement pen nibs.
The XP-Pen display offers extensive compatibility with creative software such as Photoshop, Illustrator, SAI, Painter, MediBang, Clip Studio, and more, making it a versatile tool for digital drawing, animation, sketching, photo editing, and 3D sculpting.
Setting up the XP-Pen display is straightforward. Ensure your laptop or desktop has an HDMI port and a USB-A port for connection. If you don't have these ports, you may need an adapter to convert the connection. Once connected, you can calibrate and customize your display settings through the XP-Pen driver software.
The XP-Pen display provides a one-year warranty and lifetime technical support, ensuring that you can create and express yourself without worry.
Singapore's Best Places for Affordable Monitors
You may want to see also
Frequently asked questions
To switch your pen monitor on a Windows PC, go to the Control Panel by clicking Settings > System > Display. Then, select "Duplicate these displays" or "Extend these displays" under Multiple displays.
Yes, but this may require third-party software such as AutoHotkey.
On a Mac, the "Duplicate mode" is called "Mirror display". To set your Windows PC as a Mirror display, go to System Preferences > Displays, then click on the "Arrangement" tab. Select the mirroring option and choose the display you want to mirror from the dropdown menu.
Yes, you can set your pen display as the main display by selecting the checkbox for "Make this my main display" in the Display settings on Windows.
Ensure that your display settings are correctly configured for your preferred setup. You can adjust these settings by going to the Control Panel on Windows or System Preferences on Mac.


