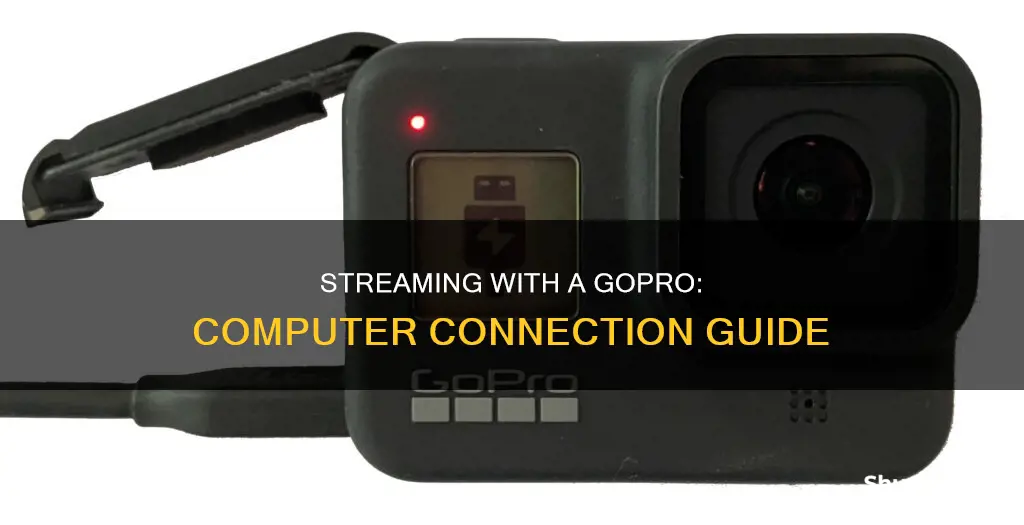
Streaming with a GoPro camera on a computer is a simple process. The GoPro HERO4 and later models have built-in webcam capability, while older models require a third-party video converter. Streaming with a GoPro requires a GoPro subscription and the GoPro app. You can live stream directly on Twitch, YouTube, or Facebook, or via RTMP URL on other sites. Additionally, you can use third-party applications like Restream and Live4 to stream from your GoPro to your computer.
| Characteristics | Values |
|---|---|
| Streaming platforms | Facebook, YouTube, Twitch, RTMP |
| Streaming equipment | GoPro camera, microSD card, USB-C cable, smartphone, GoPro app, Restream account |
| Streaming process | Update GoPro firmware, install GoPro Webcam app, connect GoPro to computer, adjust field of view, create Restream account, add streaming destinations, start streaming |
| Live streaming models | GoPro HERO7 Black and newer models |
| Webcam models | HERO4 and newer models |
What You'll Learn

Using a GoPro as a webcam
Step 1: Check your GoPro model
Firstly, check your GoPro model. The GoPro HERO4 and newer models have built-in webcam capability. If you have an older model, you will need to use a third-party video converter or an app such as LIVE4 to use it as a webcam.
Step 2: Prepare your setup
If you have a GoPro HERO4 or newer, you will need a Mac or Windows device, your smartphone, a USB-C cable, and your GoPro. For older GoPro models, you will need a Micro-HDMI-to-HDMI cable and an HDMI-to-USB video converter. It is also recommended to get a powered USB outlet to reduce battery drain.
Step 3: Update your GoPro
Update your GoPro's firmware to the latest version. In the GoPro app, select your camera, then tap the three dots in the corner and choose "Update Firmware". Follow the on-screen steps as needed.
Step 4: Install the GoPro Webcam app
Download and install the GoPro Webcam app on your computer. This app is available for both Mac and PC. After installation, restart your computer and launch the app.
Step 5: Connect your GoPro
Connect your GoPro to your computer via the USB-C cable. If using an older GoPro model, connect the Micro-HDMI-to-HDMI cable to your GoPro and the converter, and then connect the converter to your laptop. Ensure that your GoPro is plugged into a power source.
Step 6: Adjust settings
Open the GoPro app and adjust the settings. For newer GoPro models, ensure the GoPro icon has a blue dot. For older models, go to Preferences > Input/Output > HDMI Output and set it to "Live".
Step 7: Preview and adjust
Use the GoPro Webcam app to preview your setup and adjust your field of view. Make any necessary adjustments before going live.
Step 8: Open your streaming app
Open your streaming or video app and go to its settings. You should see the GoPro as an option under the camera. Select it and begin your conference.
And that's it! You're now ready to start streaming with your GoPro as a webcam.
Speeding Tickets by Camera: Moving Violations or Not?
You may want to see also

Streaming to a PC with VLC Media Player
To stream your GoPro footage to a PC using VLC Media Player, you will need to follow a few steps. Firstly, ensure that your GoPro Wi-Fi is turned on. This process differs between GoPro models. For the Hero2, connect your camera to the Wi-Fi BacPac and press the Wi-Fi button, then select "Phone and Tablet". For the Hero 3 or 3+, access the Settings menu by cycling through the options using the Mode button, then open the Wi-Fi settings and select "GoPro App".
Next, connect your PC to the GoPro by selecting your GoPro from the list of available wireless networks on your computer. The GoPro should appear in this list. The default password for the GoPro wireless network is "goprohero".
Now, you need to find the URL of your GoPro stream. Open a web browser and type in the following address: http://10.5.5.9:8080/live. Copy the entire URL by pressing Ctrl + C.
Open VLC Media Player and navigate to the Media menu. Select "Open Network Stream" and paste the streaming URL by pressing Ctrl + V.
Finally, press "Play" to launch the live stream from your GoPro camera to VLC Media Player.
For the GoPro Hero4, you will need to download and install Camera Suite from camerasuite.org. Once you have done this, follow the same steps as above.
Surveillance Cameras: The Benefits of 15-900 Second Time Range
You may want to see also

Streaming to Facebook Live with the Live4 app
To begin, you'll need to download the Live4 app and the GoPro app on your smartphone. The Live4 app is free and available for both iOS and Android devices.
Pairing your GoPro with your phone:
- Launch the GoPro app and tap "Connect your Camera".
- Select your camera model from the list of GoPro cameras on the app.
- Follow the prompts to pair your GoPro with the phone app.
- Connect your phone to the camera's Wi-Fi. This will allow you to control your GoPro remotely and use it as a viewfinder.
Streaming on Facebook Live using the Live4 app:
- Launch the Live4 app and log in with your Facebook account. Grant the necessary permissions to the app.
- Tap on the "GoPro" option on the live streaming screen. Live4 will now take input from your GoPro, provided it has been paired with your phone.
- On the same screen, enter a title for your live stream so that viewers know what it's about.
- Tap on the "f" icon on the bottom right to enable "Facebook Sharing".
- Press the big red button to start broadcasting. Your live stream will now be available on Facebook to your selected audience.
The Live4 app also allows you to customise your stream by sharing your location or making it "Public" or "Private". Additionally, your live streams are archived on the app so that you can watch and share them later.
Troubleshooting Camera Focus Issues on Your G5
You may want to see also

Streaming to YouTube with the GoPro app
Step 1: Install the GoPro App
First, you will need to download and install the GoPro app on your smartphone. The app is available for both iOS and Android devices.
Step 2: Connect Your GoPro Camera
For streaming, you will need a GoPro HERO7 Black or a newer model. Connect your GoPro camera to a Wi-Fi network. If a Wi-Fi network is unavailable, you can create a personal hotspot on your smartphone and connect your camera to it.
Step 3: Pair Your Camera with the App
Open the GoPro app and pair it with your camera by following the on-screen instructions. Ensure that your camera is connected to the internet and paired successfully with the app before proceeding.
Step 4: Select YouTube as the Streaming Platform
Open the GoPro app and look for the live streaming option. This is usually found by scrolling through the options or accessing a "Set Up Live" button. Select YouTube as your streaming platform.
Step 5: Sign In to Your YouTube Account
Sign in to your YouTube account within the GoPro app and grant the necessary permissions. You may need to verify and set up your account for live streaming, which can take up to 24 hours. Additionally, YouTube requires a minimum of 1,000 subscribers to live stream from a mobile device.
Step 6: Configure Stream Settings
Configure the stream settings according to your preferences. This includes setting the sharing settings (such as Public, Friends, or Only Me), providing a title and description for your stream, choosing the resolution (480p, 720p, or 1080p), and deciding whether to save a high-resolution version of your stream to an SD card.
Step 7: Start Streaming
Once you have completed the previous steps, you are ready to start streaming. Tap the "Go Live" button or press the shutter button to begin live streaming to YouTube. You can then switch to the YouTube app to monitor your stream and check the statistics.
Fight Tennessee Traffic Camera Tickets: Your Rights, Your Defenses
You may want to see also

Streaming with Restream Studio
Restream Studio is a browser-based streaming service that allows you to broadcast your live content to multiple streaming platforms at once, including Facebook Live, YouTube Live, LinkedIn, Twitch, and Twitter. It is a user-friendly platform that makes live streaming simple and accessible.
To get started with Restream Studio, you will need a PC or Mac, a stable internet connection, a webcam, and a microphone. The platform offers a range of features to enhance your live stream, such as the ability to add custom captions, background images, overlays, and logos. You can also add guests to your stream, share your screen, and play local video files.
One of the key benefits of Restream Studio is its ease of use. The platform automatically optimizes video settings, so you don't have to worry about manually adjusting anything before going live. Additionally, Restream Studio provides a single browser tab for all your multistreaming needs, making it a convenient and straightforward option.
If you want to add more production value to your stream, you can use third-party encoders like OBS Studio or Xsplit. This is especially useful if you plan to live stream video games.
Restream Studio also offers split track recording, which allows you to download separate audio tracks for each participant in your live session. This feature is excellent for repurposing live streams into podcasts, teasers, or social media highlights.
With Restream Studio, you can reach a wider audience by streaming to multiple platforms simultaneously. It is a powerful tool to create professional live content and engage with your viewers in real time.
Who's Watching? Computer Cameras and Your Privacy
You may want to see also
Frequently asked questions
First, make sure your GoPro model is compatible with live streaming. GoPro HERO7 Black and all newer models support live streaming with the GoPro app. If you have an older model, you'll need a third-party app like LIVE4. Next, update your GoPro's firmware to the latest version and download/install the GoPro Webcam app on your computer. Connect your GoPro to your computer via a USB cable, and use the GoPro Webcam app to do a preview and adjust your field of view.
Yes, with the GoPro HERO11 Black, HERO10 Black, HERO9 Black, and HERO8 Black models, you can use the GoPro Webcam utility and plug your GoPro camera into your computer via a USB cable.
The GoPro app supports direct streaming on Facebook, YouTube, and Twitch, as well as other sites via RTMP URL.
GoPros are known for their great image quality, small size, ruggedness, waterproof design, wide angle, and endless wearability and mounting options.


