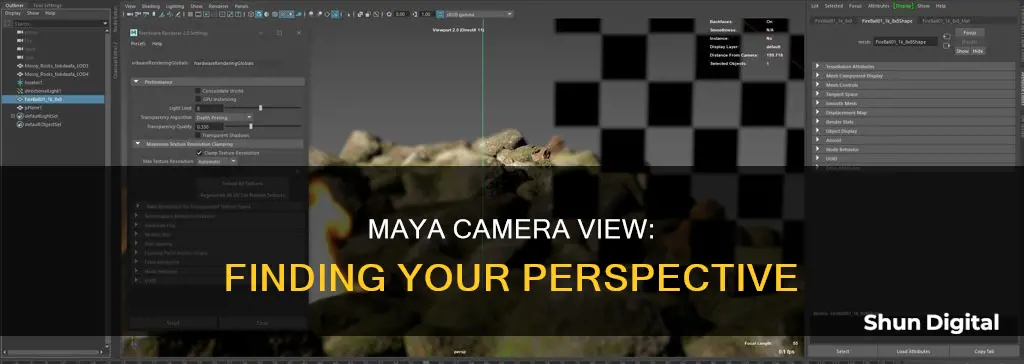
Maya is a software that allows users to interact with a virtual scene through a camera. The camera has three basic functions: pan, rotate, and zoom, which allow users to move the focal point of the camera to view an object from any angle. Maya's default camera is a perspective camera called persp, but there are three other orthographic cameras in a Maya scene by default: front, side, and top. Users can switch between these four default cameras by clicking the Four View layout button on the left of the screen. To see which camera you are currently using in Maya, simply look at the bottom of the viewport, where the name of the current camera is displayed.
What You'll Learn

Switch between camera views with the Panels menu
To switch between camera views with the Panels menu in Maya, follow these steps:
- At the top of the viewport, click on the "Panels" menu.
- Under the "Perspective" and "Orthographic" options, you will find a list of all the cameras in the scene.
- Select the desired camera from the list to switch to that specific view.
You can also create a new camera by going to "Panels" > "Perspective" > "New". This will allow you to set up multiple cameras with different view angles and switch between them using the Panels menu.
Additionally, you can use keyboard shortcuts to quickly switch between camera views. Pressing the spacebar will maximize the current viewport, and pressing it again will return to the four-panel view. You can also use the arrow keys on your keyboard to adjust the view direction and the rotate arrows to change the orientation.
The camera functions in Maya include pan, rotate, and zoom. These functions can be accessed by holding the Alt key and dragging the mouse in the Maya window with one of the three mouse buttons held down. The left mouse button rotates, the right mouse button zooms, and the center mouse button pans.
By utilizing the Panels menu and the various camera functions, you can efficiently switch between different camera views and manipulate the camera to interact effectively with Maya.
The Japanese Movie 'Don't Stop Camera' is a Must-Watch
You may want to see also

Use the Four View layout to see all default cameras
To see all the default cameras in Maya, you can use the Four View layout. This layout allows you to see all the default cameras at once: "persp", "front", "side", and "top".
To activate the Four View layout, click the "Four View" button on the left side of the screen. This will bring up Maya's four-panel layout, with the perspective camera ("persp") and three orthographic views: "top", "front", and "side".
The perspective camera acts like the human eye or a film camera, making objects that are farther away look smaller. Orthographic cameras, on the other hand, maintain the same object size regardless of distance and keep parallel lines from converging.
While in the Four View layout, you can switch to any of the four default cameras by hovering your mouse over a camera's view and hitting the spacebar. This will make the selected view take up the entire window. Hitting the spacebar again will bring you back to the Four View layout.
You can also adjust each view separately within the Four View layout. Simply select a view by clicking on it and then use the camera controls as you normally would.
If you want to focus on an object in all four views, select it and hit F (or Shift-F).
Attaching PS Camera to Your TV: Easy Steps
You may want to see also

Use the Resolution Gate for a visual representation of the camera view
When framing a shot with a renderable camera, you need to enable the resolution gate. This feature crops the viewport to show exactly what will be rendered. Enabling the resolution gate is important because it allows you to see the frameline, which is necessary for accurately composing the shot.
By default, the resolution gate feature is disabled. This means that unless you turn it on manually, the framing you see when you render will be different from what you saw in the viewport. This is because the viewport's aspect ratio is fluid and can be changed by resizing the viewport or changing certain aspects of the Maya user interface.
To enable the resolution gate, you can go to the View menu, choose Camera Settings, and then select Resolution Gate. With the resolution gate enabled, you can be sure that what you see in the viewport is what you will get in the final render.
Another way to enable the resolution gate is through the panel toolbar, which can be accessed by pressing Control + Shift + M. Here, you will find a button for the resolution gate that you can turn on and off.
The resolution gate is a useful tool for getting a precise visual representation of the camera view in Maya, ensuring that your framing and composition are accurate.
Are You Being Watched? Detect Hidden Cameras
You may want to see also

Use the Alt key and mouse buttons to pan, rotate, and zoom
To pan, rotate, and zoom in Maya, you need to use the Alt key in combination with the mouse buttons. Here's a step-by-step guide:
- Rotating the Camera: Hold down the "Alt" key on your keyboard and simultaneously press the left mouse button. This will allow you to rotate the camera view. You can rotate the camera freely to view an object from any angle, even from below it. The "up" direction will remain consistent during rotation.
- Panning the Camera: To pan the camera, hold down the "Alt" key and press the middle mouse button (usually the scroll wheel). Panning will move the focal point of the camera side to side and up and down within the window.
- Zooming the Camera: To zoom the camera, hold down the "Alt" key and press the right mouse button. This will let you move the camera closer to or farther from the focal point. Alternatively, you can also zoom by scrolling the mouse wheel, without the need to hold down the "Alt" key.
These camera controls offer a high level of flexibility in navigating and interacting with your 3D scene in Maya. You can easily adjust your viewpoint, focus on specific objects, and manipulate the camera to get the desired perspective.
It's worth noting that while you can change the hotkeys in Maya by going to "Window -> Settings/Preferences -> Hotkey Editor," it's generally not recommended to alter the default navigation controls as they are designed to be efficient and consistent with other 3D software.
Watching Camera Footage on PC: Easy Steps to Follow
You may want to see also

Adjust the focal point of the camera with a series of pans and rotates
To adjust the focal point of the camera with a series of pans and rotates, you can follow these steps:
Firstly, understand the three basic camera functions in Maya: Pan, Rotate, and Zoom. These functions can be thought of in terms of an explicit point in the scene, known as the focal point. Pan moves the focal point side to side and up and down within the window, rotate spins the camera around the focal point, and zoom moves the camera closer to or farther from the focal point.
To manually adjust the focal point, you can use a series of pans and rotates. Hold the Alt key and drag the mouse in the Maya window while holding down the left mouse button to rotate. The right mouse button will zoom, and clicking the centre mouse button (scrolling wheel) will pan. You can also use the scroll wheel to zoom without holding the Alt key.
Alternatively, if you want to focus on a specific object, simply select it by clicking on it and then hit the 'f' key. This will automatically adjust the focal point to the centre of the object and zoom in so that the selected object takes up most of the screen.
To adjust the camera's attributes, choose 'View > Select Camera' from the panel menu to select the camera and display its Attribute Editor. Here, you can set the Focal Length and Camera Aperture values. The focal length determines how zoomed in the camera is and how close or far away objects appear. Increasing the focal length will make objects appear closer and can also affect the distortion caused by the perspective effect.
Additionally, you can adjust the pivot point, which is the point around which the camera rotates and transforms. By default, it is located at the centre of the film plane, but you can move it to create a more realistic effect. It is recommended to adjust the pivot before animating your camera to avoid readjustments later.
TCL 4K Roku TV: Camera and Microphone Features Explored
You may want to see also
Frequently asked questions
The name of the current camera is visible at the bottom of the viewport.
You can switch between cameras by going to Panels > Perspective or Orthographic and selecting the camera name.
The camera has three basic functions: Pan, Rotate, and Zoom. These functions can be accessed by holding the Alt key and dragging the mouse with one of the three mouse buttons held down.
To adjust the framing, enable the Resolution Gate for the camera by going to View > Camera Settings > Resolution Gate.
There are two main types of cameras in Maya: Perspective and Orthographic. Perspective cameras act like the human eye or a film camera, while orthographic cameras maintain parallel lines and do not alter the size of an object with distance.


