Ubiquiti's UniFi cameras can be monitored in real-time using the UniFi Protect's Live View feature. The UniFi Site Manager or Protect Mobile App (iOS/Android) can be used to access the Live View and recordings. The ViewPort PoE, which connects to an HDMI display, is another option for viewing the camera feeds. However, it has been reported to be often sold out and expensive. Alternatively, you can use the RTSP protocol to stream the camera feeds to a third-party program, but this requires additional hardware and configuration.
What You'll Learn
![]()
Use the UniFi Protect app on a mobile device or tablet
The UniFi Protect app brings the full functionality of Ubiquiti's web-based camera security application to your mobile device or tablet. It is available on iOS and Android. With the app, you can monitor your UniFi cameras in real-time using the Live View feature, or watch past recordings using the Playback functionality. The app also allows you to download recorded clips by tapping the Share icon and then selecting "Export clip". You can also access these recordings via a web browser by selecting the clip and clicking the Download icon in the Playback or Detections tab.
UniFi Protect prioritizes smooth video playback, so you may notice the video resolution automatically reducing if your remote connection is weak. However, the app will still save a high-quality recording that can be watched once conditions change or you connect locally for improved performance.
You can set recording schedules for as many or as few cameras as you like within the UniFi Protect app. This is a useful feature for optimizing storage space and maximizing recording retention. For example, a business may choose to configure a schedule to record only after hours when no employees are around to monitor the site.
The UniFi Protect app also offers advanced configuration options, such as the ability to modify Motion Detection sliders for individual cameras. These settings can be found by navigating to your Protect application, selecting a camera, and accessing the Recording Mode and Detection Record Settings. Here, you can adjust the number of seconds of motion needed to trigger detection, as well as the number of seconds to record before and after motion detection.
The app also provides insights in the form of a heat map, which reveals where detections are occurring, including both standard motion and Smart Detections. This can be helpful for reviewing motion paths when planning access routes or physical layouts.
Surveillance Cameras: How to Know If They're On
You may want to see also
![]()
Use the UniFi ViewPort PoE to display feeds to an HDMI display
The UniFi ViewPort PoE is a small and easy-to-mount display adapter that allows you to stream up to 16 UniFi Protect camera feeds simultaneously on an HDMI display. It measures 157 x 52 x 37 mm (6.18 x 2.05 x 1.46 inches) and is only 5 cm (2 inches) thick, making it easy to mount behind a TV or monitor using the supplied mounting bracket. The package includes a versatile mounting bracket that can be attached to a wall or the back of a monitor/TV using VESA mounting points, as well as double-sided tape for an alternative installation method.
The UniFi ViewPort is simple to set up and only requires a PoE connection, which can be made through a PoE-capable switch or a PoE adapter (sold separately). It also comes with an HDMI cable for connecting to your display. Once connected, you can adopt the ViewPort in the UniFi Protect console, just like any other Protect device.
To view your camera feeds on the HDMI display, you need to create a Live View layout in the UniFi Protect console. This allows you to choose a grid layout with up to 26 cameras, although the UniFi ViewPort only supports up to 16 camera streams. After creating and saving your layout, you can apply it to the ViewPort by selecting it from the Live View settings in the devices section of the UniFi Protect console.
The UniFi ViewPort PoE offers a convenient and straightforward way to view multiple UniFi Protect camera feeds on a single HDMI display, eliminating the need for a dedicated computer to keep your camera feeds visible.
Understanding Camera Raw Histogram: A Beginner's Guide
You may want to see also
![]()
Use the RTSP protocol to stream to a non-UI NAS/NVR storage system
The Real-Time Streaming Protocol (RTSP) is a network protocol used to control servers that stream media content over the internet. It helps establish and manage connections between devices for streaming audio or video. RTSP does not stream multimedia content itself but communicates with the server that streams the data.
RTSP is a useful tool when it comes to security cameras and non-UI NAS/NVR storage systems. It offers an alternate audio and video stream if a device is incompatible with ONVIF. This usually occurs when a user attempts to use an IP camera with a third-party recorder. Most professional NVR systems provide alternative ways to add third-party manufactured cameras, one of which is to access the RTSP stream from a camera.
RTSP streaming can also re-record and store the transmitted stream on a third-party server or recorder. Many media and network-attached storage (NAS) servers support RTSP as it has been around for decades. Most NVR systems can also accept RTSP streams to record, which is a useful feature for users who prefer or are required to have a secondary backup of their footage.
To use the RTSP protocol to stream to a non-UI NAS/NVR storage system, you will need to determine the RTSP stream URL. This will depend on the brand and model of your camera. Here is an example of what an RTSP stream URL may look like:
Rtsp://[USERNAME]:[PASSWORD]@[IP ADDRESS]
In this URL, you will need to replace the brackets and their contents with your specific information. For example, if your camera username is "admin" and your password is "password123", while your camera's IP address is "192.168.1.109", your RTSP stream URL will look like this:
Rtsp://admin:password123@192.168.1.109
Once you have determined your RTSP stream URL, you can use it to set up streaming to your non-UI NAS/NVR storage system. This process may vary depending on the specific software and hardware you are using, but the basic steps will involve configuring your storage system to accept the RTSP stream from your camera.
It is important to note that RTSP does not support content encryption and cannot retransmit lost media packets. Additionally, it cannot stream directly to a browser over HTTP. To circumvent this, you can use FFMPEG to convert the RTSP stream to an HLS stream.
Surveillance in England: Cameras in Homes?
You may want to see also
![]()
Use a web browser to download recorded clips
To download recorded clips from your Ubiquiti cameras using a web browser, you can follow these steps:
- Open the UniFi Site Manager or the Protect Mobile App (available on iOS and Android).
- Navigate to the "Playback" or "Detections" tab.
- Select the clip you want to download.
- Click on the "Download" icon. The icon should be visible while you are in the Playback or Detections tab.
Alternatively, you can access your recordings by signing in to your UniFi Protect account and navigating to Settings > Recordings. Here, you can configure relevant settings such as how long to keep your recordings before they are automatically deleted to free up storage space.
It is worth noting that the process of downloading recorded clips from Ubiquiti cameras has been described by some users as cumbersome and time-consuming, especially when attempting to download large amounts of footage. There are some third-party tools and workarounds available to make the process more efficient, such as using a tool to automate the download process or accessing the camera's file system directly. However, these methods may require technical expertise and may not be officially supported by Ubiquiti.
Tiny Spy Tech: World's Smallest Surveillance Cameras Revealed
You may want to see also
![]()
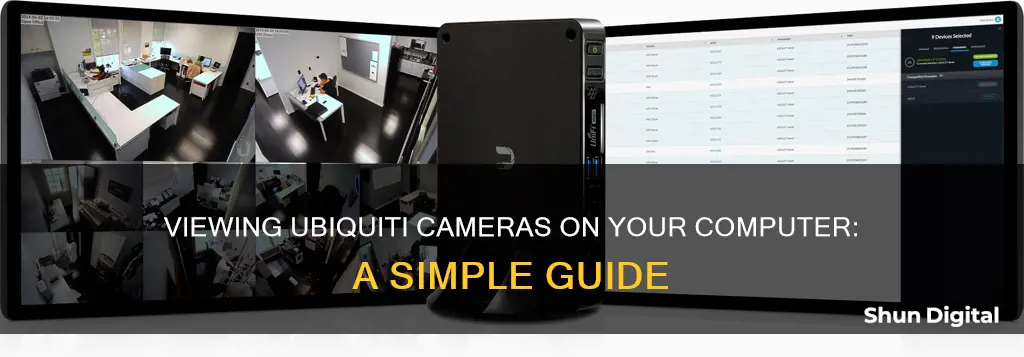
Use the UniFi Site Manager to monitor cameras and access recordings
The UniFi Site Manager is a powerful tool that allows users to securely manage their UniFi deployments from a single platform. It offers an intuitive SD WAN, global permission management, and a comprehensive inventory list across all sites. One of its key features is the ability to monitor UniFi cameras and access recordings. Here's a detailed guide on how to use the UniFi Site Manager for camera monitoring and recording access:
Accessing the UniFi Site Manager
To begin, users need to access the UniFi Site Manager platform. The platform can be accessed by visiting the URL unifi.ui.com. It is recommended to use the UniFi Site Manager for its simplicity, security, and convenience in managing UniFi deployments associated with a UI Account.
Enabling Remote Management
To make the most of the UniFi Site Manager, ensure that Remote Management is enabled in your UniFi OS settings. This feature is typically enabled by default when setting up a UniFi Console with a UI Account. For those using Legacy CloudKeys or self-hosted Network Servers, this setting can be found under Settings > System > Administration.
Signing In
Once you have accessed the UniFi Site Manager, you will need to sign in using your UI Account credentials. This will grant you access to manage your UniFi deployments and associated devices.
Monitoring Live Camera Feeds
With the UniFi Site Manager, admins can monitor UniFi camera feeds in real time. The platform provides a live view of camera streams, allowing users to keep an eye on their premises remotely. This can be particularly useful for security purposes or simply to check in on activities at different locations.
Accessing Recordings
In addition to live monitoring, the UniFi Site Manager also provides access to past recordings. Users can leverage the Playback functionality to review footage captured by their UniFi cameras. This is helpful for reviewing events that may have occurred during specific time periods.
Configuring Recording Settings
The UniFi Site Manager offers flexibility in managing camera recordings. Users can navigate to Settings > Recordings in UniFi Protect to configure relevant settings. This includes specifying how long recordings are kept before automatic deletion to free up storage space. Users can also set recording schedules, such as recording only after business hours when no employees are onsite.
Pairing Cameras with Locations
UniFi Protect cameras can be paired with specific locations, enabling automatic recording when someone unlocks a door or triggers a motion event. This feature enhances security and provides targeted recordings for admins to review. To pair cameras with locations, users can go to their Protect application and select the desired devices under UniFi Devices.
By following these steps, users can effectively utilize the UniFi Site Manager to monitor UniFi cameras and access their recordings. The platform offers a secure and convenient way to manage UniFi deployments, providing valuable insights and ensuring that important events are captured and reviewed.
Reolink Camera Battery Options: What's Your Best Pick?
You may want to see also
Frequently asked questions
You can view your Ubiquiti cameras on your computer by using the UniFi Site Manager or by downloading the UniFi Protect app on iOS or Android.
Yes, you can monitor your Ubiquiti cameras in real-time using UniFi Protect's Live View.
Yes, you can watch past recordings from your Ubiquiti cameras using the Playback functionality in the UniFi Site Manager or the UniFi Protect app.
Yes, you can download recorded clips from the UniFi Protect app by tapping the Share icon and then selecting Export clip. You can also download clips from a web browser by selecting the clip and clicking the Download icon while in the Playback or Detections tab.
Yes, you can view your Ubiquiti cameras on a monitor by using the ViewPort PoE, which allows you to display feeds to an HDMI display. Alternatively, you can use a streaming service such as Google Home or Amazon Fire Stick with a third-party program that supports RTSP.