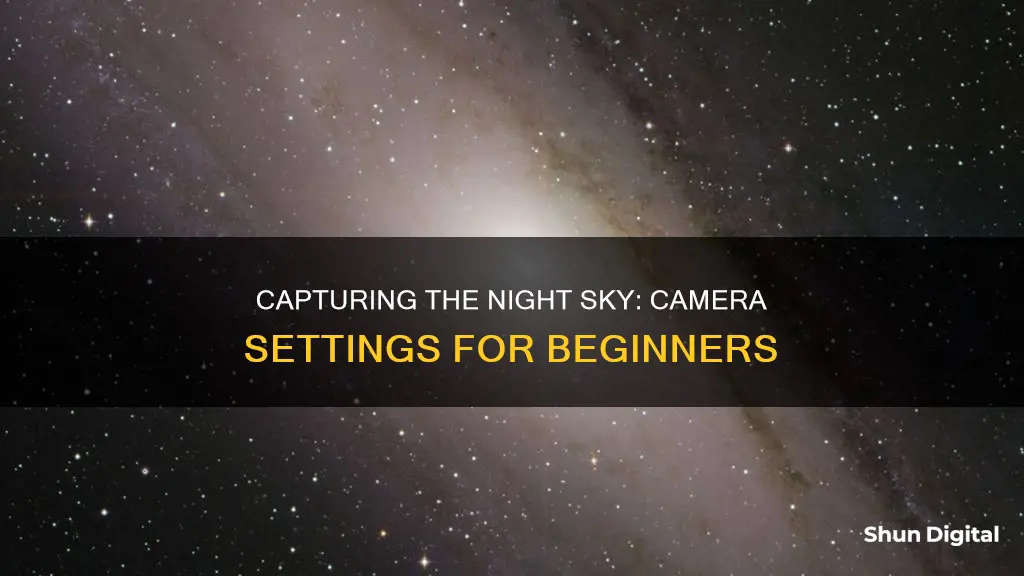
Night sky photography is a highly rewarding activity that allows you to capture the beauty of the night sky and celestial bodies in a way that the naked eye cannot see. With the right equipment and techniques, you can create breathtaking images that showcase the stunning patterns, colours, and movement of light and darkness. In this article, we will discuss the essential gear, camera settings, planning tips, and techniques to help you capture stunning images of the night sky.
| Characteristics | Values |
|---|---|
| Camera | Any camera with manual mode; DSLR or mirrorless camera |
| Camera Lens | Wide-angle lens; 10-22mm lens with an aperture of f/4 or lower |
| Tripod | Sturdy; carbon fibre; adjustable ball head |
| Light | Dark sky, away from light pollution; clear sky |
| Time | Night; new moon; 1 week before or after new moon; 1-2 hours after sunset or moonset |
| Clothing | Warm; layers; non-slip shoes |
| Equipment | Remote shutter release; head torch (red light mode); extra batteries; memory cards |
What You'll Learn
- Camera and lens types: Use a DSLR or mirrorless camera with a wide-angle lens
- Tripod: A sturdy tripod is essential to keeping your camera still
- Location: Find a dark sky location away from light pollution
- Camera settings: Use manual mode and experiment with shutter speed, aperture, and ISO
- Focus: Focus on a bright star or planet and adjust until the object is sharp

Camera and lens types: Use a DSLR or mirrorless camera with a wide-angle lens
When it comes to night sky photography, you'll want to use a DSLR or mirrorless camera with a wide-angle lens. Both types of camera have their benefits, with DSLRs being easy to use and affordable, and mirrorless cameras offering high ISO capabilities that allow you to capture the light and detail of the night sky perfectly.
DSLRs are a good option for beginners as they are cost-effective and versatile. They also use interchangeable lenses, which is extremely beneficial for astrophotography. You can attach a standard kit lens (such as an 18-55mm) to capture the Milky Way, or use a camera-lens telescope adapter for deep-sky imaging. A telephoto camera lens will also do a fine job of capturing deep-sky objects, but a telescope offers many advantages, including a locking dual-speed precision focuser.
If you already own a DSLR for daytime photography, it's worth trying it out for astrophotography before upgrading. Full-frame DSLRs are a good option for landscape astrophotography as they can capture extreme wide-angle shots. However, if you're shooting deep-sky astrophotography through a telescope, a crop-sensor DSLR is a better choice as they are more affordable and lighter.
Mirrorless cameras have gained in popularity in recent years, with Canon even announcing a full-frame, mirrorless camera designed specifically for astrophotography—the Canon EOS Ra. Mirrorless cameras have high ISO capabilities, allowing you to capture the light and detail of the night sky. They also tend to be smaller and lighter than DSLRs, making them a good option if you're travelling with your camera equipment.
When choosing a lens for night sky photography, a wide-angle lens is generally best as it allows you to capture more of the night sky in a single frame and reduces star trails. A focal length of 16-35mm works well, with the sweet spot often considered to be 24mm. You'll want a lens with a wide aperture (f/2.8 or wider) so that as much light as possible enters the lens, capturing the stars in sharp detail.
Troubleshooting Funlux Camera's Wireless Connectivity Issues
You may want to see also

Tripod: A sturdy tripod is essential to keeping your camera still
Capturing the night sky in all its glory requires a sturdy tripod to keep your camera still and ensure your images are sharp.
A tripod is essential for night sky photography because it keeps your camera steady during long-exposure shots. When photographing the night sky, you need to let as much light in as possible, which means using a slow shutter speed. However, if your camera moves during the long exposure, your image will be blurry. A sturdy tripod prevents this from happening.
When choosing a tripod for night sky photography, look for one that is durable and can withstand windy conditions. It should also be easy to set up and pack away, especially if you plan to shoot in multiple locations. Most tripods have adjustable legs, so you can find one that fits your height and camera setup.
The weight of the tripod is also important. A heavier tripod will provide more stability, but it will be less portable. Carbon fibre tripods are lightweight and durable, but they tend to be more expensive. Aluminium tripods are a more affordable option, but they are heavier and can get very cold in low temperatures.
In addition to weight, consider the tripod's payload capacity, which is the maximum weight it can support. Make sure your tripod can handle the weight of your camera and any other gear you plan to attach to it.
Finally, look for a tripod with a ball-head mount, which is much easier to use in the dark than a standard tripod mount.
Exploring Highway Cameras: Accessing Live Feeds and Footage
You may want to see also

Location: Find a dark sky location away from light pollution
To capture the night sky in all its glory, you need to find a dark sky location away from light pollution. Light pollution washes out the sky, making it difficult to see smaller or faint objects like stars, constellations, and nebulae. Urban areas, towns, and cities are known for their excessive light, so it's best to get as far away from city lights as possible. Even some rural areas can have ambient light from streetlights and houses, so it's important to do your research and find a truly dark location.
There are several tools and resources available to help you find dark sky locations. The International Dark Sky Association (IDA) is a great place to start. They have a network of certified Dark Sky Parks and a Dark Sky Places Finder tool on their website, which can help you find locations free from light pollution. In addition, there are several websites and apps dedicated to helping you find dark skies, such as Light Pollution Map, Dark Site Finder, and PhotoPills. These tools provide comprehensive maps of light pollution levels, allowing you to easily identify the darkest locations.
When planning your trip to a dark sky location, there are a few things to keep in mind. First, try to time your visit to coincide with a new moon or a few days before or after, as moonlight can wash out the night sky. Second, consider the weather conditions and aim for a clear sky with low wind. Windy conditions can increase light pollution, and clouds can reduce the visibility of celestial objects. Third, if you're travelling to a remote location, it's a good idea to visit the site in person beforehand to ensure there are no unexpected sources of light or obstructions.
By finding a dark sky location away from light pollution, you'll be able to capture the true beauty of the night sky, including faint objects that wouldn't be visible from light-polluted areas. So take the time to plan and scout your location, and you'll be rewarded with incredible night sky photography opportunities.
Can Roku TVs Spy on You?
You may want to see also

Camera settings: Use manual mode and experiment with shutter speed, aperture, and ISO
Night sky photography is all about letting in as much light as possible. To do this, you'll need to put your camera into manual mode so that you can adjust the shutter speed, ISO, and aperture independently.
Shutter speed determines how long the shutter stays open, and for night sky photography, you'll want to set it to around 25 seconds. This will allow you to capture even the faintest light from distant stars. However, going longer than 30 seconds may cause the stars to blur due to the Earth's rotation.
Aperture refers to the opening of the lens through which light enters your camera. For night sky photography, you'll want to use the widest aperture your lens allows. Most photographers use an aperture of f/2.8 or wider.
ISO refers to the sensitivity of your camera's sensor to light. If you're in a very low-light area, such as the countryside, set your ISO between 1600 and 3200, or higher if necessary. For areas with more light pollution, like cities, keep your ISO around 800 to reduce noise in the image.
Once you've set your camera to manual mode and adjusted these three settings, you can start experimenting. Play around with different combinations of shutter speed, aperture, and ISO until you find the right balance for your specific camera and lighting conditions. Remember, the key to night sky photography is letting in as much light as possible while avoiding blur and noise in your images.
Mastering Camera Apertures: Where to Find and How to See
You may want to see also

Focus: Focus on a bright star or planet and adjust until the object is sharp
Focusing on a bright star or planet and adjusting until the object is sharp is a critical step in night sky photography. Here are some detailed instructions and tips to help you master this technique:
Finding a Bright Star or Planet
Begin by locating the brightest star or planet in the sky. Planets like Venus and Jupiter work well for this purpose. If you're having trouble finding a sufficiently bright celestial body, you can use artificial light sources such as distant buildings, far-off towns, roadways, or even your headlamp. Just ensure that the light source is at least 100 feet or 30 meters away, as this distance is crucial for achieving "true infinity" focus.
Centering and Magnifying
Once you've identified your bright star or planet, compose your shot so that the celestial body is centred in your image. Most cameras have a magnification feature; use this to zoom in on the live view feed and help you pinpoint the object more accurately.
Manual Focusing
Set your camera to manual focus mode. This will give you more control over the focusing process and allow you to make fine adjustments. Adjust the focus ring slowly until the star or planet appears as a sharp, pinpoint of light. A useful indicator of good focus is the size of the star; when it's perfectly in focus, it will look as small and sharp as possible.
Checking for Colour Fringes
Another way to assess the accuracy of your focus is to look for colour fringes around the star or planet. If you see a green or magenta tint, your focus is slightly off. If the fringe is green, focus slightly further away; if it's magenta, focus slightly closer.
Using Live View
If you're using a DSLR camera, enable Live View mode. This will allow you to use the LCD monitor to frame your shots, as the eye-level viewfinder will likely be too dark. Live View can electronically amplify the scene, making it easier to magnify and focus on your chosen celestial body.
Test Shots
Take some test shots to ensure that your focus is accurate. Use your camera's magnification function when reviewing the images to confirm that you've achieved perfect focus. Remember to check your focus periodically throughout your photography session, as it can be easily knocked out of alignment.
Locking Your Focus
Once you're confident that you've achieved sharp focus, consider locking it down by carefully taping your focus ring with gaffer tape. This will prevent accidental adjustments and ensure that your focus remains consistent throughout your photo session.
Unraveling the Mystery of Person, Woman, Man, Camera, TV
You may want to see also
Frequently asked questions
A full-frame DSLR camera with manual mode is best for night sky photography. This will allow you to capture more light and reduce noise in high ISO images.
Use a wide aperture (around f/2-f/4) to maximise light-gathering capabilities and get the highest quality image results. Set the ISO to between 1600 and 3200, and the shutter speed to between 15 and 30 seconds.
In addition to your camera, you will need a sturdy tripod, a remote shutter release or intervalometer, a headlamp with a red light mode, and extra batteries and memory cards.
Choose a location with minimal light pollution, away from city lights. Use tools like Light Pollution Map and International Dark Sky Places Finder to find dark sky regions.
Use manual focus mode and focus on something far away (15 metres or more). You can also use your camera's Live View mode to zoom in and focus on a bright star or planet.


