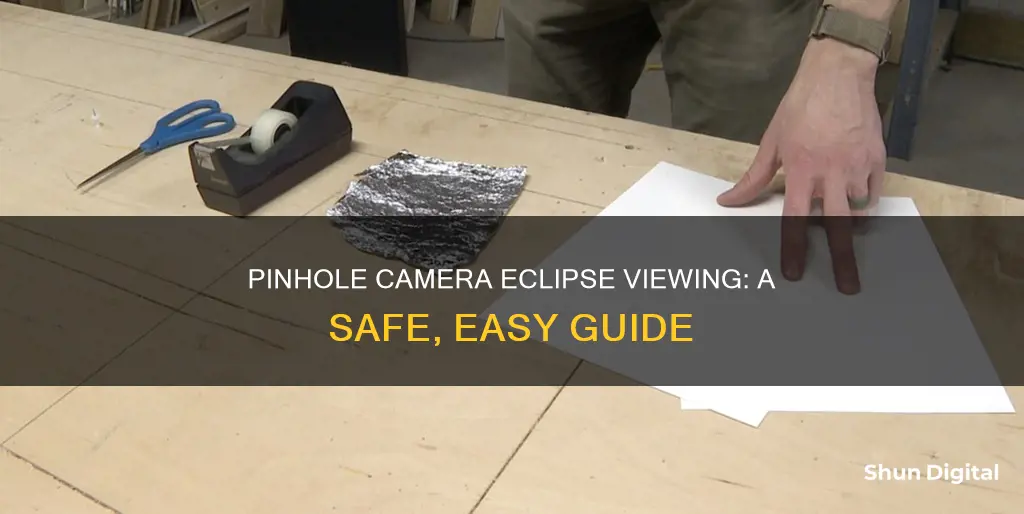
Solar eclipses are fascinating, but it's important to remember that looking directly at the sun can damage your vision. One way to safely watch a solar eclipse is to use a pinhole camera, which projects the eclipse onto a small piece of card stock. You can make a pinhole camera with a few simple supplies, such as a cardboard box, a pin, and some aluminium foil. The pinhole camera will allow you to see an image of the sun that is safe to look at. Here's how to make one.
| Characteristics | Values |
|---|---|
| Number of pieces of card/paper | 2 |
| Type of card/paper | Stiff white card stock, or plain white paper |
| Size of card/paper | 18 inches long (minimum) |
| Hole size | Small, round, and smooth |
| Hole-making tools | Pin, thumbtack, needle, paper clip, or pencil |
| Additional items | Tin foil, tape, scissors/sharp knife, white paper/card |
| Direction | Face away from the sun |
| Distance | Hold the second piece of card further away for a larger image |
What You'll Learn

The equipment you'll need
To make a pinhole camera, you will need the following equipment:
- A cardboard box at least 18 inches long. If you use a box shorter than this, the projected image of the eclipse or sun will be too small.
- A sharp knife to cut out a circle (about 1-2 inches in diameter) in the middle of one of the smaller ends of the box.
- Aluminium foil to cover the hole.
- Tape to secure the foil over the hole.
- A pin, paper clip, or sharp pencil to poke a small hole in the foil.
- A piece of white card stock or paper to act as a screen for the projection.
Alternatively, you can make a simpler pinhole projector with just two pieces of stiff white cardboard or paper, and a thumbtack, sharp pin, or needle.
Accessing Your x10Linked Camera Feed on PC
You may want to see also

How to make the pinhole
Making a pinhole camera is a fun and easy way to watch a solar eclipse without damaging your eyes. Here's a step-by-step guide on how to make the pinhole:
Step 1: Gather Your Materials
You will need a box (a cereal box or a shoe box works well), a piece of white paper, duct tape or electrical tape, scissors or a box cutter, and aluminium foil.
Step 2: Light-Proof Your Box
Seal all openings of the box except for one side, using tape to prevent light rays from getting in. Pay special attention to the corners and wherever two pieces of cardboard meet. The pinhole will only allow a few rays of light into the box, so the darker your camera, the better the image will be.
Step 3: Prepare the Inside of the Box
On one of the smallest sides of the box, cut a piece of white paper to fit and tape or glue it to the inside of the box. Ensure the paper is smooth, with no wrinkles or folds, as these may distort the image.
Step 4: Measure and Cut Openings
On the side opposite the white paper, measure and cut two openings. The pinhole opening will be in the upper left corner, about half an inch from the edges, and the viewing opening will be in the upper right corner, half an inch from the top and one inch from the right edge. The viewing opening should be smaller, about one inch square.
Step 5: Seal the Box
Check your box again for any gaps that might let light in, especially around the corners and above and below your openings. Cover these areas with tape to seal them.
Step 6: Cover the Larger Opening with Aluminium Foil
Cut a smooth piece of aluminium foil slightly larger than the larger opening. With the dull side facing you, carefully tape the foil over the opening, making sure it is tight and secure so no light can get in.
Step 7: Create the Pinhole
Find the centre of the foil and gently push a thumbtack, toothpick, or embroidery needle through, then remove it, leaving a clean, round hole. The ideal width of the pinhole is about 0.2 millimetres. This width is important as it determines how much light gets into the box. If the hole is too big, the image will be blurry.
Now you have created your pinhole, you can test out your pinhole camera by standing with your back to the sun and looking into the box through the viewport.
Viewing Blue Iris Cameras on Echo Show Devices
You may want to see also

How to use the camera
To use your pinhole camera, start by standing with your back to the sun. Place the second piece of card stock on the ground and hold the piece with the aluminium foil above it, facing up. You can also tape the foil to the box if you are using a box. You should now be able to see the projected image on the card below. The farther away you hold your camera, the bigger your projected image will be.
To make your projection a bit more defined, try putting the bottom piece of card stock in a shadowed area while you hold the other piece in the sunlight.
For extra fun, try pokings multiple holes in your foil to make shapes, patterns, and other designs. Each hole you create will turn into its own projection of the sun, creating some neat effects.
Remember to never look directly at the sun without equipment that is specifically designed for looking at the sun. Note that sunglasses, binoculars, and telescopes do NOT count as proper protection.
Apple Watch Camera Remote: Where Is It?
You may want to see also

Safety precautions
To safely watch a solar eclipse, you can use two pieces of cardboard to make a pinhole projector. Here are some safety precautions to follow when using a pinhole camera to view an eclipse:
- Never look directly at the Sun without proper eye protection. Staring at the Sun can seriously hurt your eyes and even cause blindness.
- Do not look at the Sun through the pinhole, binoculars, or a telescope.
- Always keep your back towards the Sun while looking at a pinhole projection.
- Only use equipment that is specifically designed for looking at the Sun. Note that sunglasses, binoculars, and telescopes do not count as proper eye protection.
- If you are using a box projector, make sure the hole is small enough to maintain the pinhole camera effect. If the hole is too big, you will lose the effect and will not be able to see the projection.
- If you are using two pieces of card or paper, make sure the hole is round and smooth.
Xbox One's Camera: Watching You?
You may want to see also

Other items that can be used as pinhole cameras
A pinhole camera is a simple device that can be made from everyday items. It allows you to view a solar eclipse safely and easily. The basic principle behind a pinhole camera is that light from the sun passes through a tiny aperture and projects an inverted image on the opposite side.
- Colander: Hold a colander or any item with small holes over a piece of card stock or cardboard on the ground to see the projected image. Experiment with moving the colander closer to or farther away from the projected image to observe the effects.
- Cereal box: You can make a pinhole camera using a cereal box.
- Shoe box: Get an empty shoe box with a lid. Use a sharp pencil to punch a hole in one of the shorter ends of the box. Cut a 2-inch square in the opposite end, directly across from the hole. Cut a 3-inch square of wax paper and tape it over the square cut-out. Take the box to a dimly lit room, cover your head and the box with a blanket, and aim the pinhole end at a lamp about 5 feet away. You should see an inverted image of the lamp projected on the wax paper.
- Cardboard box: You can use a cardboard box that is at least 18 inches long. On one of the smaller ends, trace a circle using a quarter and carefully cut it out with a sharp knife. Cut a piece of aluminium foil big enough to cover the hole and tape it over. Poke a hole in the foil using a pin or a sharp pencil. Tape a white piece of paper inside the box opposite the hole and point the pinhole at the sun to observe the projection.
- Paper plates: Take two stiff white paper plates or pieces of plain white paper. Make a tiny hole in the middle of one of the plates using a pin or a thumbtack. Make sure the hole is round and smooth. With your back to the sun, hold one plate above your shoulder, allowing the sun to shine on it. Use the second plate as a screen by holding it at a distance. You should see an inverted image of the sun projected on the paper screen.
Are NSA Agents Watching Us Through Our Cameras?
You may want to see also
Frequently asked questions
A pinhole camera is a projector that reflects the image of the Sun onto a surface, such as a piece of card, using a small hole.
You can make a pinhole camera with two pieces of white card stock, a pin, and some aluminium foil. Cut a 1-2 inch square hole in the middle of one piece of card stock, cover it with the foil, and poke a small hole in the foil. With the Sun behind you, hold the second piece of card stock on the ground and place the other piece with the pinhole above it, with the foil facing up. You should then be able to see the projected image on the card.
The hole in the foil should be round and smooth.
The farther away you hold the second piece of card stock, the bigger the projected image will be.
No, you should never look directly at the Sun without protective eye gear.


