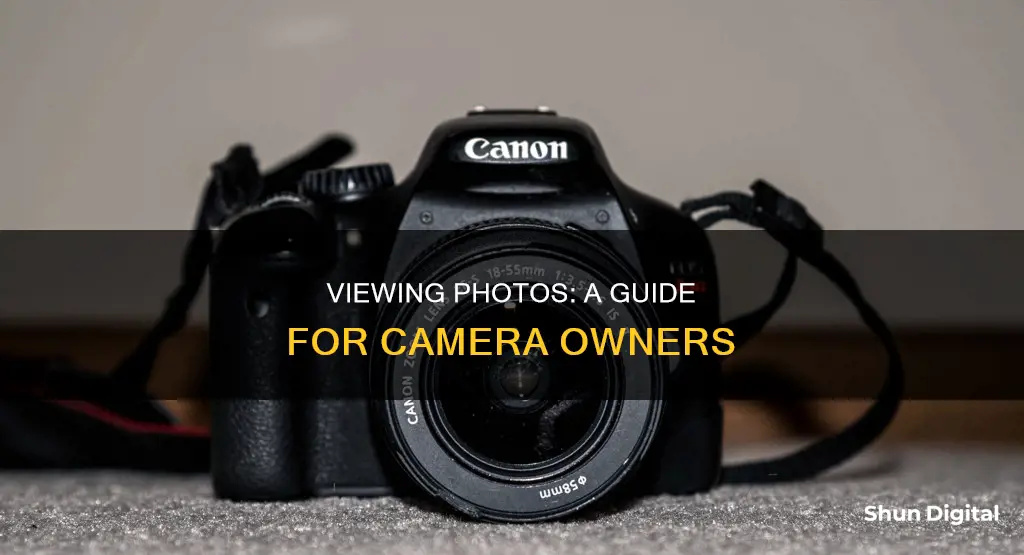
There are several ways to view pictures from your camera, depending on the device you are using. If you are using an iPhone, you can use the Photos app to view your pictures. You can also use the Map view to see photos taken in a specific location. If you are using a Windows PC, you can right-click on a picture file and select Properties to view the details, including the location the photo was taken. On a Mac, you can right-click on the image file and select Get Info to view the latitude and longitude coordinates. If you want to test your webcam, you can use an online tool to check its functionality and picture quality.
What You'll Learn

How to see pictures from your camera on a Windows PC
There are a few ways to see pictures from your camera on a Windows PC. Here is a step-by-step guide:
Using the Camera App:
- Open the Camera app by clicking the Start button and selecting "Camera" from the list of apps.
- If you have multiple cameras, select "Change Camera" at the top right to switch between them.
- Adjust camera settings if needed, such as turning on location info or showing grid lines.
- Take a photo or video by clicking the "Capture" button.
- To view your photos or videos, open the Camera app and select the left arrow.
- You can also find your photos in the "Photos" app or the "Pictures" folder on your PC.
Using a USB Cable:
- Turn on your computer and connect your camera to the PC using a USB cable.
- Turn on your camera and switch it to "Review" mode if needed.
- Open the "AutoPlay" window and select "Open folder to view files."
- Navigate to the "DCIM" folder, which usually contains your photos.
- Select the photos you want to transfer and drag them to a new location on your PC, such as the "Pictures" folder.
- Eject your camera before unplugging it from the computer.
Using an SD Card:
- Remove the SD card from your camera and insert it into your computer's card reader. If your computer doesn't have a built-in card reader, you can purchase an external SD card reader that connects via USB.
- Open the "File Explorer" and navigate to your SD card.
- Select the photos you want to transfer and drag them to a new location on your PC.
- Eject the SD card before removing it from the computer.
Troubleshooting:
If your camera is not working in Windows, try the following:
- Run the automated camera troubleshooter in the Get Help app.
- Check for updates and restart your PC.
- Test your camera with the Camera app and ensure you have given apps permission to access your camera.
- Check your antivirus software and hardware drivers.
- Try using a different USB port and scan for hardware changes.
- If your camera still doesn't work, you may need to roll back or uninstall your camera driver and scan for hardware changes.
Mastering Camera TV: A Guide to Enhancing Your Viewing Experience
You may want to see also

How to see pictures from your camera on a Mac
There are several ways to see pictures from your camera on a Mac. Here is a step-by-step guide:
Method 1: Using the Photos App
- Connect your camera, iPhone, or iPad to your Mac using a USB or USB-C cable.
- Ensure that your device is turned on and set to the correct mode for importing photos. Refer to your camera's instructions for the appropriate mode.
- Open the Photos app on your Mac.
- Click on the device under "Devices" in the sidebar. The "Devices" option will only appear when a camera or storage device is connected.
- If you want the Photos app to open automatically when you connect your device, select the "Open Photos" checkbox.
- You can now import photos from your device into the Photos app. Click "Import" to import all new photos or select specific photos and click "Import Selected."
- If you want to delete the photos from your camera after importing them, select the "Delete Items" checkbox.
- Choose where to import the photos by selecting an existing album, creating a new album, or importing without specifying an album.
- Once the photos are imported, you can view them within the Photos app.
Method 2: Using Image Capture App
- Connect your iPhone or iPad to your Mac using a Lightning or USB-C cable.
- If prompted, trust the computer on your iOS device and enter your device passcode.
- Open the Image Capture app, which is pre-installed on your Mac.
- Select your iPhone or iPad from the app's sidebar to view all your photos and videos.
- From here, you can select, move, and delete photos from your Camera Roll. You can also use the "Import All" button to transfer all images to your Mac.
Method 3: Using iCloud Photos
If you use iCloud Photos on both your iPhone and Mac, you can access your entire photo library on both devices. This method allows you to view and manage your photos seamlessly across all your Apple devices.
Method 4: Using Photo Booth (Built-in Camera)
- Locate and launch the Photo Booth app on your Mac. You can find it by going to Finder > Applications > Photo Booth or by searching for it in Launchpad or Mac Spotlight.
- In the app, click on the camera icon in the bottom middle of the window.
- You can now take photos using your Mac's built-in camera.
- Right-click on the picture you took and choose "Export" to select the file path where you want to save it.
Tips for Improving Image Quality
To ensure better image quality when using your Mac's built-in camera, consider the following:
- Clean the camera lens with a soft, lint-free cloth.
- Adjust your lighting by ensuring you are well-lit from the front and avoiding too much light behind you.
- Improve your Wi-Fi connection by moving closer to your router and removing any objects that may impede the signal.
- Adjust camera quality in the app settings, if available.
Hacking Cameras: Watch Dogs Style Guide for Beginners
You may want to see also

How to see pictures from your iPhone camera
There are several ways to view pictures from your iPhone camera.
The first is to use the Photos app. When you open the app, your library of photos and videos will appear in a grid. The most recent photos are at the bottom; continue swiping down to go back in time. You can also pinch the screen to zoom in or out. Below your library, your photos and videos are organized into curated collections like Recent Days, Trips, and People & Pets. Tap a collection to open it and see the detailed view with highlights from the collection. Swipe right or left to see other collections in that section.
If you want to see only the photos you've taken with your iPhone camera, you can turn off iCloud Photo Library in your Settings. Go to Settings > Photos & Camera and turn off iCloud Photo Library. Then, when you open the Photos app, you will see the Camera Roll album, which only contains photos taken with your iPhone. However, keep in mind that if you turn off iCloud Photo Library, you will need to manually back up your Camera Roll photos to your laptop or another device.
Another way to filter and view only your iPhone photos is to use the search function in the Photos app. Open Photos, go to search, and start typing "iPhone." You'll see your model in the list. Click on it and search. This will bring up only the pictures you've taken with your iPhone, excluding screenshots and photos from other sources.
Finally, you can also use the Visual Look Up feature to identify and view specific items in your photos, such as plants, dog breeds, art, or landmarks. To use this feature, select a photo in apps like Notes, Mail, or Messages by touching and holding the image. Then, tap the Info button or Look Up in the options menu. Tap the icon that appears in or below the photo, such as a paw print for pets or a leaf for plants, to get more information about the item from Siri Knowledge and the web. Note that Visual Look Up is only available on iOS 15 or later.
The Art of Seeing: Unlocking Your Camera's Potential
You may want to see also

How to see pictures from your camera on an Android phone
Finding the Camera App
On most Android phones, the camera app will be on the home screen by default. If not, you can open the app drawer to locate the app. While on the home screen, slide up from the bottom of the screen and browse through your apps until you find the Camera app. You can also tap on the Search bar at the top of the app drawer and type "camera".
Taking a Picture
Open the Camera app and make sure Photo is highlighted at the bottom of the capture area. Tap the "rotating arrows" icon to the left of the shutter button if you want to take a selfie. Line up your shot inside the screen and tap the shutter button. You can also tap the screen to set the camera's focus to a specific part of the frame.
Viewing Your Pictures
In most cases, if you're looking for a photo you recently captured, you can access it by opening the Camera app and tapping the image icon on the bottom right of the screen. This takes you to a file-by-file gallery where you can view one picture or video at a time.
Using Google Photos
While most phones have their own gallery app, Google Photos is the best option for viewing your pictures. It collects and organizes the content on your device and in the cloud. You can access Google Photos by opening the app drawer and tapping on the Photos icon. It should open to a batch of recent images and videos where you can find any content by swiping through the grid of thumbnails.
Restoring Deleted Photos
If you have recently deleted any photos, you can restore them if they are still in your trash. Items that are permanently deleted cannot be restored. Backed-up photos and videos stay in your trash for 60 days, while photos and videos that were not backed up stay in your trash for 30 days.
Checking Your Device Folders
If you are missing photos or videos from other apps or devices, check your device folders. Open the Google Photos app and tap Collections On this device at the bottom. If available, open your device folders to find your missing item.
Insignia Smart TV Camera Capability: What You Need to Know
You may want to see also

How to see pictures from your camera on Linux
There are several ways to view pictures from your camera on Linux. Here is a step-by-step guide:
Step 1: Check if your camera is recognised by Linux
First, you need to check if your camera is recognised by your Linux system. You can do this by using the lsusb command in your terminal, which will list all the USB devices connected to your computer, including your camera.
Step 2: Install a compatible application
If your camera is recognised, you can then proceed to install a compatible application to view your pictures. Here are some options:
- Cheese: This is a simple, dedicated application for managing webcams in Linux. It can be installed by opening the terminal and entering the command `sudo apt install cheese`. Once installed, you can run the application by entering `cheese` into the terminal or searching for it in your application menu.
- FFmpeg: FFmpeg is a command-line utility for processing media files. It can be used to view and stream video from your webcam. To install FFmpeg, use the package manager for your Linux distribution. For Ubuntu, the command is `sudo apt install ffmpeg`. For Arch Linux, use `pacman`, and for Fedora Linux, use `dnf` with the command `sudo dnf -y install ffmpeg`. Once installed, you can view your webcam feed by entering the following command: `ffmpeg -f v4l2 -video_size 640x480 -i /dev/video0 -vf "format=yuv420p" -f sdl "Webcam Feed"`.
- VLC Media Player: VLC is a free and open-source media player that can also be used to view your webcam feed. It can be installed using the package manager for your Linux distribution. For Ubuntu, use the command `sudo apt install vlc`. For Arch Linux, use `sudo pacman -S vlc`. And for Fedora Linux, use `sudo dnf install vlc`. Once installed, open VLC and go to the "Media" menu, then select "Open Capture Device". This will allow you to select your video and audio devices and view your webcam feed.
Step 3: View your pictures
After installing and setting up your chosen application, you can now view your pictures from your camera. Simply follow the instructions for the application you selected, and you will be able to see the feed from your camera and browse or capture images.
Finding Cameras on Your Network: A Comprehensive Guide
You may want to see also
Frequently asked questions
Open the Photos app on your iPhone and tap the "Search" icon from the bottom menu. In the search box, type your iPhone model, e.g. "iPhone XS". Your iPhone model will show up in the drop-down box. Tap it to continue, and you'll see all the photos you've taken on this device, organised by category.
Open the Photos app and tap on the photo you want to view. You can check the location data on an Android phone by opening the image in the Photos app and tapping the three-dot menu item. Scroll down to see a ton of metadata about the image, including the location data.
If your PC has a built-in camera or a connected webcam, you can use the Camera app to take photos and videos. To find the Camera app, select Start > Camera. After you've taken a photo, you can view it by opening the Camera app and selecting the left arrow.
In macOS, right-click the image file (or Control+click it), and select "Get Info." You'll see the Latitude and Longitude coordinates under the "More Info" section. Alternatively, you can open the image, click the "i" button at the top, click the "i" button again in the new popup, then select the "GPS" tab.
You can test your camera by using an online tool. Simply grant the tool access to your camera and you should be able to see yourself or whatever the camera is pointed at.


