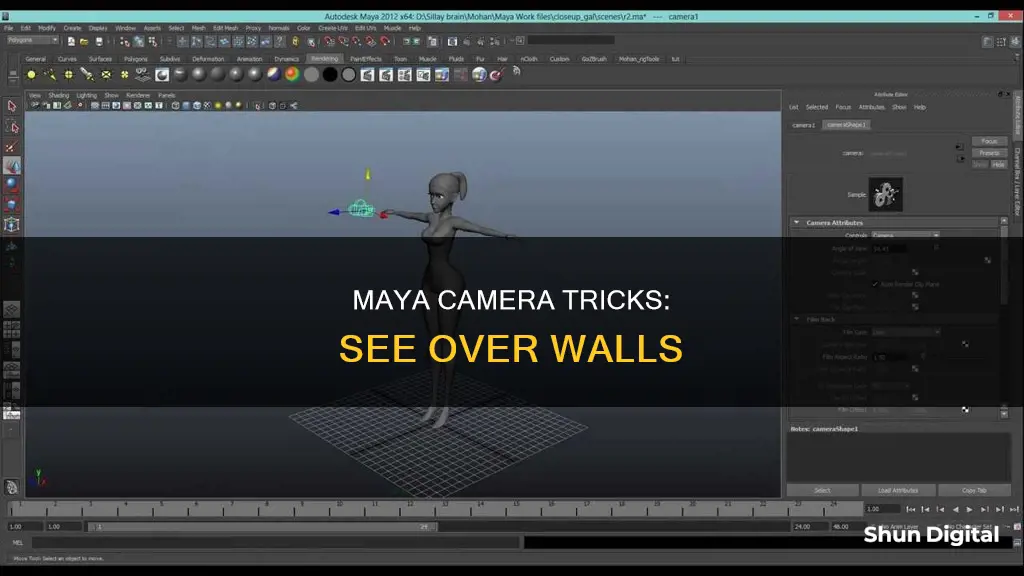
If you're using Autodesk Maya and want to see over a wall with a camera, there are a few methods you can try. One way is to select the geometry, go to the render stats in the attribute editor, and find the opposite setting, where the walls will be invisible when facing the camera. You can also play around with the double-sided setting. Alternatively, you can hide the wall by selecting it and pressing Ctrl + H. If you only want to hide a specific wall face, you can select that face, extract it, and then hide it. If you want to see through walls without hiding them, you can try using orthographic cameras, which are real objects in Maya that can be moved and manipulated.
| Characteristics | Values |
|---|---|
| Software | Autodesk Maya |
| Method 1 | Make the walls transparent from behind |
| Method 2 | Make the walls disappear when the camera is looking through them |
| Method 3 | Hide the wall |
| Method 4 | Extract wall faces |
| Method 5 | Use backface culling |
| Method 6 | Turn off double-sided rendering |
| Method 7 | Disable "visible to camera" |
| Method 8 | Disable Primary Visibility in Render Stats |
What You'll Learn

Using the orthographic camera to see through walls
Orthographic cameras in Maya are real objects that can be seen, selected, and manipulated. This gives users a lot of power, such as the ability to see through walls by simply moving the orthographic camera.
To start using orthographic cameras, you must first reveal them. Go to the Display menu and choose Show, Cameras. This will enable visibility for all cameras in the scene. You can then select the camera you want to use, such as the top, side, or front view. The line sticking out of the camera indicates its line of sight, and it can only see in front of itself.
If you want to rotate the orthographic camera, it is best to do so in another view, as rotating in the orthographic view can be disorienting and unnatural. To rotate, simply select the orthographic camera in the outliner and rotate it like a normal object.
If you want to make walls disappear when the camera views through them, you have a few options. One way is to select the geometry, go to the render stats in the attribute editor, and look for something called "opposite" where the walls will be invisible facing the camera. You can also play with the double-sided settings. Alternatively, you can hide the wall by selecting it and pressing Ctrl + H. If you only want to hide a specific side of the wall, select the wall face you want to hide, extract the faces, and then hide the selected face.
Another way to make walls transparent is to select all the walls or the desired geometry, go to the bottom of the channel box window to the layer section, right-click on layers, and add the selected geometry to a new layer. Then, click on the new layer's third little box, which will put it into template mode, allowing you to see through it but not select it. Additionally, in the shape node, you can turn off Render Stats > Double Sided, so that the wall is only visible from the front side. This will affect both the viewport and renders.
You can also use backface culling to make walls transparent from one side. This can be turned on in the viewport shading options.
Visio TV Camera: How to Spot It
You may want to see also

Making walls disappear when the camera views through them
If you want to make walls disappear when the camera views through them in Maya, there are several methods you can try.
One method is to select the geometry of the wall, go to the render stats in the attribute editor, and locate the "opposite" setting. Here, you can make the walls invisible when facing the camera. You can also experiment with the "double-sided" setting.
Another approach is to simply hide the wall you want to not see. To do this, select the wall and press Ctrl + H. If your box sides are all connected, you can select the specific wall face you want to hide by pressing Shift + RMB (right mouse button) and choosing "Extract Faces". Then, go back to object mode, select the wall, and press Ctrl + H. This will keep the wall visible from one side while making it invisible from the other. After rendering, you can bring the wall back by pressing Ctrl + Shift + H.
Additionally, you can make the walls transparent from behind by selecting all the walls or the desired geometry, going to the bottom of the channel box window to the layer section, right-clicking on layers, and adding the selected walls to a new layer. Then, click the new layer's third little box to enter template mode, which will make the walls see-through but not selectable.
Furthermore, in the shape node, you can turn off "Render Stats > Double Sided" to make the walls only visible from the front side, affecting both the viewport and renders.
Keep in mind that you'll also need to add the walls to a reference layer to be able to click through them. However, reference layers were broken in the 2020 version of Maya, so this may not work as expected.
Lastly, if you're using 3ds Max and V-Ray, you can adjust the settings of your V-Ray camera. Enable "clipping", and adjust the "near clipping plane" and "far clipping plane" values to control how close or far the camera can see through the wall. If you want the cut wall to appear with a closed loop, add the "cap holes" modifier in the modifier list.
Insignia Roku TV: Does It Have a Camera?
You may want to see also

Hiding the wall without deleting it
If you want to hide a wall in Maya without deleting it, there are several methods you can try. One way is to select the wall and press Ctrl + H to hide it. If you want to hide only a specific face of the wall, you can select that face, press Shift + RMB, choose "Extract Faces", then hide the selected face. This will make the chosen face invisible while keeping the rest of the wall visible.
Another method is to select all the walls or geometry you want to hide, go to the bottom of the Channel Box window to the layer section, right-click on "Layers", and select "Add Selected to New Layer". Then, click the third little box in the new layer to enable "Template Mode", which will make the objects on that layer transparent but not selectable.
Additionally, you can make objects transparent in the viewport but visible in the render by opening the Attribute Editor, extending the "Object Display Options", turning on "Enable Overrides", and setting the "Level of Detail" to "Bounding Box".
If you are using planes for your walls, you can also make them transparent from behind by going to the shape node in the Attribute Editor, turning off "Render Stats", and disabling "Double-Sided". This will make the planes only visible from the front side.
Toshiba Fire TV Camera Location Explained
You may want to see also

Making walls transparent from behind
Using Layers:
Select all the walls or other geometry you want to make transparent. Go to the bottom of the Channel Box window to the Layer section, right-click on Layers, and choose "Add Selected to New Layer." Once you've created the new layer, click on its third little box to enable Template mode. This will make the objects on that layer transparent but not selectable.
Adjusting Render Stats:
Go to the Shape Node of your object and locate the Render Stats section in the Attribute Editor. Here, you can make adjustments to make your walls transparent from the back. Turn off "Double Sided" rendering, which will make the walls only visible from the front side. Alternatively, you can also play around with the "Opposite" setting, which will make the walls invisible when facing the camera.
Using Backface Culling:
Backface Culling is a technique that can help you achieve the desired effect. You can either turn on backface culling in the Viewport Shading options or turn off double-sided rendering in the Render Stats of the Shape Node, depending on your specific needs. This will ensure that the back faces of the polygons are not rendered when they are facing away from the camera.
Creating Transparent Materials:
Another approach is to create a transparent material and assign it to your walls. Go to the Hypershade window, create a new material (e.g., aiStandardSurface), and assign it to your walls. Then, adjust the material's parameters, such as Specular Weight, Roughness, IOR (Index of Refraction), and Anisotropy, to achieve the desired level of transparency.
Using X-Ray Viewport Shading:
If you want to see through the walls while working, you can use the X-ray viewport shading option. Simply go to Viewport Shading and select X-ray. This will allow you to see through the walls without affecting the final render.
Remember, depending on your specific needs and the version of Maya you are using, you may need to experiment with a combination of these techniques to achieve the desired result of making walls transparent from behind.
Mobile CC Camera Viewing: Easy, Quick Setup Guide
You may want to see also

Disabling Primary Visibility in Render Stats
Identifying Primary and Secondary Rays
Before adjusting render stats, it's important to understand the difference between primary and secondary rays. Rays shot from the camera are called primary rays, and they determine whether an object is visible from the camera's perspective. On the other hand, secondary rays are rays that bounce off the surface of an object for reflection, refraction, or global illumination.
Accessing Render Stats Options
To access the Render Stats options in Maya, select the object or objects you want to adjust. Then, go to the Attribute Editor and locate the "Render Stats" section. Here, you can modify settings like "Primary Ray Visible" and "Secondary Ray Visible".
Disabling Primary Visibility
To disable primary visibility for an object, simply turn off the "Primary Ray Visible" option in the Render Stats. This will make the selected object invisible from the camera's perspective but visible in reflections, refractions, and global illumination. This is particularly useful when you want to include an object's influence on the surrounding environment without actually seeing the object itself.
Considerations and Workarounds
When disabling primary visibility, it's important to note that the default Maya "Render Stats" options take precedence over Redshift visibility options. If the Redshift Visibility options are disabled or grayed out, Maya's "Render Stats" will be used instead. Additionally, if you're using Mental Ray as your rendering engine, you may encounter challenges with overriding primary visibility. In such cases, consider using a more modern renderer if possible.
By disabling primary visibility in Render Stats, you can selectively hide objects from the camera's view while still including their impact on the scene. This feature provides flexibility in adjusting the visibility of objects during rendering to achieve the desired visual outcome.
Exploring Global Camera Feeds: A Step-by-Step Guide
You may want to see also
Frequently asked questions
Go to the Display menu and choose Show, Cameras. This will enable visibility for all cameras in the scene. Select the orthographic camera and simply move it to see through walls.
Select the geometry, go to Render Stats in the Attribute Editor, and click Opposite so that the walls are invisible when facing the camera.
Select the wall you want to hide and press Ctrl + H. If the box sides are connected, select the wall face you want to hide, extract the faces, and then hide the selected wall face.
Create an object property set and disable "visible to camera".
Turn off Render Stats > Double Sided in the shape node.


