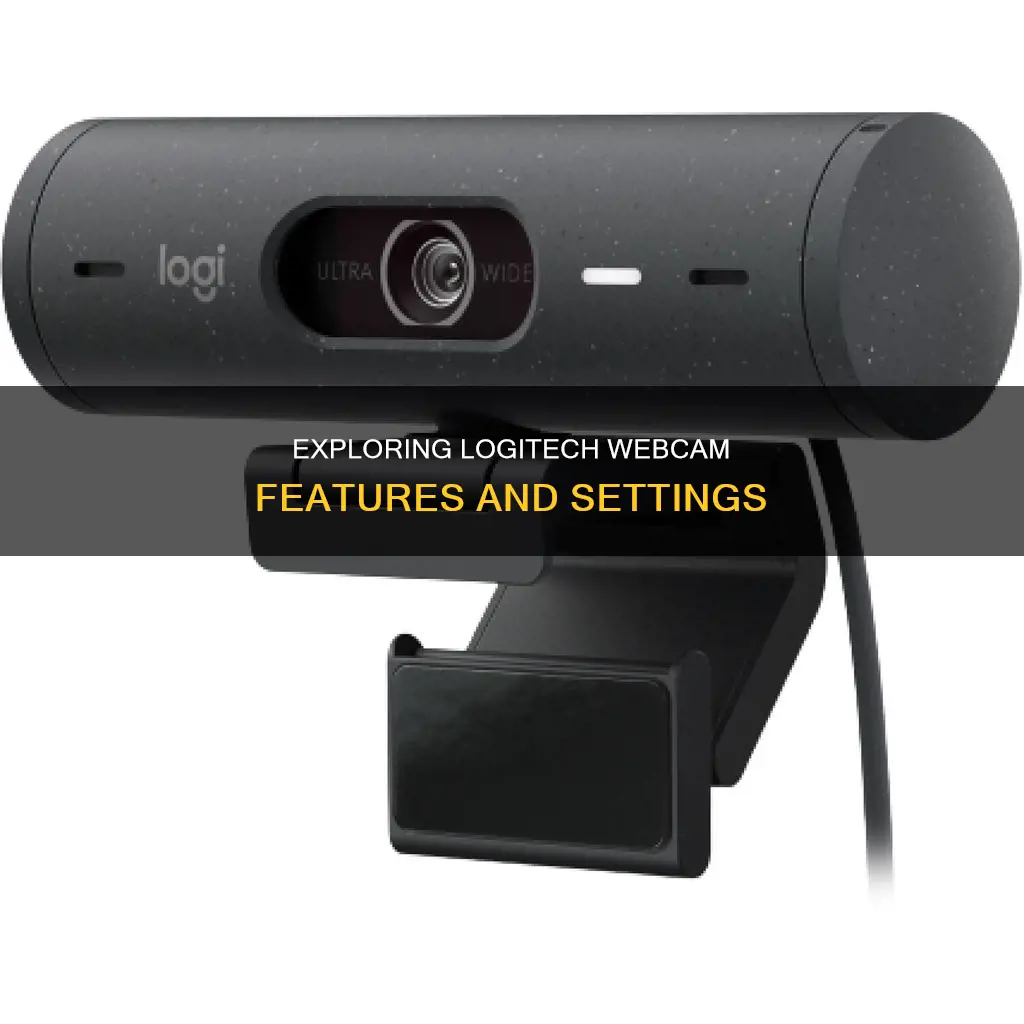
Logitech webcams are easy to set up and don't require any special software. All you need to do is position your camera, plug it into an available USB port, and you're ready to go! Once connected, you can test your Logitech camera in the Windows Camera app or on FaceTime on your Mac. To do this, simply open the Camera app or FaceTime and you should see yourself on the screen. If you're using a laptop with a built-in camera, you may need to select your Logitech camera when joining calls or recording a video.
If you're having trouble getting your Logitech camera to work, there are a few things you can try. First, check the connection port and make sure the wires are arranged properly and the USB is securely plugged in. If your computer is running an operating system older than Windows 8 or macOS 10.10, you will need to manually install the drivers from the Logitech support website. You can also try using another USB port or computer to see if your webcam is working.
| Characteristics | Values |
|---|---|
| Ease of setup | Logitech webcams are easy to set up and don't require any special software. |
| Connection | Plug the camera into an available USB port. Depending on the model, this may be USB-A or USB-C. |
| Software | No software is required to use a Logitech webcam, but Logitech offers various optional software packages to improve your experience. |
| Microphone | Most Logitech webcams have a built-in microphone. |
| Testing | To test the camera, use the Windows Camera app or FaceTime on a Mac. |
What You'll Learn

Check the connection port
To check the connection port of your Logitech camera, you should first locate the appropriate cable. The type of cable required depends on your camera model, with common options including USB, HDMI, and Ethernet cables. Once you have the correct cable, follow these steps:
- Connect one end of the cable to the corresponding port on your camera. This port is usually located at the back or side of the camera.
- Connect the other end of the cable to the matching port on your computer. This could be a USB, HDMI, or Ethernet port, depending on the cable type. Ensure that the cable is securely plugged into both the camera and the computer.
- If your camera requires power, make sure it is powered on by following the instructions in your camera's manual.
- Allow your computer to recognise the camera. You may see a notification or hear a sound indicating that a new device has been connected.
- If prompted, install any necessary drivers. You can usually find these on the Logitech website or included in the software package.
By following these steps, you can ensure that your Logitech camera is correctly connected to the appropriate port on your computer.
Watching Your Camera Feed Remotely: A Step-by-Step Guide
You may want to see also

Check if your system can detect a camera
To check if your system can detect a Logitech camera, you can use the Logitech Support site. Here's how:
- Locate your webcam's identification (ID) tag. This tag is usually near the connector end of the webcam's USB connection cable.
- Look for the webcam's model number on the ID tag. The model number is typically labelled "M/N".
- Visit the Logitech Support site and enter the webcam's model number (M/N) in the Search Support text field, exactly as it appears on the webcam's ID tag. Tap or click the Search button.
- The listing for your webcam's support page will appear under the Products tab. Tap or click on the product to go to its support page.
Alternatively, you can try plugging your Logitech camera into your computer's USB port. Your computer should automatically detect the Logitech webcam and install the appropriate device drivers if they're not already present. If your computer is running an operating system older than Windows 8 or macOS 10.10, you will need to manually install the drivers yourself from the Logitech support website.
Once your camera is plugged in, open an app such as Camera or FaceTime that supports webcam functionality to turn on the camera. You should automatically see a video input from your Logitech webcam within the app after you open it.
If you're using a laptop that also has a built-in webcam, the Camera app may default to your built-in cam. To switch cameras, just click the camera switch button at the top-right corner (the camera with curved arrows).
Blackmagic Pocket Camera: Viewing Audio Meters
You may want to see also

Try another USB port or computer
If you're having issues with your Logitech camera, it could be a connection problem. Try plugging your camera into a different USB port on your computer. Sometimes, a USB port on your system may be faulty, so it's worth trying another one.
If you don't have another USB port available, or if you've tried multiple ports and your camera still isn't working, try plugging it into a different computer. This will help you determine whether the issue is with your camera or your computer.
If you're connecting your camera through a USB hub or extender, try plugging it directly into a USB port on your computer. Some external hubs and extenders may not have enough power or the right specifications to support your camera.
If you've tried these steps and your Logitech camera still isn't working, you may need to check your device's drivers or contact customer support for further assistance.
Chevy's Camera System: Seeing Behind Trailers
You may want to see also

Check your privacy settings
Logitech's Privacy Policy outlines how the company handles your personal data. The company does not sell your personal data and will notify you of any significant changes to the policy.
Logitech collects data in a variety of ways, including through your interactions with their products, website, and services. The data collected includes:
- Name and contact data
- Credentials, such as passwords and authentication information
- Demographic data, such as age, gender, and country
- Payment data, such as shipping address and contact information
- Usage data, including product usage data, device data, error reports, and support data
- Interests and favorites, such as music preferences and programmed activities
- Social logins, such as Apple, Facebook, or Google accounts used to log in
- Location data, including precise data such as home or work address, and imprecise data such as city or region
- Content, including the content of messages, feedback, and product reviews
You can control and access your information by directing Logitech to update, delete, or deactivate certain information. You can also unsubscribe from marketing emails and adjust your preferences for personalized recommendations.
If you are a resident of California, you have the right to know what personal data has been collected about you and how it is used, shared, and disclosed. You also have the right to request that your personal data be deleted.
For users in the European Economic Area (EEA), the United Kingdom (UK), and Switzerland (CH), Logitech provides additional information about the legal bases for processing personal data and your rights under the General Data Protection Regulation (GDPR). You have the right to access, rectify, restrict, and delete your personal data, as well as the right to data portability and to complain to a supervisory authority.
Stream Tybee Island: Accessing the Tybee Cameras
You may want to see also

Uninstall and reinstall the Logitech webcam driver
Uninstalling and reinstalling the Logitech webcam driver can be a useful way to troubleshoot issues with your webcam. Here are the steps to do so:
Uninstall the Logitech Webcam Driver:
- Click the Windows "Start" button and select "Control Panel".
- Choose the "Hardware and Sound" link.
- Click the "Device Manager" link under the "Devices and Printers" section.
- Locate the Logitech webcam driver from the list on the screen. You may need to expand the relevant device section (e.g., "Mice and Other Pointing Devices") using the small arrow symbol on the left.
- Right-click on the driver and choose "Uninstall".
- Click "OK" on the subsequent dialog box to confirm.
Alternatively, you can try the following methods:
- Use a third-party uninstaller like Revo Uninstaller Pro.
- Uninstall via Apps and Features/Programs and Features in the Start Menu.
- Use the uninstall.exe or uninst000.exe file in the Logitech Webcam Software installation folder (usually in C:\Program Files or C:\Program Files(x86)).
- Use the uninstallation string "C:\Program Files (x86)\Common Files\LogiShrd\Installer\{D40EB009-0499-459c-A8AF-C9C110766215}\setup.exe" /lang=ENU /guid="{D40EB009-0499-459c-A8AF-C9C110766215}" in the Run command (Windows + R).
Reinstall the Logitech Webcam Driver:
- Go to Logitech's Support and Downloads section on their website.
- Use the online wizard to identify your device. You will need your webcam's model number, which can be found on the ID tag near the connector end of the USB connection cable.
- Download the relevant drivers for your device and operating system.
- Double-click the downloaded file and follow the on-screen instructions to install the drivers.
If you are using a newer operating system (Windows 8 or higher, or macOS 10.10 or later), your computer should automatically detect and install the Logitech webcam driver when you plug in your webcam.
How Teleprompter Beam Splitters Affect Camera Images
You may want to see also
Frequently asked questions
First, place your Logitech camera in the desired position. Next, plug your camera into your computer via a USB port. If you are using a Windows computer, open the Camera app. If you are using a Mac, open the Launchpad and click on FaceTime. You should now see yourself on the screen.
There are several reasons why your Logitech camera may not be working. Firstly, check the connection port and ensure that the wires are arranged and the USB is securely plugged in. If your camera is connected properly, the issue may be due to misconfigured settings, outdated or missing drivers, or conflicting programs. Try using another USB port or computer to test the camera. If the issue persists, you may need to uninstall and reinstall the Logitech webcam driver.
Logitech camera settings are typically managed within the app that you are using the camera with. For example, if you are using OBS Studio, you would need to edit the Source or Scene settings to adjust the webcam's behaviour or appearance. In the Windows Camera app, you can change settings such as the webcam's brightness from the left toolbar.


